20 DIY Home Projects That Transform Your Space Without Breaking the Bank
Home improvement does not have to mean hiring a contractor. It does not have to mean spending thousands of dollars. The best changes are often the ones you make yourself.
DIY projects save money. They also give you control over materials, colors, and finishes. A weekend of work can transform a room for the cost of a dinner out.
This guide delivers 20 DIY home projects for every skill level. From beginner to advanced, each project adds value and beauty to your home.
1. Paint an Accent Wall for Instant Drama
One wall in a bold color changes the entire feel of a room. It creates a focal point. It adds depth. It costs under $50.
Choose the wall that naturally draws attention—behind the bed, behind the sofa, or the fireplace wall. Paint the other walls a neutral color.
Pro Tip: Use painter’s tape to create crisp edges. Press the tape down firmly to prevent bleeding.
Mistake to Avoid: Do not paint the smallest wall. The accent wall should be the largest or most prominent wall.
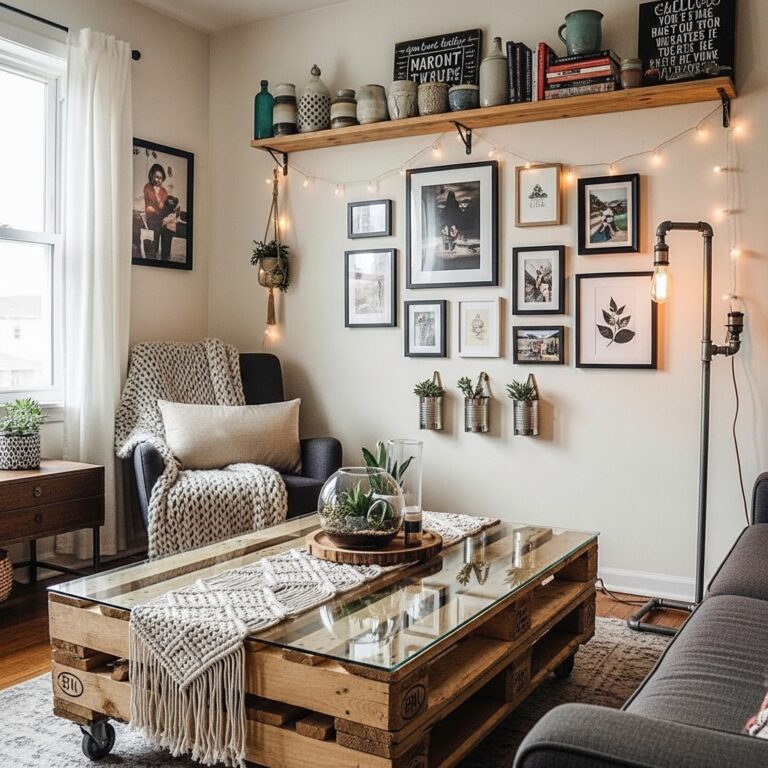
2. Install Floating Shelves for Storage and Display
Floating shelves add storage without taking floor space. They also create opportunities for display.
Buy pre-made shelves or cut your own from wood. Mount them to wall studs. Use a level to ensure they are straight.
Pro Tip: Use hollow wall anchors if you cannot hit studs. Heavy-duty anchors hold up to 50 pounds.
Mistake to Avoid: Do not overload shelves. Each shelf has a weight limit.
3. Replace Cabinet Hardware for an Instant Update
New knobs and pulls change the look of cabinets without replacing them. The impact is immediate.
Remove old hardware. Fill old screw holes with wood filler. Install new hardware in the same holes or drill new ones.
Pro Tip: Use a template to drill new holes. A piece of cardboard with holes marked ensures consistency.
Mistake to Avoid: Do not mix hardware finishes in the same room. Stick to one finish—brass, nickel, or black.
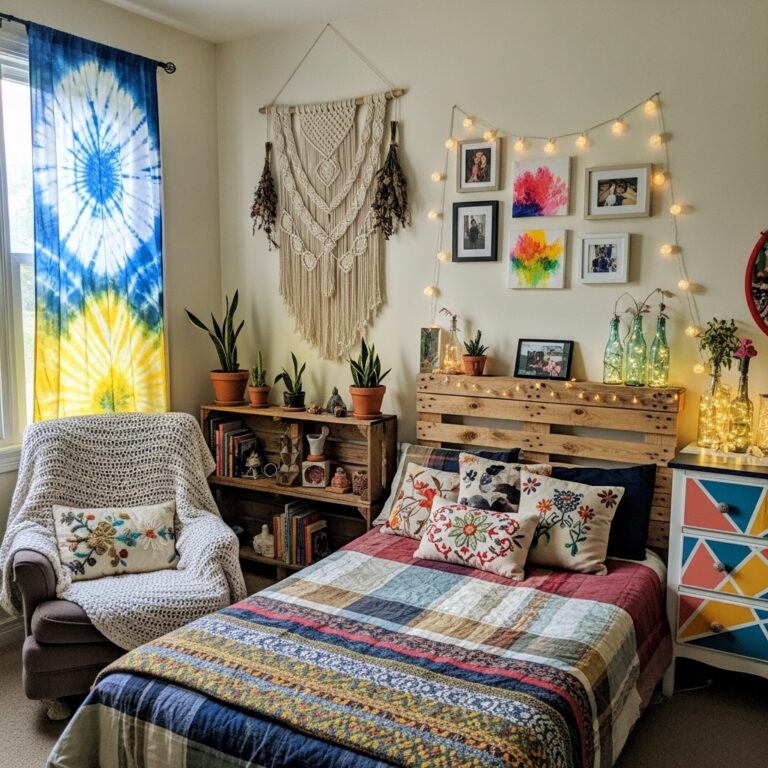
4. Build a Simple Headboard from Plywood
A headboard anchors the bed. It adds height and drama. A plywood headboard costs under $50.
Cut plywood to the width of your bed. Paint or stain it. Mount it to the wall behind the bed.
Pro Tip: Add foam and fabric to the plywood for an upholstered look. A staple gun attaches the fabric.
Mistake to Avoid: Do not make the headboard too tall. The top should be 48-54 inches from the floor.
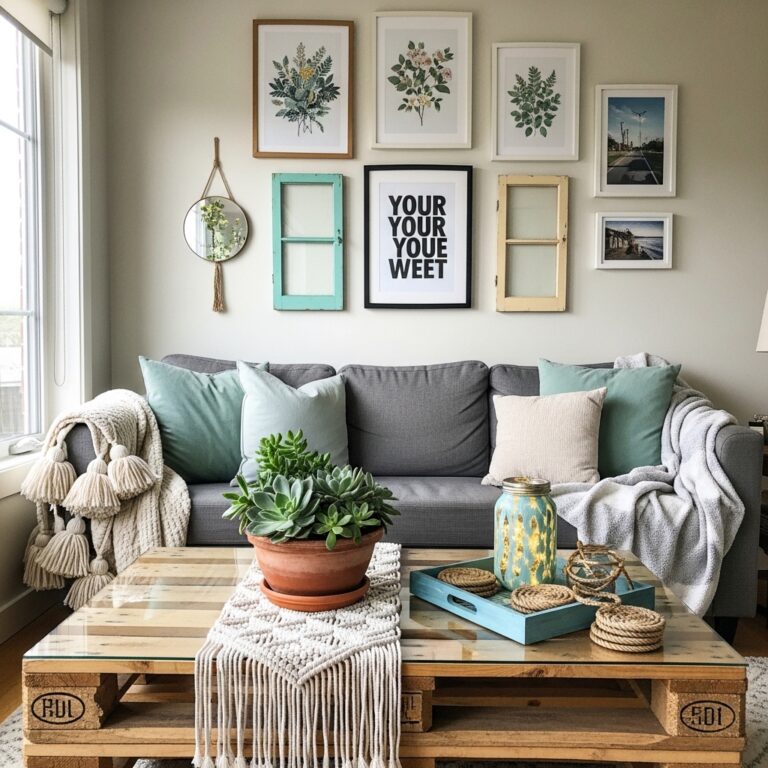
5. Create a Gallery Wall with Thrifted Frames
A gallery wall fills empty wall space. Thrifted frames keep the cost low. Paint them all the same color for cohesion.
Collect frames over time. Remove the old art. Replace it with your own photos, prints, or fabric. Arrange the frames on the floor before hanging.
Pro Tip: Trace each frame on kraft paper. Tape the paper outlines to the wall. Adjust until the layout feels balanced.
Mistake to Avoid: Do not hang frames too high. The center of the gallery should be 57-60 inches from the floor.
6. Refinish a Thrifted Dresser
Old dressers are solid wood. New dressers are particle board. A thrifted dresser with new paint or stain is better than anything new.
Sand the dresser to remove the old finish. Prime it. Paint or stain it. Replace the hardware.
Pro Tip: Use chalk paint for a matte, vintage finish. Chalk paint requires minimal sanding.
Mistake to Avoid: Do not skip priming. Primer prevents old stains from bleeding through.
7. Install Peel-and-Stick Backsplash
Tile backsplash is expensive. Peel-and-stick backsplash is not. It looks like real tile. It installs in hours.
Clean the wall. Cut the tiles with scissors. Peel the backing. Stick them to the wall. Press firmly.
Pro Tip: Use a grout pen between tiles. The white lines make it look like real tile.
Mistake to Avoid: Do not install peel-and-stick tile over textured walls. The adhesive will not hold.
8. Build a Simple Bench for Entryway or Foot of Bed
A bench adds seating and storage. A simple wood bench costs under $50 in materials.
Cut wood to length. Assemble with screws. Sand and paint or stain. Add a cushion for comfort.
Pro Tip: Use 2x4s for the frame. The wood is inexpensive and sturdy.
Mistake to Avoid: Do not skip sanding. Splinters are dangerous.
9. Replace Light Switch Covers and Outlet Covers
Old, yellowed switch covers make a room feel dated. New covers cost under $1 each.
Remove the old cover. Clean the wall. Install the new cover. The change takes seconds.
Pro Tip: Use screwless covers for a modern look. The cover snaps into place. No visible screws.
Mistake to Avoid: Do not use covers that are too small. Standard size fits most outlets.
10. Paint Interior Doors a Bold Color
White doors are standard. Colored doors are intentional. A bold door becomes a focal point.
Remove the door. Lay it flat. Paint it with a roller. Rehang it when dry.
Pro Tip: Use semi-gloss paint for doors. The finish is durable and easy to clean.
Mistake to Avoid: Do not paint the door frame a different color. The frame should match the door or the wall.
11. Build a Simple Picture Ledge
A picture ledge holds art without nails in the wall. Change the art whenever you want.
Cut wood to length. Route a groove or attach a small lip to the front edge. Mount it to the wall.
Pro Tip: Make the ledge 4-5 inches deep. The depth holds frames securely.
Mistake to Avoid: Do not overload the ledge. Three to five frames per foot of ledge is plenty.
12. Create a Charging Station in a Drawer
Cords are ugly. A drawer hides them. A charging station keeps devices organized and out of sight.
Drill a hole in the back of a drawer. Run a power strip through the hole. Plug chargers into the strip. Close the drawer.
Pro Tip: Use a drawer organizer to separate devices. Each device has its own compartment.
Mistake to Avoid: Do not overload the power strip. Check the amperage rating.
13. Install Under-Cabinet Lighting
Under-cabinet lighting illuminates countertops. It makes food prep easier. It adds a high-end look.
Use plug-in LED strip lights. Peel and stick them to the underside of cabinets. Plug them into an outlet.
Pro Tip: Use a remote control switch. Turn the lights on and off without reaching behind the cabinet.
Mistake to Avoid: Do not use warm white light under cabinets. Cool white (3000K-4000K) is better for task lighting.
14. Build a Simple Coffee Table from Crates
Wooden crates are inexpensive. Stack them to create a coffee table. The industrial look is modern and intentional.
Buy four to six crates. Stack them in a square or rectangle. Secure them with screws. Add casters for mobility.
Pro Tip: Paint the crates or leave them natural. Stain adds warmth without hiding the wood grain.
Mistake to Avoid: Do not use crates that are damaged. Splinters and cracks look shabby.
15. Add Wainscoting or Board and Batten
Wainscoting adds architectural interest to plain walls. It is easier than it looks.
Install vertical boards at 36 inches from the floor. Cap them with a shelf or chair rail. Paint everything the same color.
Pro Tip: Use MDF for the boards. MDF is smooth, paintable, and less expensive than wood.
Mistake to Avoid: Do not skip the chair rail. The rail covers the seams between boards.
16. Create a Shoe Storage Bench
Shoes pile up by the door. A bench with cubbies gives them a home. It also provides seating.
Build a simple bench frame. Add dividers to create cubbies. Paint or stain it. Add a cushion to the top.
Pro Tip: Make the cubbies 6-8 inches tall. Standard shoe height.
Mistake to Avoid: Do not make the bench too deep. 14-16 inches is plenty.
17. Install a Closet Organization System
Wire shelves are standard. Custom shelves are better. A DIY closet system costs a fraction of custom.
Buy adjustable wire shelving from a home improvement store. Cut it to length. Mount it to the wall.
Pro Tip: Use a stud finder. Shelves must be anchored into studs.
Mistake to Avoid: Do not overload shelves. Each shelf has a weight limit.
18. Paint a Rug on a Drop Cloth
Canvas drop cloths are inexpensive. Paint turns them into custom rugs. The pattern is up to you.
Stretch the drop cloth flat. Use painter’s tape to create stripes or a grid. Paint between the tape.
Pro Tip: Use fabric paint or exterior latex. Regular latex will crack.
Mistake to Avoid: Do not skip the primer coat. Primer helps the paint adhere.
19. Build a Simple Desk from Plywood and Legs
A desk does not need to be complicated. A plywood top and metal legs are enough. The industrial look is modern.
Cut plywood to size. Sand it smooth. Attach pre-made metal legs. Seal the wood with polyurethane.
Pro Tip: Use hairpin legs. They are inexpensive and easy to attach.
Mistake to Avoid: Do not use thin plywood. 3/4 inch plywood is sturdy enough for a desk.
20. Create a Headboard from an Old Door
An old door becomes a headboard. The hardware adds character. The paint or stain adds warmth.
Remove the doorknob and hinges. Paint or stain the door. Mount it to the wall behind the bed.
Pro Tip: Look for old doors at architectural salvage yards. The imperfections add charm.
Mistake to Avoid: Do not use a door that is too heavy. Secure it properly to wall studs.
Frequently Asked Questions
What is the easiest DIY home project for a beginner?
Replace light switch covers. The project takes minutes. The cost is under $5. The impact is immediate. Yellowed covers make a room feel dated.
What tools do I need for most DIY projects?
A hammer. Screwdrivers (Phillips and flathead). A drill. A level. A tape measure. Sandpaper. Paintbrushes. These eight tools complete most projects.
How do I know if a project is too advanced for me?
Read the instructions first. If you do not understand the steps, the project may be too advanced. Start with simpler projects. Build skills over time.
What is the best way to save money on DIY projects?
Use reclaimed materials. Thrift stores, architectural salvage yards, and Facebook Marketplace are excellent sources. Paint old furniture instead of buying new.
Conclusion
DIY home projects save money. They also give you control over materials, colors, and finishes. Paint an accent wall. Install floating shelves. Replace cabinet hardware. Build a simple headboard. Create a gallery wall. Refinish a thrifted dresser.
Start with one project this weekend. Replace the switch covers. Paint a wall. Build a shelf. The room will feel different. The pride will last longer than the project.