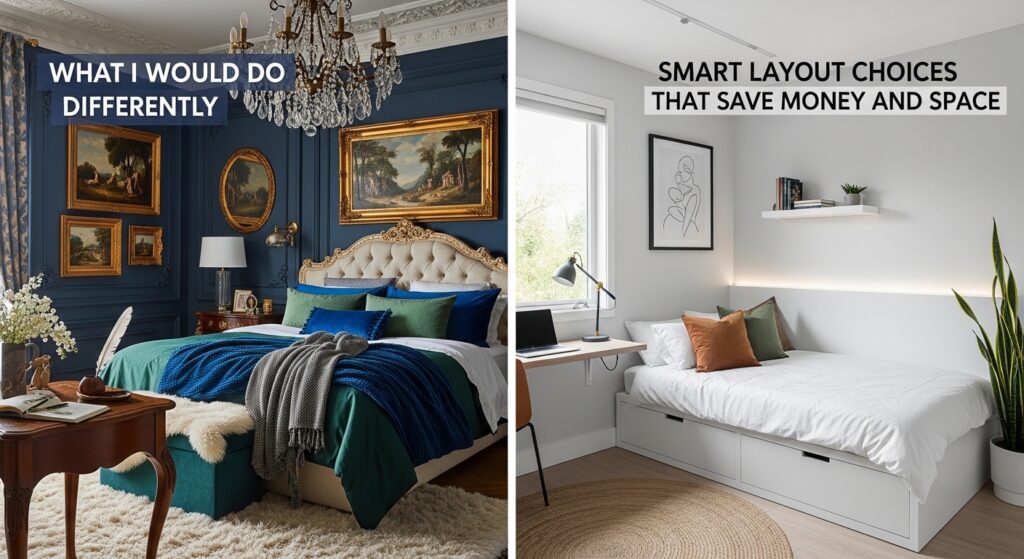
What I Would Do Differently If I Redesigned My Bedroom & Smart Layout Choices That Save Money and Space
Hindsight is a gift that arrives too late. After years of living with bedroom design choices, the mistakes are impossible to ignore.
The nightstand that never worked. The dresser that blocked the closet. The paint color that looked perfect in the store and terrible on the wall.
Every wrong choice taught something valuable. Every wasted dollar revealed a better way to spend the next dollar.
This guide shares the honest lessons learned from bedroom design failures. The goal is not perfection. The goal is helping others avoid the same expensive, frustrating mistakes.
Why Bedroom Design Is Different from Every Other Room
The bedroom serves more functions than any other room in the house. Sleep. Dressing. Reading. Working. Relaxing. Intimacy.
One space must do it all well. Most bedrooms do none of it well because they are designed without purpose.
The bedroom is also the most personal room. Guest rooms can look like catalogs. Primary bedrooms need to look like the people who sleep there.
The Mistake of Decorating for Guests Instead of Yourself

Many people decorate their bedrooms for visitors who never come. The guest-ready room looks nice but feels wrong to the person who lives there.
The fix is designing for daily life, not occasional guests. A chair that holds worn clothes is more useful than a perfectly styled reading nook that never gets used.
The Mistake of Ignoring Sleep Function
A beautiful bedroom that does not support good sleep is a failure. Light, noise, temperature, and comfort all affect sleep quality.
The fix is prioritizing sleep over aesthetics. Blackout curtains over sheer. Quiet ceiling fans over decorative ones. Comfortable bedding over trendy patterns.
What I Would Do Differently: Bed Placement
The bed is the largest piece of furniture in the bedroom. Its placement affects everything else. Get this wrong and the whole room suffers.
The Original Bed Placement Mistake
The bed was centered on the longest wall. This seemed correct at the time. Centered furniture feels balanced and proper.
The problem was the window. The headboard blocked the bottom third of the window. Natural light was reduced. The room felt darker and smaller than its actual size.
The Better Bed Placement Choice
| Placement | Pros | Cons |
|---|---|---|
| Centered on longest wall | Balanced, symmetrical | May block windows or doors |
| Corner anchored | Maximizes floor space, clear walking paths | Only one nightstand possible |
| Angled in corner | Interesting layout, dramatic | Difficult to make bed |
| Against window wall | Unobstructed window view | Headboard blocks light |
| Floating (away from walls) | Creates depth, dramatic | Requires large room |
What I Would Do Instead
Place the bed on a wall with no windows or doors. This is not always possible in small rooms. When it is not possible, place the bed so the headboard does not block the window.
In the current room, the bed would move to the opposite wall. The window would become fully visible. Natural light would fill the room. The dresser would move to the wall where the bed used to be.
Pro Tip: Sketch your room to scale on graph paper. Cut out paper furniture to scale. Move the paper pieces around before moving real furniture.
Mistake to Avoid: Do not place the bed with the foot directly facing the door. This is called the coffin position in feng shui and feels unsettling to many people.
What I Would Do Differently: Nightstand Selection
Nightstands seem simple. They are not. The wrong nightstand causes daily frustration.
The Original Nightstand Mistake
Two matching nightstands were purchased from a big box store. They were the right width. They were the wrong height.
The nightstands were four inches lower than the mattress. Reaching down for a glass of water in the dark was awkward. The lamp sat too low. The room felt off balance.
The Nightstand Height Rule
The nightstand surface should be within two inches of the mattress height. A higher nightstand is better than a lower one.
Nightstand Height Guide:
| Mattress Height | Nightstand Height Range |
|---|---|
| 20 inches | 18-22 inches |
| 24 inches | 22-26 inches |
| 28 inches | 26-30 inches |
| 30+ inches | 28-32 inches |
What I Would Do Instead
Measure the mattress height before shopping for nightstands. Bring a tape measure to thrift stores and furniture shops. Do not trust listed dimensions without verifying.
Consider different nightstands on each side. Matching is not required. A small dresser on one side and a floating shelf on the other works beautifully.
Pro Tip: Use a floating shelf as a nightstand in very small rooms. The shelf takes up no floor space. Install it at the correct height based on mattress level.
Mistake to Avoid: Do not buy nightstands without checking drawer depth. Shallow drawers that cannot hold a book or tablet are useless.
What I Would Do Differently: Lighting Layers
Single light sources create dark corners and harsh shadows. Layered lighting transforms a room.
The Original Lighting Mistake
One overhead fixture provided all the light. The room was either fully bright or fully dark. There was no middle ground.
Reading in bed required the overhead light. The light shone directly into eyes. The partner trying to sleep was disturbed. The room felt harsh and uninviting.
The Three Layers of Bedroom Lighting
| Light Layer | Purpose | Examples | Placement |
|---|---|---|---|
| Ambient | General illumination | Overhead fixture, flush mount | Ceiling center |
| Task | Specific activities | Reading lamps, bedside sconces | Nightstands, walls |
| Accent | Mood and depth | Picture lights, strip lighting | Art, shelves, coves |
What I Would Do Instead
Install wall-mounted sconces above each nightstand. Sconces free up nightstand surface space and provide directed reading light.
Add a dimmer switch to the overhead light. Dimmers allow bright light for cleaning and dim light for winding down.
Place a floor lamp in the darkest corner. The corner that previously disappeared now holds visual weight and provides ambient light.
Pro Tip: Use battery-operated puck lights under bed frames for a soft glow at floor level. The subtle light guides nighttime trips to the bathroom without waking a partner.
Mistake to Avoid: Do not use cool white bulbs in bedroom lamps. Cool white light signals daytime to the brain. Use warm white bulbs (2700K) for sleep readiness.
What I Would Do Differently: Window Treatments
Windows are functional necessities and design opportunities. Most bedrooms treat them as afterthoughts.
The Original Window Treatment Mistake
Cheap vinyl blinds were installed. They were functional. They were also ugly. Dust collected on every slat. The room felt cheap and unfinished.
Comparison Table: Window Treatment Options
| Treatment | Light Control | Privacy | Cost | Difficulty | Best For |
|---|---|---|---|---|---|
| Vinyl blinds | Good | Good | $ | Easy | Budget, rentals |
| Roller shades | Excellent | Excellent | $$ | Easy | Clean, modern look |
| Curtains only | Poor | Poor | $$ | Easy | Layering, softness |
| Roman shades | Excellent | Excellent | $$$ | Medium | Polished, tailored look |
| Layered (shades + curtains) | Excellent | Excellent | $$$ | Medium | Best of both |
What I Would Do Instead
Install blackout roller shades for light control and privacy. Layer curtains over the shades for softness and style.
The shades block light for better sleep. The curtains add color, texture, and warmth. The layered look is intentional and finished.
Bullet Point: Curtain hanging rules
- Hang curtain rod 4-6 inches above window frame
- Extend rod 6-12 inches beyond window on each side
- Curtains should just kiss the floor (not pool, not hover)
- Choose fabric based on room use (light linen for living, heavy velvet for bedrooms)
Pro Tip: Use two curtain panels per window even for narrow windows. Two panels look fuller and more intentional than one.
Mistake to Avoid: Do not hang curtains too low. Curtains that stop at the window sill make ceilings feel lower. Hang high and wide.
What I Would Do Differently: Color Choices
Color sets the mood of the entire room. The wrong color creates the wrong mood.

The Original Color Mistake
A trendy dark color was chosen for the accent wall. It looked amazing in the store. It looked amazing in online photos.
On the bedroom wall, the dark color absorbed all light. The room felt like a cave. Morning felt like midnight. The color was repainted within six months.
Color Psychology for Bedrooms
| Color | Effect | Best For | Avoid For |
|---|---|---|---|
| Soft blue | Calming, lowers heart rate | Sleep, relaxation | Rooms with no natural light |
| Sage green | Restful, natural | Sleep, balance | Small, dark rooms |
| Lavender | Calming, slightly uplifting | Sleep, stress reduction | Bright, hot rooms |
| Warm gray | Neutral, cozy | Any bedroom | North-facing rooms |
| Cream | Warm, bright | Small bedrooms | High-traffic areas |
| Dark navy | Dramatic, cozy | Large bedrooms | Small bedrooms |
| White | Clean, bright | Any bedroom | Rooms needing warmth |
What I Would Do Instead
Choose a soft, muted color for the walls. Save bold, dark colors for accessories that can be changed easily.
Paint the ceiling a lighter version of the wall color. A white ceiling with colored walls creates a harsh line. A lighter version of the same color creates a seamless, enveloping feel.
Pro Tip: Test paint colors on multiple walls. The same color looks different on a north wall versus a south wall. Paint large swatches and observe for several days.
Mistake to Avoid: Do not choose bedroom paint color from a tiny swatch alone. Lighting changes everything. Test on walls first.
What I Would Do Differently: Storage Solutions
Bedroom storage is never enough. The mistake is not lack of storage. The mistake is wrong storage.
The Original Storage Mistake
A low, wide dresser took up an entire wall. The dresser had six shallow drawers. Each drawer held a jumbled mess of clothes.
The top of the dresser became a dumping ground. Keys. Mail. Loose change. Dust. The dresser was storage and clutter in one piece.
Storage Comparison: Dresser vs. Vertical Solutions
| Storage Type | Floor Space | Capacity | Visibility | Best For |
|---|---|---|---|---|
| Low, wide dresser | High | Low | None (drawers hide) | Heavy items |
| Tall dresser | Low | High | None (drawers hide) | Daily clothes |
| Open bookshelf | Low | Medium | High | Baskets, decor, books |
| Wardrobe/armoire | Medium | High | Low | Hanging clothes |
| Under-bed drawers | None | Medium | None | Off-season items |
What I Would Do Instead
Replace the low, wide dresser with a tall, narrow dresser. Same storage capacity. Half the floor space.
Add open shelving for items that are used daily and look good on display. Baskets on shelves hide items that are not display-worthy.
Use the space under the bed for off-season clothing and extra bedding. Under-bed drawers on wheels make access easy.
Pro Tip: Store off-season clothes in labeled clear bins under the bed. Clear bins show contents without opening. Labels make seasonal rotation simple.
Mistake to Avoid: Do not stack bins under the bed without a system. Unlabeled bins become forgotten bins. Label everything.
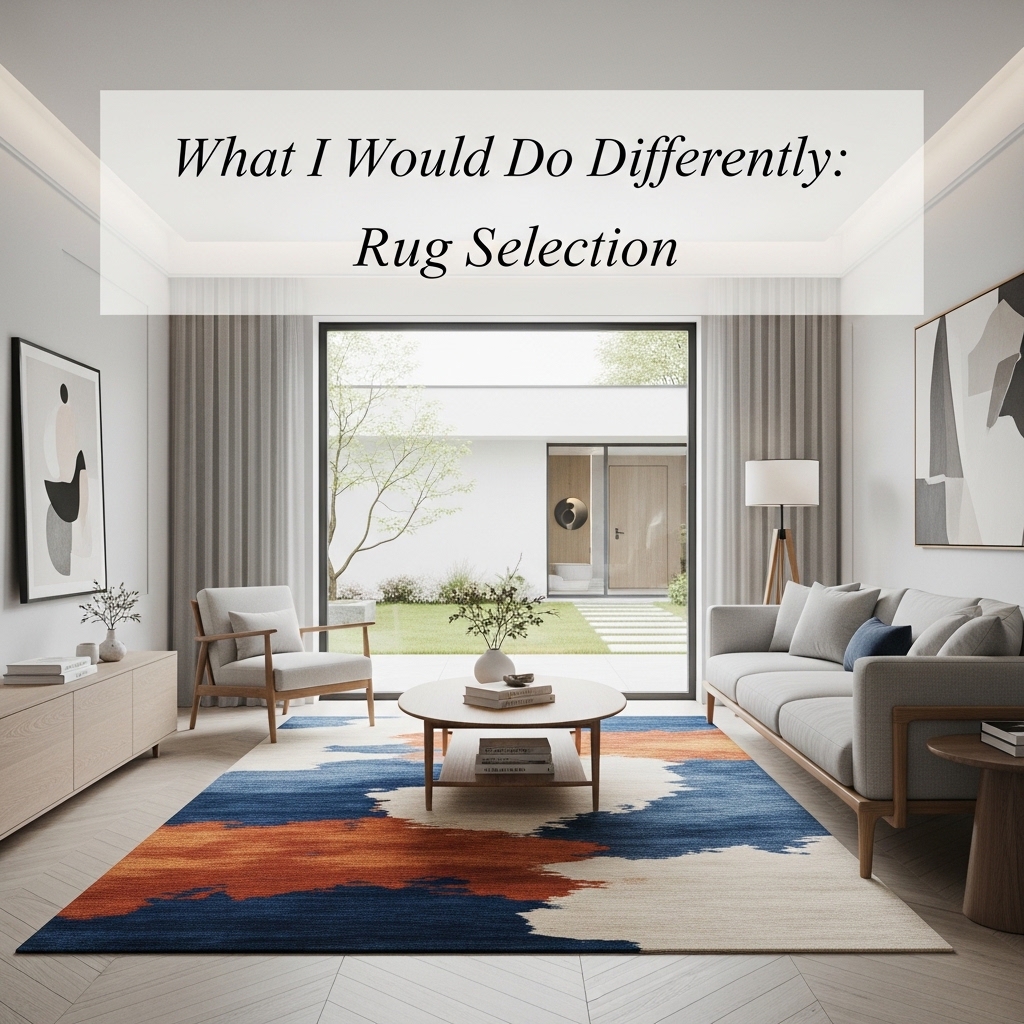
What I Would Do Differently: Rug Selection
Rugs anchor a room. The wrong rug makes the room feel smaller and choppier.
The Original Rug Mistake
A small rug was placed at the foot of the bed. The rug was the right color. The rug was the wrong size.
The small rug floated in the middle of the floor. Visible floor around all four edges created a frame that highlighted how small the room actually was.
Rug Size Rules for Bedrooms
| Bed Size | Minimum Rug Size | Ideal Rug Size | Placement |
|---|---|---|---|
| Twin | 5×8 | 6×9 | Centered under bed |
| Full | 5×8 | 8×10 | Extends 18 inches beyond all sides |
| Queen | 8×10 | 9×12 | Extends 24 inches beyond sides |
| King | 9×12 | 10×14 | Extends 24 inches beyond sides |
What I Would Do Instead
Choose a rug large enough that it extends at least 18 inches beyond all sides of the bed.
In a small room where a large rug does not fit, remove the rug entirely. Bare floors are better than too-small rugs.
Pro Tip: Use rug tape to keep large rugs flat. Rug tape prevents curling corners and tripping hazards.
Mistake to Avoid: Do not place a rug only at the foot of the bed. The rug should extend to the nightstands on both sides of the bed.
What I Would Do Differently: Art Placement
Art adds personality. Wrongly placed art adds nothing.
The Original Art Placement Mistake
A large piece of art hung above the bed. The art was beautiful. The placement was wrong.
The art was hung too high. There was a gap of empty wall between the headboard and the art. The art felt disconnected from the bed below it.
Art Height Rules for Bedrooms
| Location | Art Placement Rule |
|---|---|
| Above bed | Bottom of art 6-12 inches above headboard |
| Above dresser | Bottom of art 6-12 inches above dresser |
| On empty wall | Center of art at 57-60 inches from floor |
| Gallery wall | Center of cluster at 57-60 inches from floor |
What I Would Do Instead
Lower the art above the bed so the bottom of the frame sits six inches above the headboard. The art and headboard become a single visual unit.
Create a small gallery wall on an empty wall. Mix frame sizes and colors. Include personal photos, art prints, and a small mirror.
Pro Tip: Trace frames on kraft paper. Tape the paper templates to the wall. Adjust placement before hammering nails.
Mistake to Avoid: Do not hang art where direct sunlight hits it. Sunlight fades prints and photographs over time.
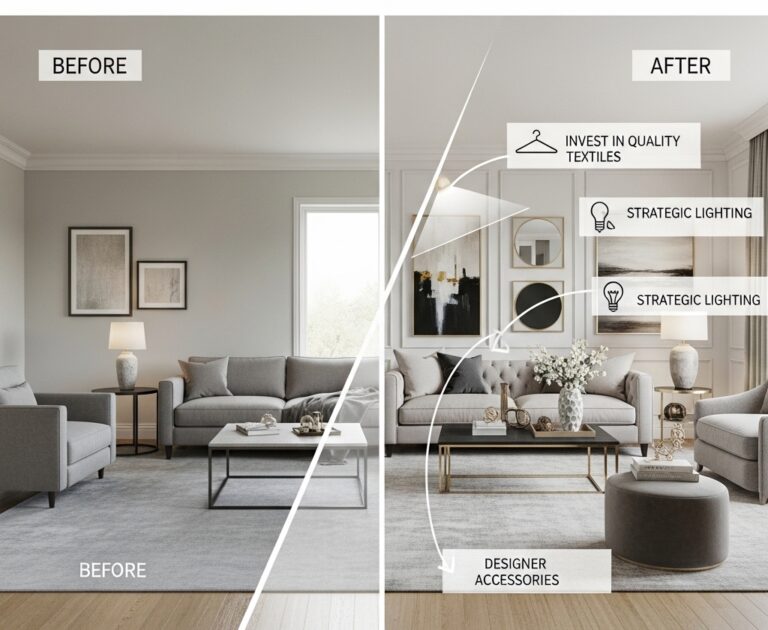
The Cost Comparison: Original Design vs. Redesign
| Item | Original Choice | Cost | Redesign Choice | Cost | Savings |
|---|---|---|---|---|---|
| Bed placement | Blocked window | $0 | Unobstructed window | $0 | $0 |
| Nightstands | Matching, wrong height | $150 | Thrifted, correct height | $40 | $110 |
| Lighting | Overhead only | $0 | Sconces + dimmer | $60 | -$60 |
| Window treatments | Vinyl blinds | $40 | Blackout shades + curtains | $80 | -$40 |
| Paint | Trendy dark | $50 | Soft muted tone | $50 | $0 |
| Storage | Low wide dresser | $200 | Tall narrow dresser + shelves | $120 | $80 |
| Rug | Too small | $80 | No rug (room too small) | $0 | $80 |
| Art | Single piece too high | $0 | Lowered + gallery wall | $0 | $0 |
Original total spent: $520
Redesign total spent: $350
Total saved by making different choices: $170
The 7-Day Bedroom Redesign Plan
Day one: Assess current layout. Identify the three biggest problems using this guide.
Day two: Move the bed to the optimal wall. Live with it for a day before making other changes.
Day three: Fix nightstand height. Add risers under legs or replace with correct height pieces.
Day four: Add lighting layers. Install sconces, add a floor lamp, change bulbs to warm white.
Day five: Upgrade window treatments. Add blackout shades. Layer with curtains.
Day six: Reassess storage. Replace wide dresser with tall version. Add under-bed storage.
Day seven: Adjust art placement. Lower pieces. Create a gallery wall.
Conclusion
Bedroom design mistakes are not permanent. They are lessons that guide better choices.
The differences shared here are not about spending more money. They are about spending money differently. On the right bed placement. The correct nightstand height. Layered lighting that supports sleep.
Start with one change. Move the bed. Lower the art. Add a dimmer. Small changes compound into dramatic transformations.
The bedroom should serve the person who sleeps there, not design rules or catalog photos.
Take back your bedroom starting today. Better sleep and better design are waiting.