How to Create a Pinterest-Worthy Home Setup That Looks Good in Every Photo
You scroll through Pinterest. Perfect rooms. Perfect lighting. Perfect styling. Your home never looks like that in photos.
The difference is not expensive furniture. The difference is understanding what photographs well. Some rooms look amazing in person but terrible in photos. Others look amazing in both.
This guide delivers the exact strategies used to create a home setup that photographs beautifully. No filters required.
Before Starting: The Photo Test
Before changing anything, take photos of each room. Use natural light. Do not use filters. The photos will reveal problems your eyes have learned to ignore.
The Camera Never Lies
| What Eyes See | What Camera Captures |
|---|---|
| Warm, inviting space | Cluttered surfaces, dark corners |
| Cozy lighting | Harsh shadows, uneven light |
| Balanced arrangement | Crooked art, awkward spacing |
The Three Photo Rules
Rule 1: Use natural light. Turn off all artificial lights. Open curtains. Take photos in the morning or late afternoon.
Rule 2: Shoot from standing eye level. Hold the phone at chest height. Do not angle up or down.
Rule 3: Take photos of every corner. What looks good in person may look empty or cluttered in photos.
Pro Tip: Take photos on a cloudy day. Cloudy days provide soft, even light that flatters every room.
Mistake to Avoid: Do not use filters. Filters hide problems. You need to see the problems to fix them.
The 10 Secrets to Pinterest-Worthy Photos
Secret 1: Edit Ruthlessly Before Shooting
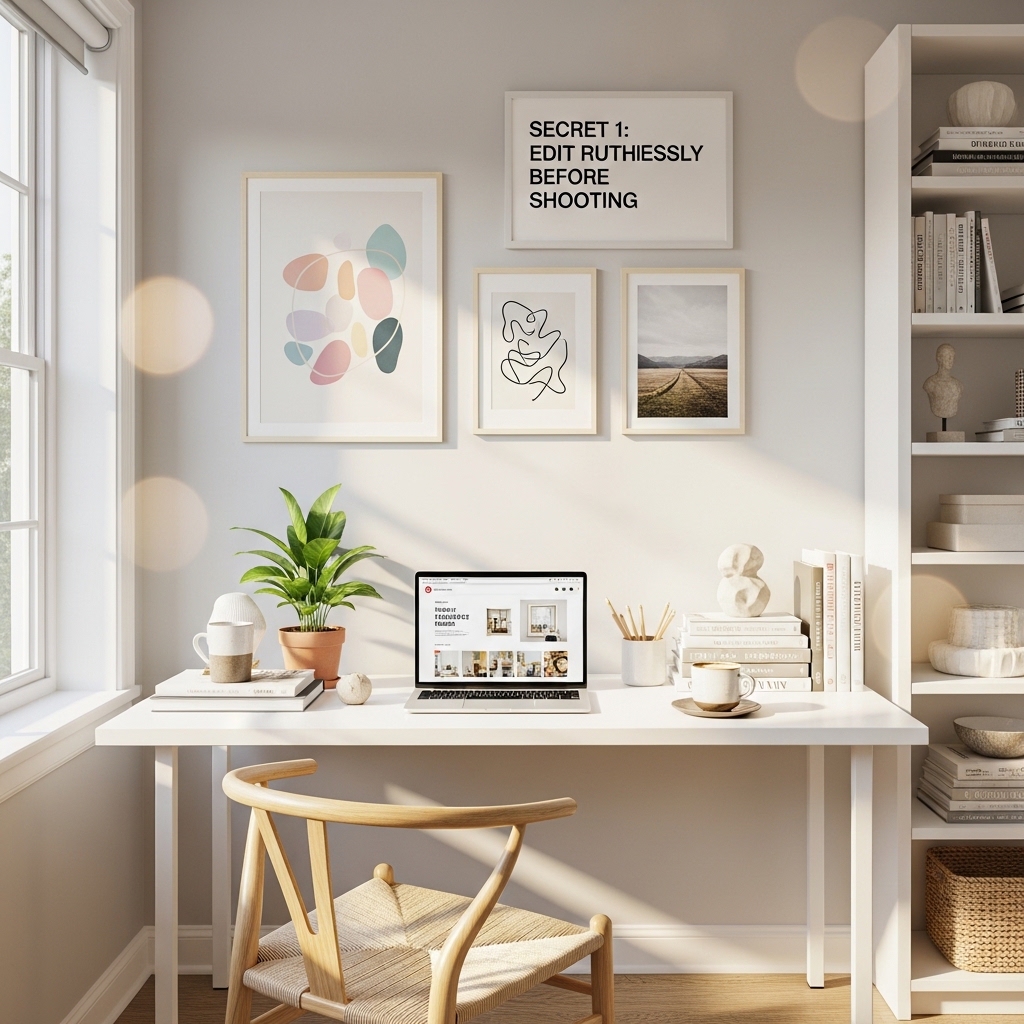
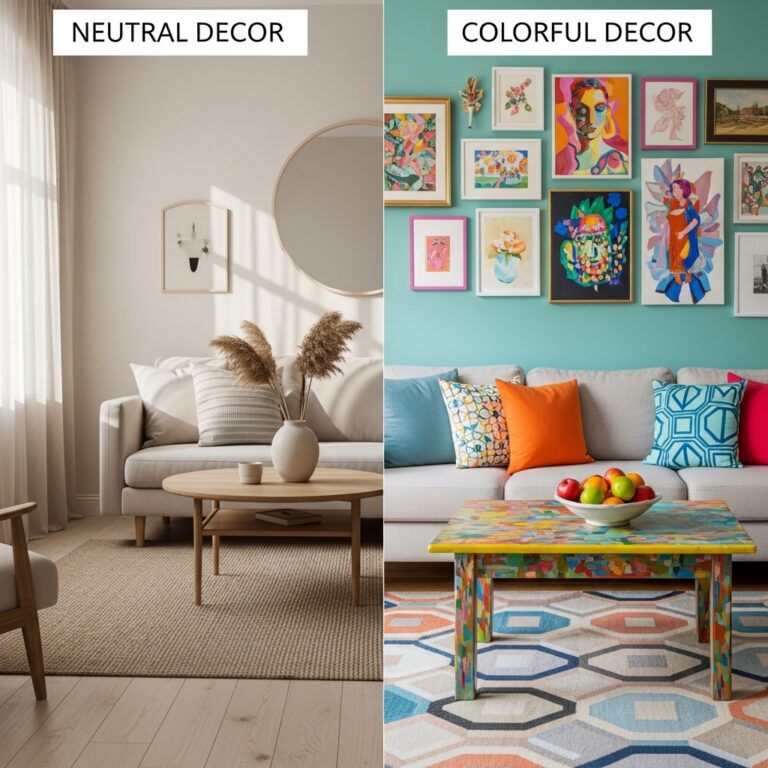
Pinterest rooms have less stuff. Much less stuff. Every item is intentional.
The photo rule: Remove 50% of what is on every surface. Remove 30% of what is on every shelf. Remove furniture that does not serve a purpose.
Why it works: Cameras amplify clutter. What looks fine in person looks chaotic in photos. Empty space photographs beautifully.
| Before Photo | After Photo |
|---|---|
| Coffee table: 12 items | Coffee table: 3 items |
| Bookshelf: completely full | Bookshelf: 70% full, 30% empty |
| Counters: appliances everywhere | Counters: only coffee maker and fruit bowl |
Pro Tip: Remove everything. Add items back one at a time. Stop when the surface looks good in a test photo.
Mistake to Avoid: Do not leave empty space that looks accidental. Empty space should look intentional.
Secret 2: Master Natural Light
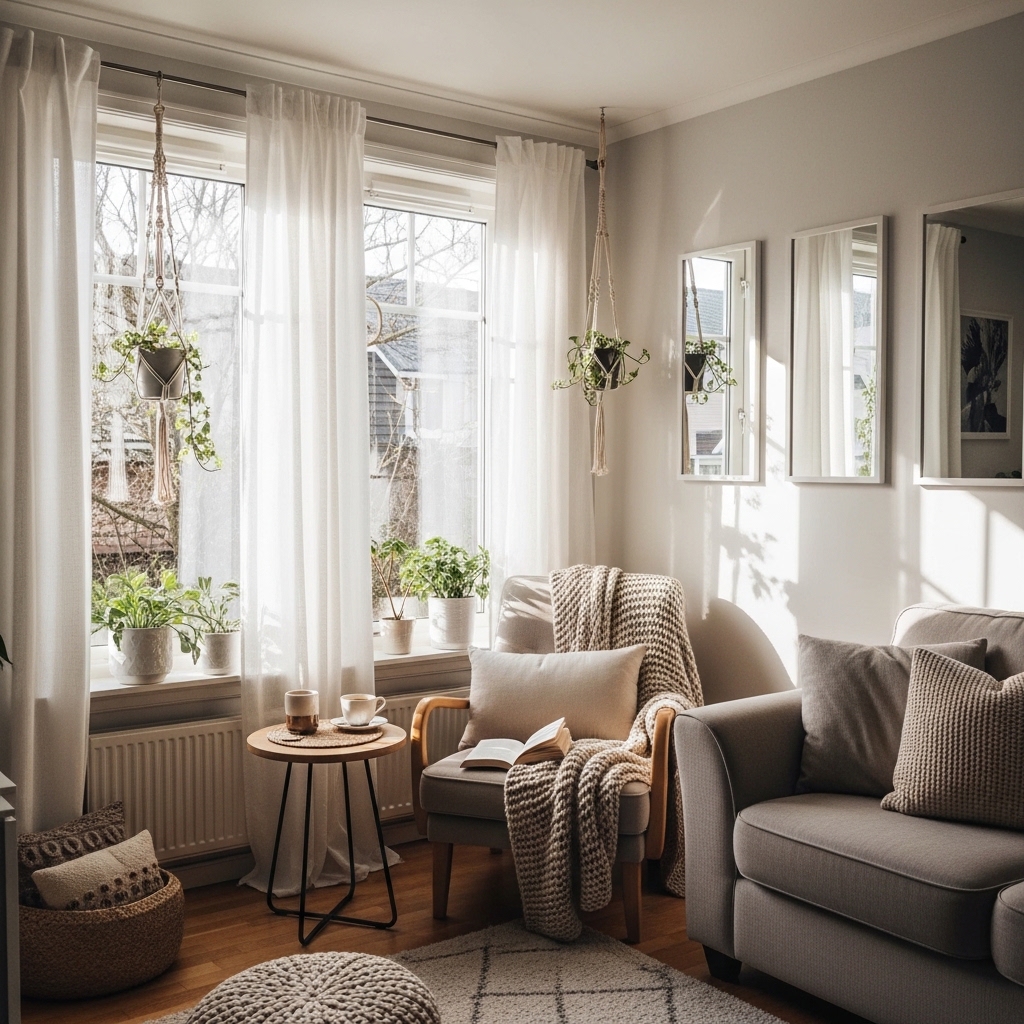
Artificial light photographs poorly. Natural light photographs beautifully.
The photo rule: Take photos within two hours of sunrise or two hours of sunset. This is the golden hour. The light is soft, warm, and flattering.
Best times for photos by season:
| Season | Golden Hour Morning | Golden Hour Evening |
|---|---|---|
| Spring | 6:30-8:30 AM | 5:30-7:30 PM |
| Summer | 5:30-7:30 AM | 7:00-9:00 PM |
| Fall | 7:00-9:00 AM | 4:30-6:30 PM |
| Winter | 7:30-9:30 AM | 3:30-5:30 PM |
Pro Tip: Use sheer curtains to diffuse harsh midday light. Diffused light is softer and more flattering than direct sun.
Mistake to Avoid: Do not use overhead lights in photos. Overhead light creates harsh shadows on faces and furniture.
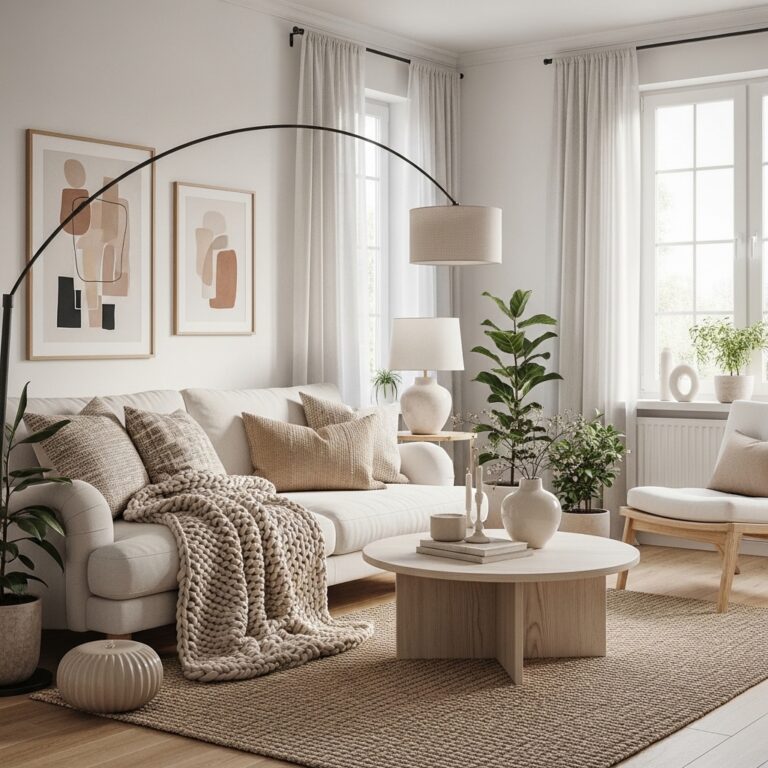
Secret 3: Create Depth with Layered Lighting
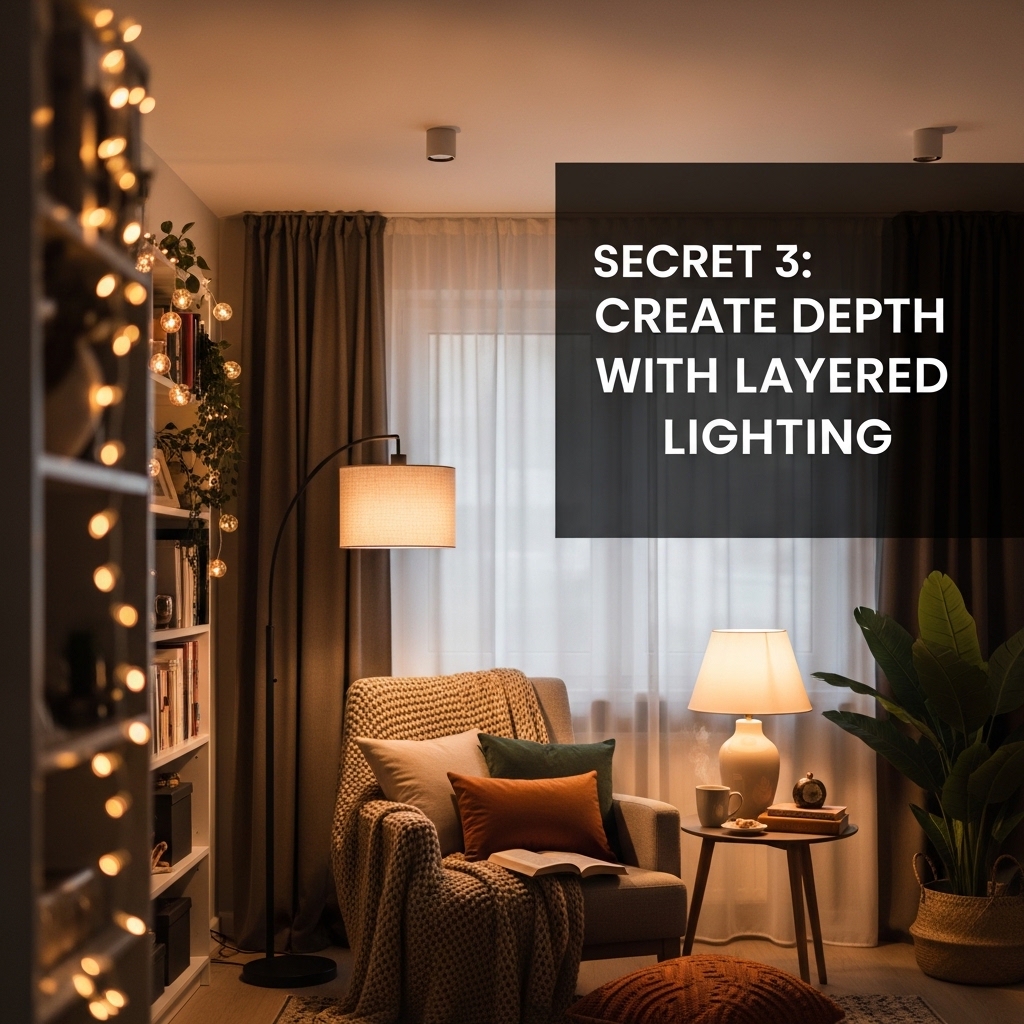
Pinterest rooms have depth. Depth comes from multiple light sources at different heights.
The photo rule: Turn on all lamps. Place a floor lamp in a dark corner. Place a table lamp on a nightstand. Use warm white bulbs (2700K) everywhere.
Lighting layers that photograph well:
| Layer | Placement | Effect in Photos |
|---|---|---|
| Natural light | Windows | Soft, even base |
| Table lamps | Nightstands, consoles | Warm pools of light |
| Floor lamps | Corners | Eliminates dark shadows |
| Accent lights | Art, shelves | Adds dimension |
Pro Tip: Place a lamp behind a chair or sofa. Backlighting creates a beautiful glow around the furniture.
Mistake to Avoid: Do not mix bulb color temperatures. Mixed temperatures look chaotic in photos.
Secret 4: Style in Odd Numbers
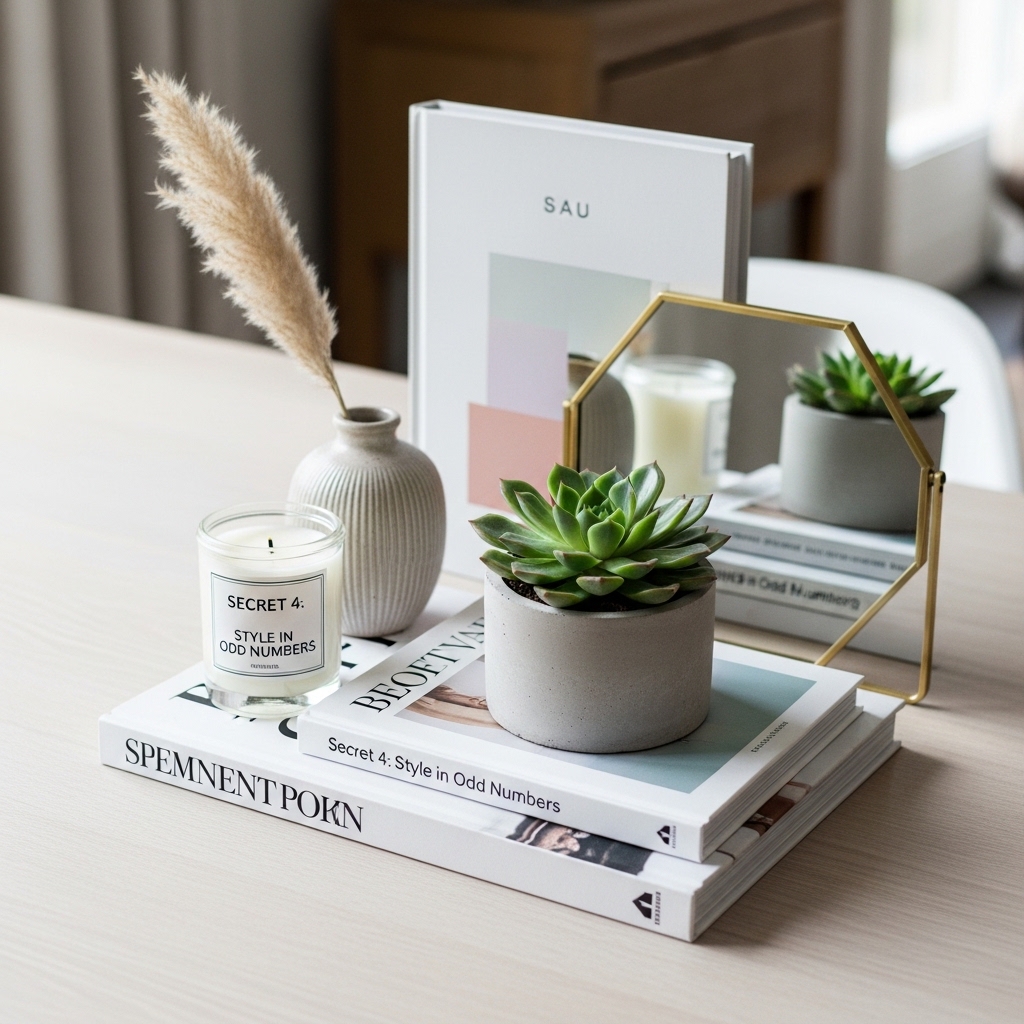
The rule of three is not just for design. It is for photography.
The photo rule: Group decor in threes. Three pillows. Three books. Three candles. Three frames on a wall.
Why it works: Odd numbers create visual rhythm. Even numbers feel static. Three items move the eye through the frame.
| Number of Items | Photo Impact |
|---|---|
| 1 | Minimal, intentional |
| 2 | Static, balanced (good for symmetry) |
| 3 | Dynamic, interesting |
| 4 | Crowded, chaotic |
Pro Tip: Vary heights within the group. Tall, medium, low. The eye moves up and down, creating visual interest.
Mistake to Avoid: Do not line up items in a straight row. Staggered placement photographs better.
Secret 5: Add Something Living
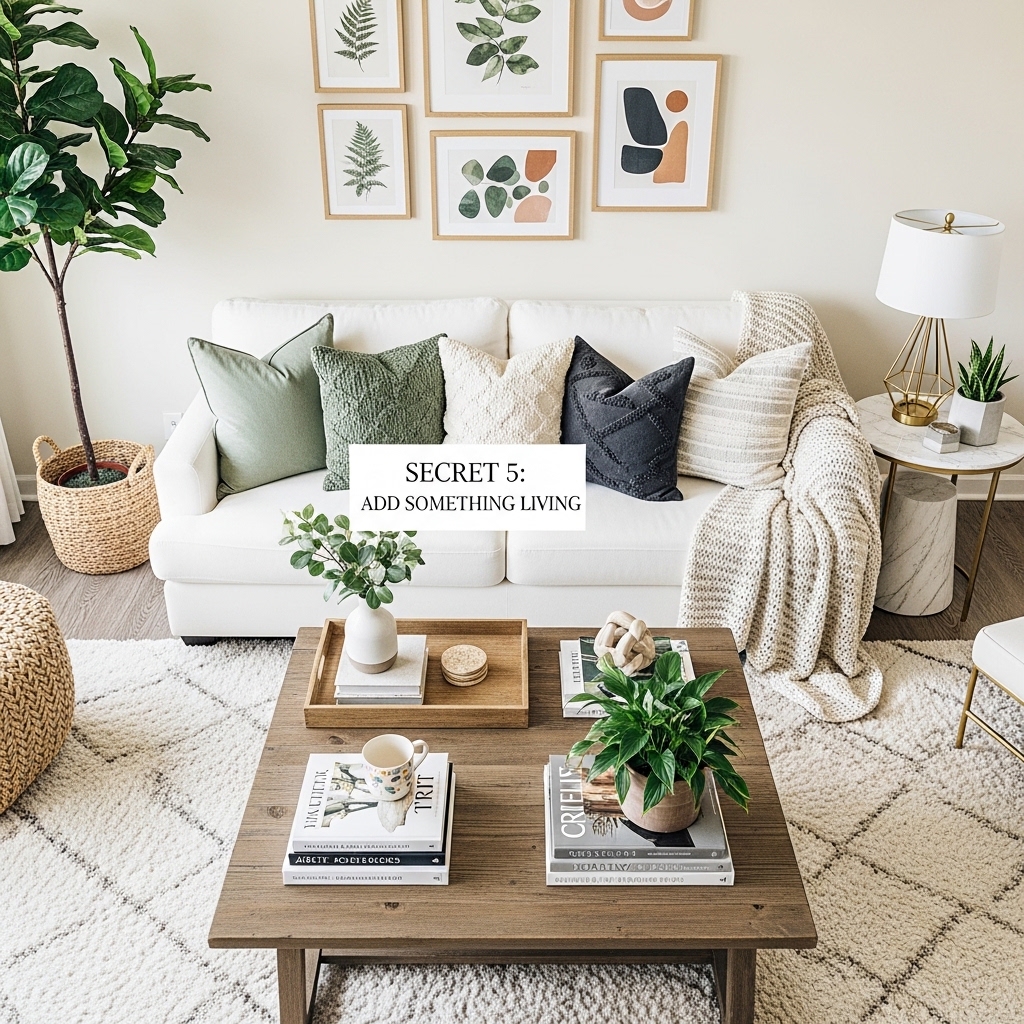
Plants photograph beautifully. They add life, color, and organic shapes.
The photo rule: Place a plant in every photo. A tall plant in the corner. A small plant on the coffee table. A trailing plant on a shelf.
Best plants for photos:
| Plant | Why It Photographs Well |
|---|---|
| Fiddle leaf fig | Tall, sculptural, dramatic leaves |
| Snake plant | Vertical lines, graphic shape |
| Pothos | Trailing vines add movement |
| Monstera | Large, interesting leaves |
Pro Tip: Wipe dust off leaves before photographing. Dust shows up clearly in photos and looks unkempt.
Mistake to Avoid: Do not use fake plants that look obviously plastic. High-quality fake plants can work. Cheap ones look terrible in photos.
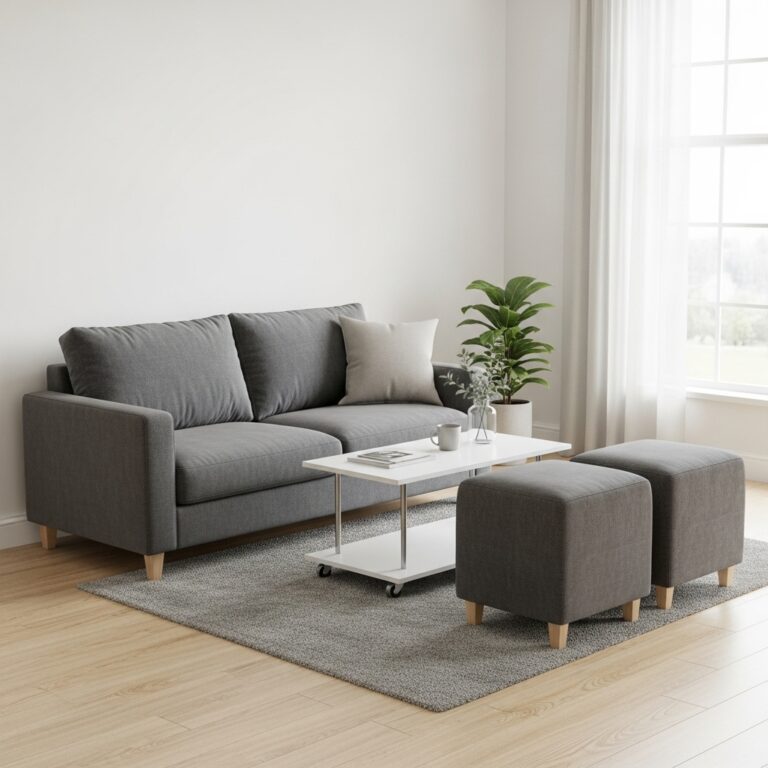
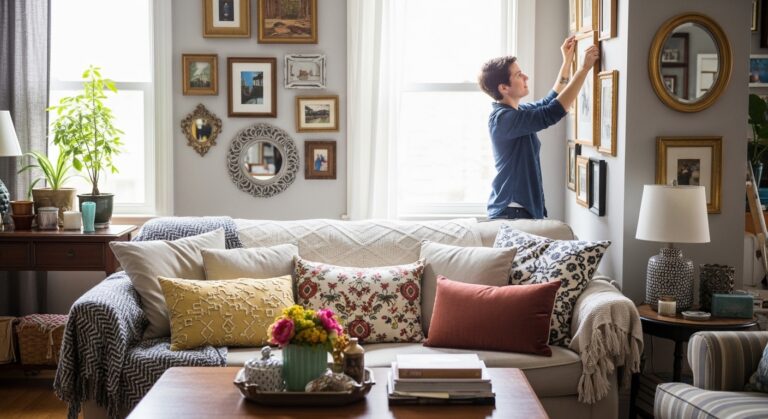
Secret 6: Create Focal Points
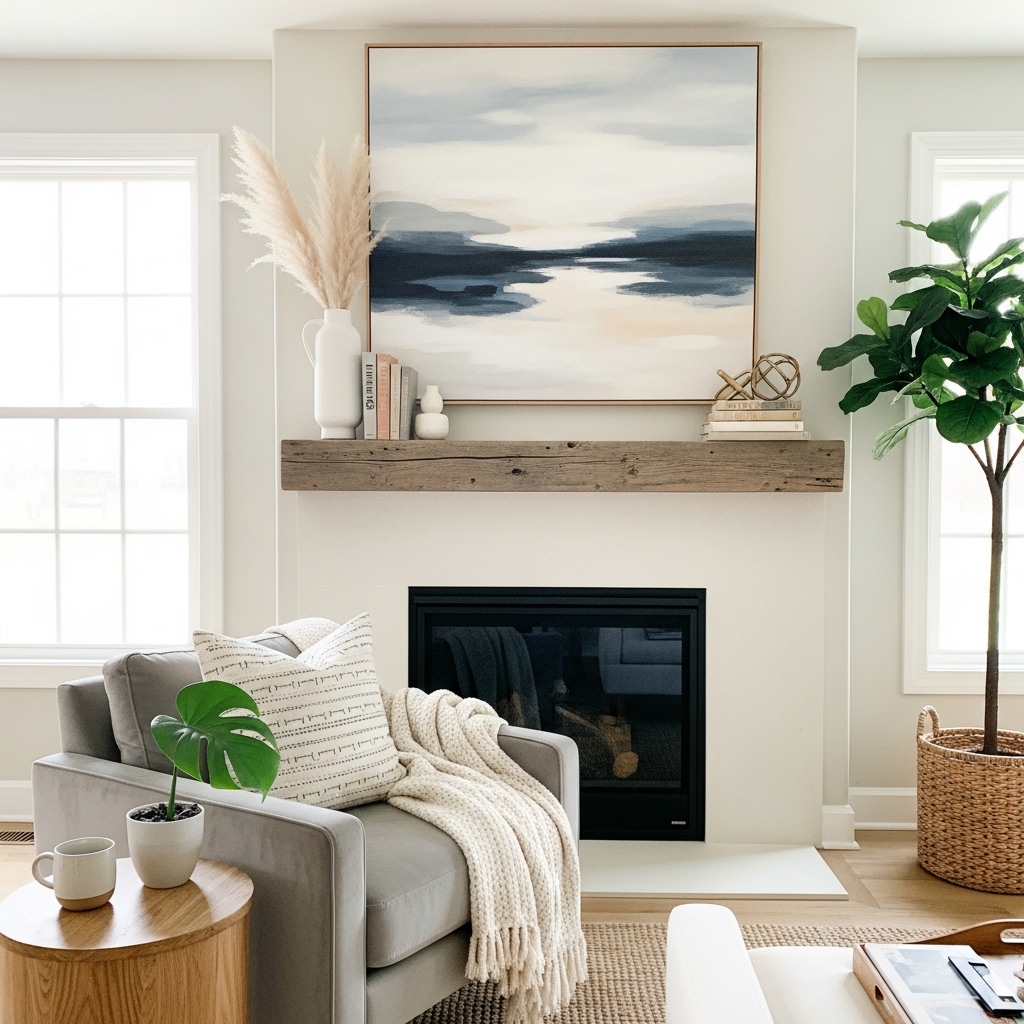
Every photo needs a focal point. The eye needs somewhere to land.
The photo rule: Choose one focal point per photo. A fireplace. A piece of art. A bed with layered bedding. A styled coffee table.
How to create a focal point:
- Art: Hang one large piece instead of several small pieces
- Bed: Layer pillows, a duvet, and a throw blanket
- Coffee table: Style with a tray, books, and a candle
- Fireplace: Add a mirror above and decor on the mantel
Pro Tip: Stand in the doorway and take a photo of the entire room. The focal point should be immediately visible.
Mistake to Avoid: Do not have competing focal points. One strong focal point per room. Two is confusing.
Secret 7: Use the Triangle Composition
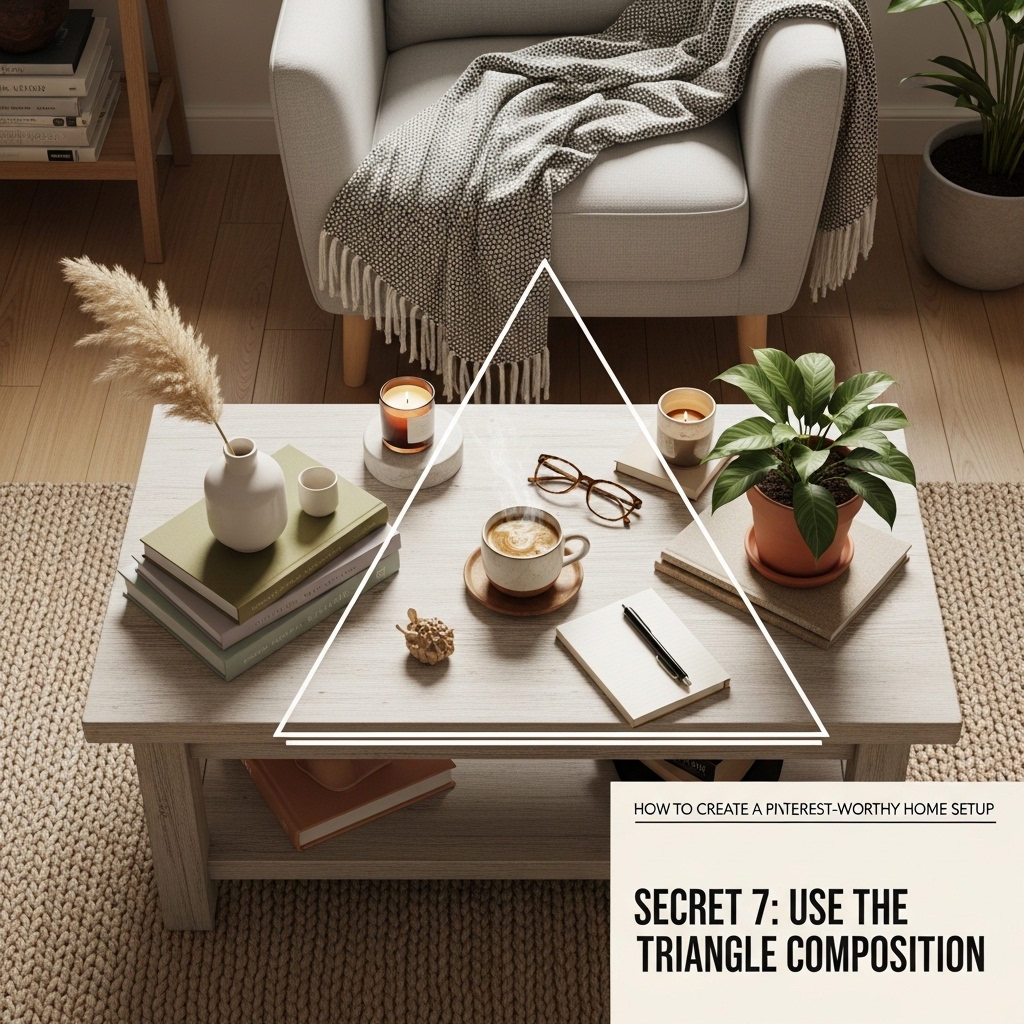
Professional photographers use the triangle composition. It works for home photos too.
The photo rule: Arrange items so their tops form an imaginary triangle. The eye follows the triangle around the frame.
Example triangle arrangements:
| Items | Triangle Formation |
|---|---|
| Sofa, lamp, plant | Sofa (base), lamp (left point), plant (right point) |
| Bed, nightstand, lamp | Bed (base), nightstand (left), lamp (right) |
| Coffee table tray, candle, book | Tray (base), candle (center point), book (top point) |
Pro Tip: Take a test photo. Draw an imaginary triangle connecting the main elements. If the triangle is not clear, rearrange.
Mistake to Avoid: Do not place all items in a straight line. Straight lines are static. Triangles are dynamic.
Secret 8: Add Texture
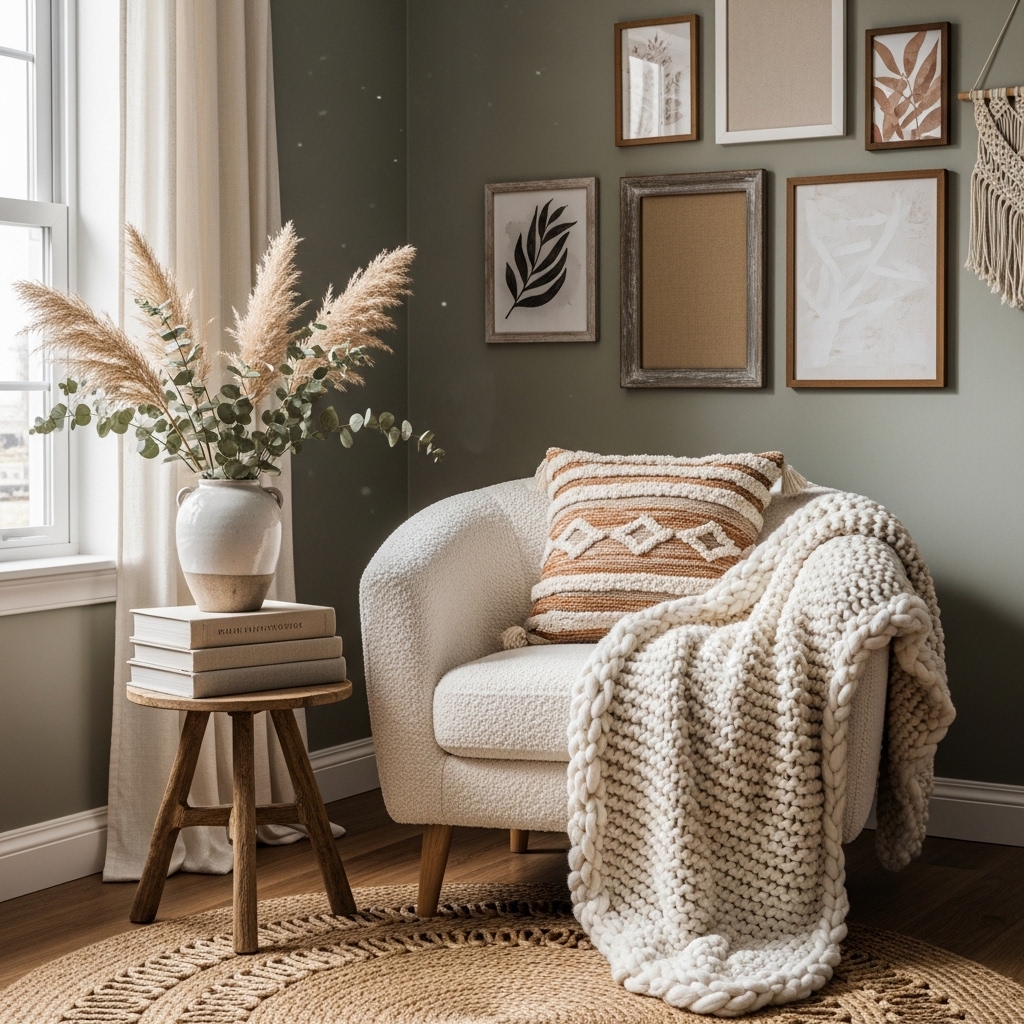
Flat surfaces photograph flat. Textured surfaces photograph rich.
The photo rule: Layer textures. A wool throw on a linen sofa. A velvet pillow on a cotton chair. A jute rug under a wood coffee table.
Textures that photograph well:
| Texture | Where to Use |
|---|---|
| Linen | Curtains, pillow covers, upholstery |
| Wool | Throw blankets, rugs |
| Velvet | Pillows, ottomans, chairs |
| Wood | Furniture, frames, trays |
| Ceramic | Vases, bowls, plant pots |
| Rattan | Baskets, chairs, mirrors |
Pro Tip: Mix at least three textures in every photo. The contrast between textures adds depth.
Mistake to Avoid: Do not use all smooth textures. A room of leather, glass, and metal looks cold in photos.
Secret 9: Style Your Bookshelves
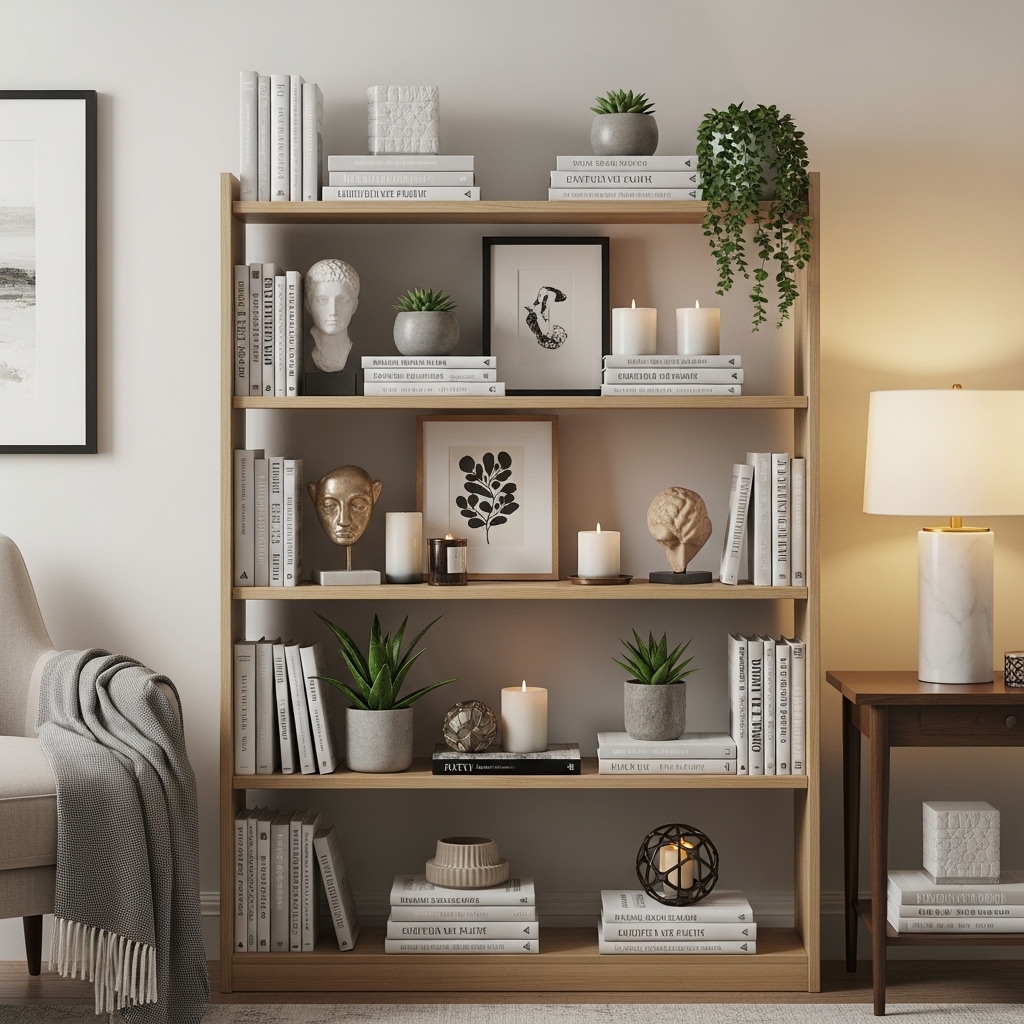
Bookshelves are the hardest to photograph. They are also the most rewarding when done well.
The photo rule: Remove 30% of the books. Turn some books facing forward. Add decorative objects between book stacks.
Bookshelf styling formula:
| Layer | What to Add |
|---|---|
| Books | Stacks of 3-5, some vertical, some horizontal |
| Objects | Vases, bowls, small sculptures, frames |
| Plants | Small trailing plants on top shelves |
| Baskets | Hide clutter in lower shelves |
Pro Tip: Use the rule of thirds. Divide the shelf into three sections. Books in one section. Objects in another. Empty space in the third.
Mistake to Avoid: Do not fill every inch of shelf space. Empty space is essential for good photos.
Secret 10: Edit Your Photos (Lightly)
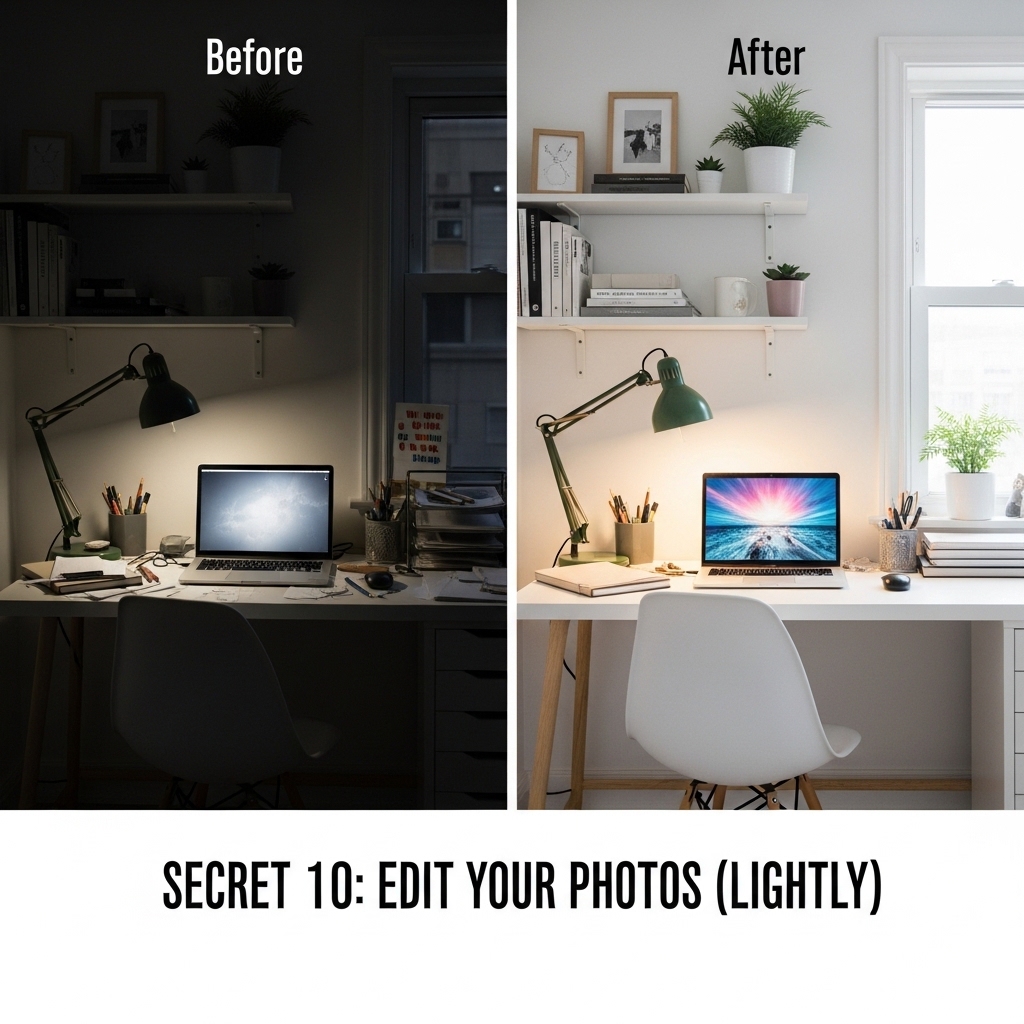
Pinterest photos are edited. They are not filtered. There is a difference.
The photo rule: Adjust brightness, contrast, and warmth. Do not use Instagram filters. Do not over-saturate colors.
Basic editing steps:
| Adjustment | Amount | Why |
|---|---|---|
| Brightness | +5 to +10 | Brightens shadows |
| Contrast | +5 to +10 | Adds depth |
| Warmth | +5 to +10 | Enhances cozy feel |
| Saturation | 0 or -5 | Do not add color |
Pro Tip: Use the same editing settings for all photos in a room. Consistent editing creates a cohesive look.
Mistake to Avoid: Do not over-edit. Over-edited photos look fake. The goal is to look like a beautiful version of your actual home.
Before and After: A Pinterest-Worthy Transformation
| Element | Before | After |
|---|---|---|
| Surfaces | Cluttered (12 items on coffee table) | Curated (3 items on coffee table) |
| Lighting | One overhead light | Layered lamps + natural light |
| Plants | None | Snake plant in corner + pothos on shelf |
| Bookshelf | Completely full | 70% full, 30% empty, styled |
| Texture | Smooth surfaces only | Linen, wool, wood, ceramic mixed |
| Editing | None | Brightness +10, warmth +5 |
Time invested: One weekend for decluttering and styling. 30 minutes for photography and editing.
Cost: $0 (used items already owned)
Frequently Asked Questions
What is the most important factor for Pinterest-worthy photos?
Lighting. Natural light at golden hour is the single most important factor. No amount of styling can fix bad lighting.
Do I need a professional camera?
No. Modern smartphones take excellent photos. Use natural light. Clean your lens. Hold the phone steady. Edit lightly.
How do I make a small room look good in photos?
Use a wide angle lens (most phones have one). Stand in the corner. Capture the whole room. Empty space photographs well. Do not over-furnish.
What should I never do in home photos?
Never use overhead lights. Never use flash. Never use Instagram filters. Never leave clutter visible. Never photograph on a cloudy day without enough light.
Conclusion
Pinterest-worthy photos are not about expensive furniture. They are about light, styling, and editing.
Edit ruthlessly before shooting. Master natural light. Layer your lighting. Style in odd numbers. Add plants. Create focal points. Use triangle composition. Add texture. Style bookshelves. Edit photos lightly.
Start with one room today. Remove clutter. Wait for golden hour. Take a photo. Edit lightly.
Small changes add up to photos you will be proud to pin.