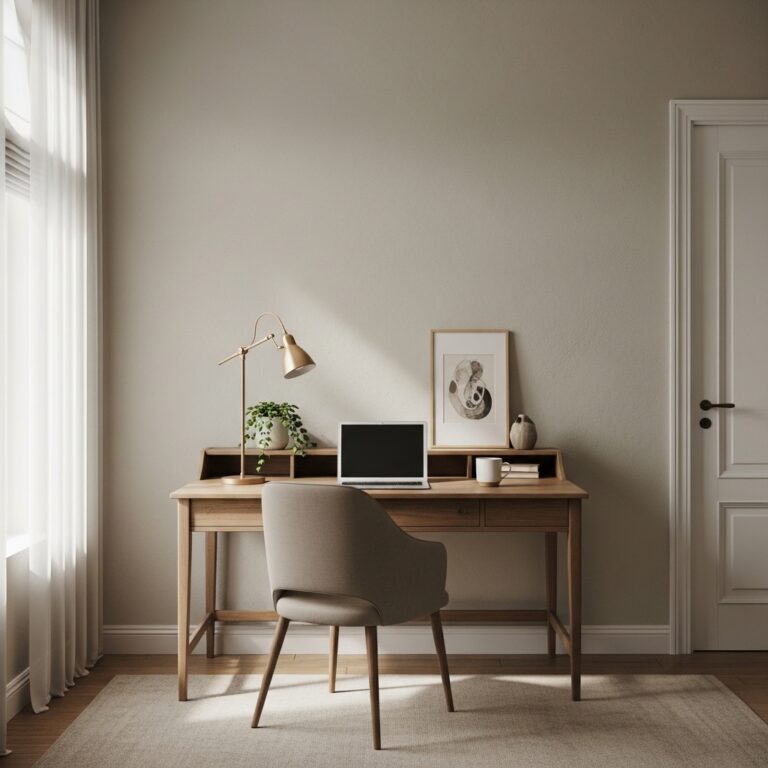
How to Arrange Furniture in a Small Living Room: 10 Layouts That Actually Work
The sofa was against one wall. The chairs were against the opposite wall. The coffee table sat in the exact center. The room felt like a waiting room. Conversation was awkward. Walking paths were cramped.
After years of frustrating layouts, the lessons finally became clear. There is a science to furniture arrangement. The right layout makes a small room feel spacious. The wrong layout makes it feel like a maze.
This guide delivers 10 furniture layouts that actually work in small living rooms. No guessing. No trial and error. Just proven arrangements.
Before Starting: The Small Room Assessment
Before moving any furniture, the room needed an honest assessment. What were the constraints? What had to stay? What could be moved?
The Room Audit
The living room measured 11 feet by 13 feet with an 8-foot ceiling. A single 4-foot window sat centered on the 11-foot wall. A doorway on the opposite wall led to the hallway. Another doorway led to the kitchen.
| Feature | Measurement | Constraint |
|---|---|---|
| Room dimensions | 11′ x 13′ | Small, every inch matters |
| Window | 4′ wide | Centered on 11′ wall |
| Doorway 1 | 30″ wide | Hallway entrance |
| Doorway 2 | 30″ wide | Kitchen entrance |
| Traffic path | Between doorways | Must stay clear |
The Non-Negotiable Constraints
Every room has limitations. Identifying them early prevents frustrating layout attempts.
Traffic Flow Requirements
The two doorways created a natural walking path from the hallway to the kitchen. This path needed to stay clear. Furniture could not block it.
- Main traffic path: 36 inches minimum width
- Secondary paths: 30 inches minimum width
- Door swings: Nothing within the door swing arc
Fixed Elements
- Window location: The 11-foot wall with the window was the focal wall
- Wall outlets: Limited to two walls, which affected lamp placement
- TV connection: Only on one wall (the wall opposite the window)
Pro Tip: Sketch your room on graph paper before moving furniture. Include windows, doors, outlets, and traffic paths.
Mistake to Avoid: Do not start moving furniture without measuring. Measure everything. Doorways. Wall lengths. Walking paths.
The 5 Golden Rules of Small Living Room Arrangement
Before diving into specific layouts, understand the rules that apply to every small living room.
Rule 1: Float Furniture Away from Walls
Conventional wisdom says push furniture against walls to open up the center. This does the opposite.
The rule: Pull furniture 6-12 inches away from walls. Even a small gap creates visual depth. The room feels larger.
Rule 2: Keep Traffic Paths Clear
Every doorway needs a clear path to the other side of the room.
The rule: Main traffic paths need 36 inches of width. Secondary paths need 30 inches. Test every path by walking it.
Rule 3: Create a Focal Point
Every room needs a focal point. The eye needs somewhere to land.
The rule: Choose one focal point per room. A window. A fireplace. A TV. A large piece of art. Arrange furniture around it.
Rule 4: Use the Right-Sized Rug
The rug anchors the seating area. The wrong size ruins the layout.
The rule: The front legs of all seating should sit on the rug. The rug should extend beyond the coffee table.
Rule 5: Leave Breathing Room
Not every inch needs furniture. Empty space makes small rooms feel larger.
The rule: Leave at least 18 inches between the coffee table and the sofa. Leave at least 30 inches between large furniture pieces.
Pro Tip: Use painter’s tape to outline furniture footprints on the floor. Live with the tape for a day before moving heavy pieces.
Mistake to Avoid: Do not push all furniture against the walls. Floating pieces create depth and interest.
Layout 1: The Classic L-Shape
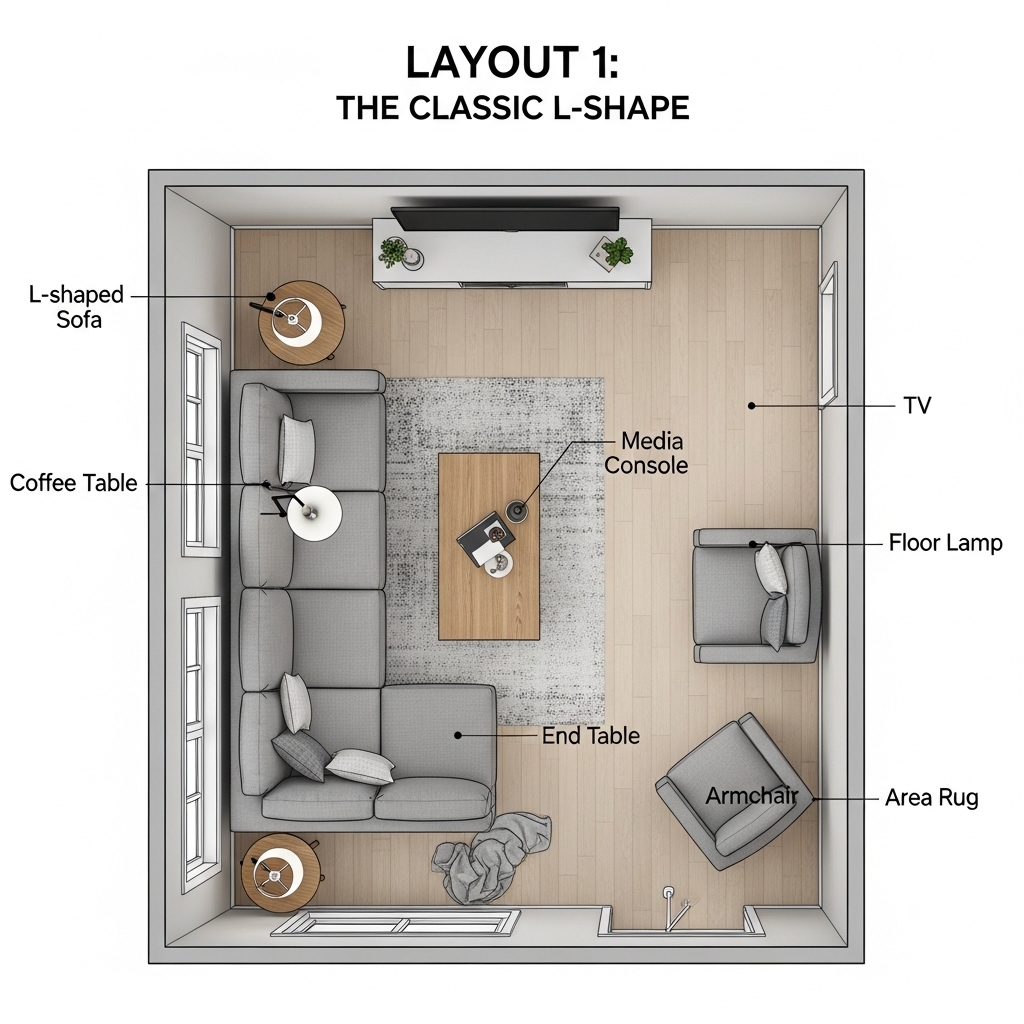
The classic L-shape works in most small living rooms. It creates a natural conversation area and maximizes corner space.
When to Use This Layout
- The room is rectangular (longer than it is wide)
- You have a sectional sofa or a sofa + loveseat
- You need to keep one traffic path clear
How to Arrange It
Place the longer side of the L against the longest wall. Place the shorter side perpendicular, floating in the room. The L should open toward the focal point (window or TV).
The coffee table sits in the center of the L. A small chair can float opposite the L if space allows.
| Element | Placement | Distance |
|---|---|---|
| Long sofa side | Against longest wall | Flush or 6″ away |
| Short sofa side | Perpendicular, floating | Creates L shape |
| Coffee table | Centered in L | 18″ from sofa |
| Traffic path | Behind short side | 36″ minimum |
Why This Layout Works
The L-shape defines the seating area without closing it off. The open side of the L invites entry. The corner space is used efficiently.
Pro Tip: If the short side of the L blocks a walking path, leave a 36-inch gap between the end of the sofa and the wall.
Mistake to Avoid: Do not place the L-shape with the open side facing a wall. The open side should face the room’s focal point.
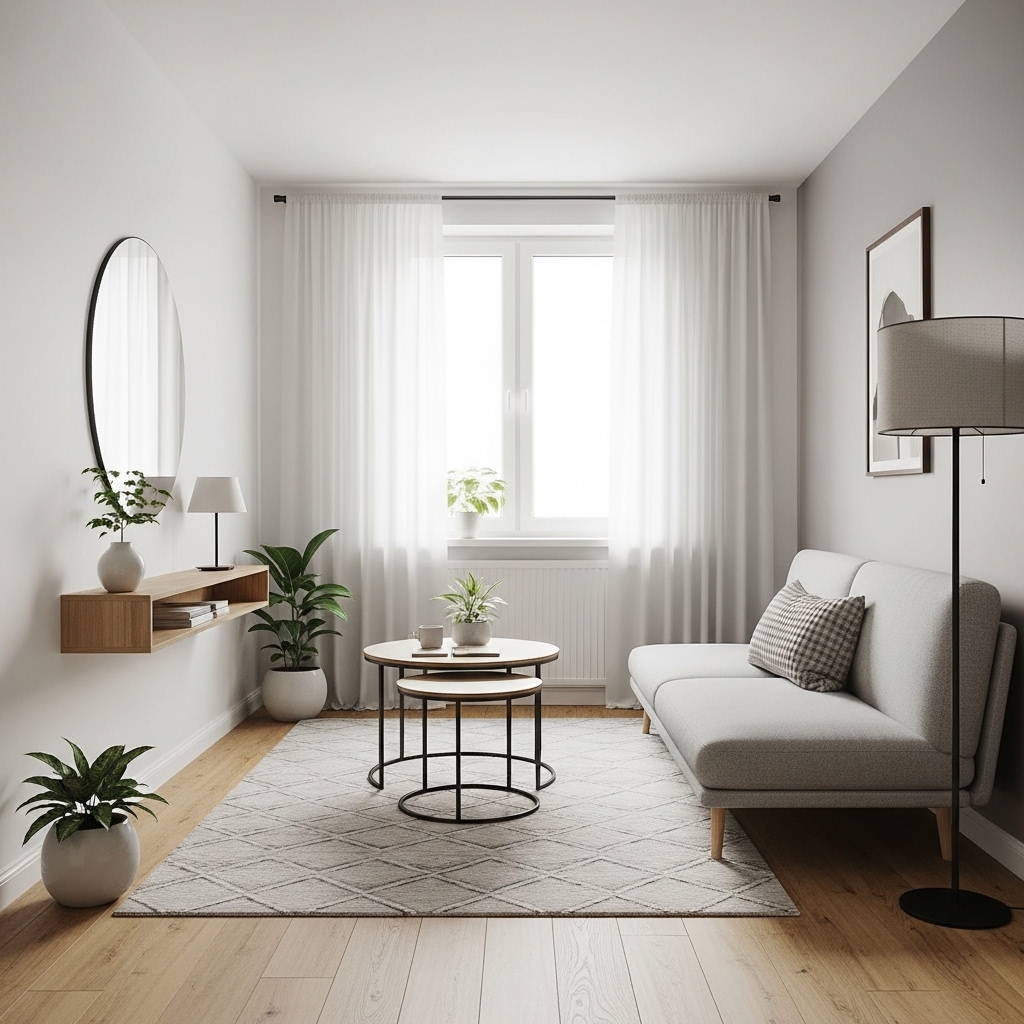
Layout 2: The Floating Sofa
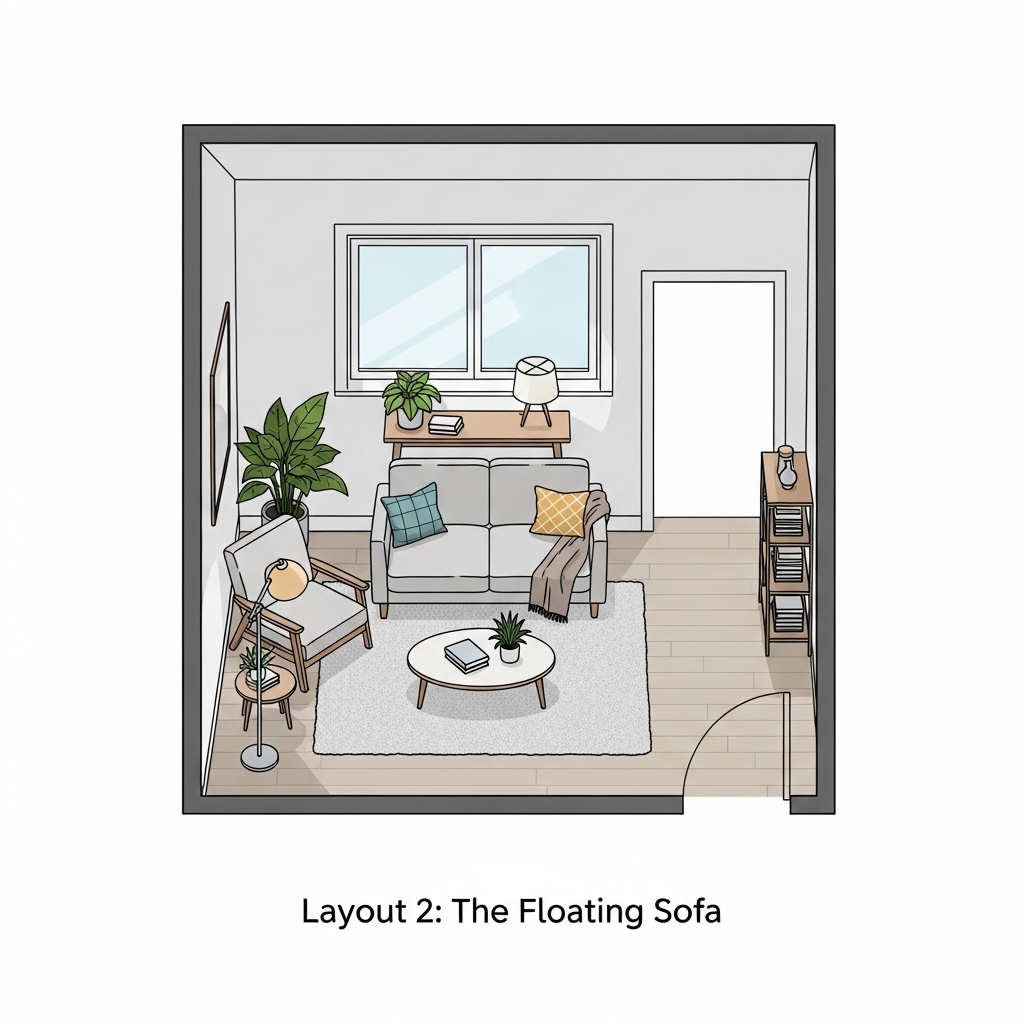
The floating sofa layout is unexpected. It also makes small rooms feel much larger.
When to Use This Layout
- The room has two doorways on opposite walls
- You want to create distinct zones (seating + something else)
- You have a sofa that looks good from the back
How to Arrange It
Pull the sofa away from the wall. Float it perpendicular to the longest wall, facing the focal point. Leave a walking path behind the sofa.
Two chairs face the sofa at an angle. The coffee table sits between them.
| Element | Placement | Distance |
|---|---|---|
| Sofa | Floating, perpendicular to wall | 36″ from opposite wall |
| Walking path | Behind sofa | 30-36″ wide |
| Chairs | Angled toward sofa | 24″ from sofa |
| Coffee table | Centered | 18″ from sofa |
Why This Layout Works
The gap behind the sofa creates visual depth. The room feels larger because the eye sees space behind the furniture. The walking path connects the two doorways naturally.
Pro Tip: Place a slim console table behind the floating sofa. The table adds surface space and makes the back of the sofa look intentional.
Mistake to Avoid: Do not float the sofa if it is ugly from the back. The back of the sofa will be visible.
Layout 3: The Corner Focus
The corner focus layout works when the room has an awkward corner that needs to become the center of attention.
When to Use This Layout
- The room has a fireplace or TV in a corner
- The room is square (width and length are similar)
- You want a cozy, intimate seating area
How to Arrange It
Place the sofa at an angle in the corner, facing out. Place two chairs on either side of the sofa, also angled. The coffee table sits in the center of the angled arrangement.
All seating faces the corner focal point.
| Element | Placement | Distance |
|---|---|---|
| Sofa | Angled in corner | 12″ from each wall |
| Chairs | Flanking sofa, angled | 24″ from sofa |
| Coffee table | Centered | 18″ from all seating |
| Focal point | In corner | Behind the arrangement |
Why This Layout Works
The angled arrangement softens the room. Straight lines feel stiff. Angled furniture feels dynamic and inviting. The corner focal point becomes the star.
Pro Tip: Use a round coffee table with this layout. A round table echoes the angled arrangement and softens the look further.
Mistake to Avoid: Do not use this layout if the corner focal point is not worth looking at. The layout only works if the corner is interesting.
Layout 4: The Symmetrical Face-Off
The symmetrical face-off is classic and balanced. It works best in rooms where symmetry feels intentional.
When to Use This Layout
- The room has a strong focal point (fireplace, large window)
- You have two matching sofas or two matching chairs
- You want a formal, balanced look
How to Arrange It
Place two sofas facing each other, perpendicular to the focal point. The coffee table sits between them. The focal point is at one end of the arrangement.
| Element | Placement | Distance |
|---|---|---|
| Sofa 1 | Facing focal point | 6-12″ from wall |
| Sofa 2 | Facing sofa 1 | 48-60″ apart |
| Coffee table | Centered between sofas | 18″ from each sofa |
| Focal point | At one end | Centered |
Why This Layout Works
Symmetry is visually pleasing. The balanced arrangement feels intentional and designed. Conversation flows easily because people face each other.
Pro Tip: Use this layout only if the room is wide enough. You need at least 9 feet of width for two sofas facing each other with a coffee table between them.
Mistake to Avoid: Do not use this layout in a narrow room. The sofas will be too close together, and the space will feel cramped.
Layout 5: The U-Shape
The U-shape wraps seating around the focal point. It is the most conversation-friendly layout.
When to Use This Layout
- The room is large enough for three seating pieces
- You entertain frequently
- The focal point is on one wall (TV, fireplace, art)
How to Arrange It
Place the main sofa facing the focal point. Place two chairs or a loveseat on each side, perpendicular to the sofa. All seating faces inward.
The coffee table sits in the center of the U.
| Element | Placement | Distance |
|---|---|---|
| Main sofa | Facing focal point | 6-12″ from wall |
| Side seating | Perpendicular to sofa | Flanking the sofa |
| Coffee table | Centered in U | 18″ from all seating |
| Focal point | At open end of U | On the wall |
Why This Layout Works
The U-shape wraps around the conversation area. Everyone can see everyone else. The arrangement feels cozy and intimate.
Pro Tip: Leave the open end of the U facing the focal point. The open end invites entry into the seating area.
Mistake to Avoid: Do not close off the U completely. The arrangement needs one open side for entry.
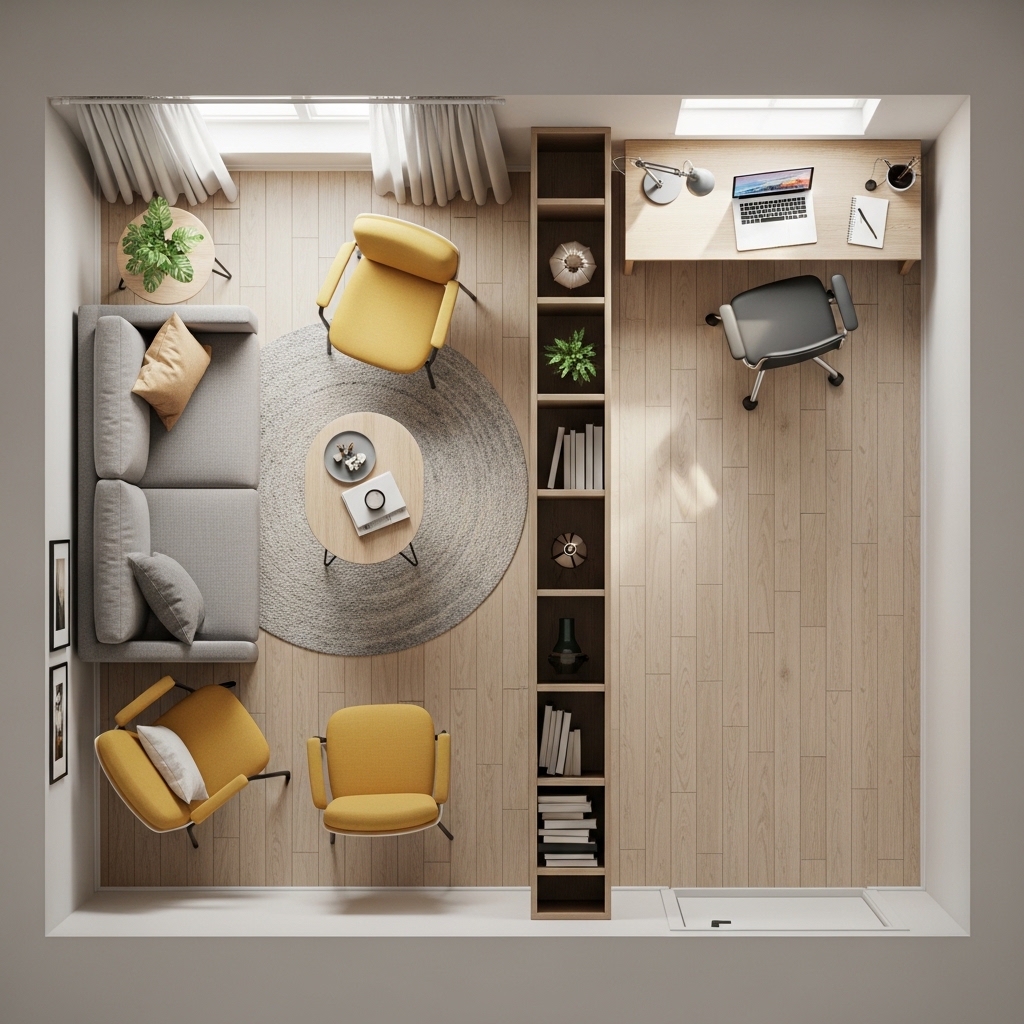
Layout 6: The Zone Divide
The zone divide works when one room needs to serve two purposes. Living room plus dining. Living room plus home office.
When to Use This Layout
- The room is long and narrow
- You need two distinct functional zones
- You have a sofa that can define the boundary
How to Arrange It
Place the sofa perpendicular to the long wall, floating in the middle of the room. The sofa becomes the divider. One zone on each side.
On one side of the sofa, place chairs and a coffee table (living zone). On the other side, place a desk or dining table (second zone).
| Element | Placement | Distance |
|---|---|---|
| Sofa | Floating, perpendicular | Divides the room |
| Living zone | One side of sofa | Chairs + coffee table |
| Second zone | Other side of sofa | Desk or dining table |
| Traffic path | Between zones | 30-36″ wide |
Why This Layout Works
The sofa defines two zones without walls. The room serves two purposes. The space feels intentional, not cramped.
Pro Tip: Use a sofa with a low back for this layout. A low back allows light to flow between zones. A high back blocks light and makes the room feel chopped up.
Mistake to Avoid: Do not place the sofa so it blocks the walking path. Leave at least 30 inches between the end of the sofa and the wall.
Layout 7: The Window Focus
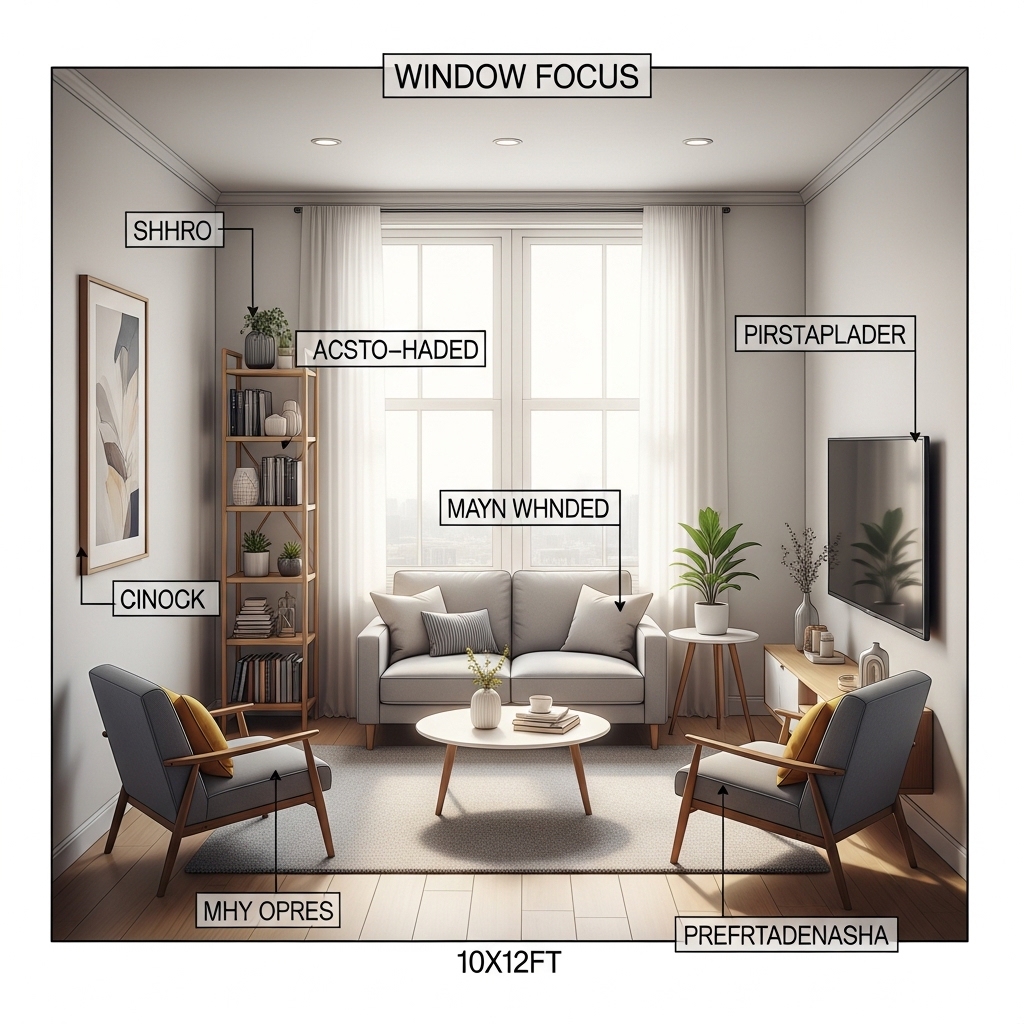
The window focus layout makes the window the star. It works best when the view is worth looking at.
When to Use This Layout
- The room has a large window with a good view
- You want natural light to be the focal point
- The room gets abundant natural light
How to Arrange It
Place the sofa facing the window. Place chairs on either side of the sofa, also facing the window. The coffee table sits in front of the sofa.
The back of the sofa faces the room. All seating looks outward.
| Element | Placement | Distance |
|---|---|---|
| Sofa | Facing window | 6-12″ from opposite wall |
| Chairs | Flanking sofa | Facing window |
| Coffee table | In front of sofa | 18″ from sofa |
| Traffic path | Behind sofa | 30-36″ wide |
Why This Layout Works
The window becomes the focal point. Natural light is maximized. The view becomes part of the room’s decor.
Pro Tip: Place a console table behind the sofa. The table gives the back of the sofa purpose and adds surface space.
Mistake to Avoid: Do not place the sofa so close to the window that curtains cannot hang properly. Leave at least 6 inches between the sofa and the window wall.
Layout 8: The Compact Corner
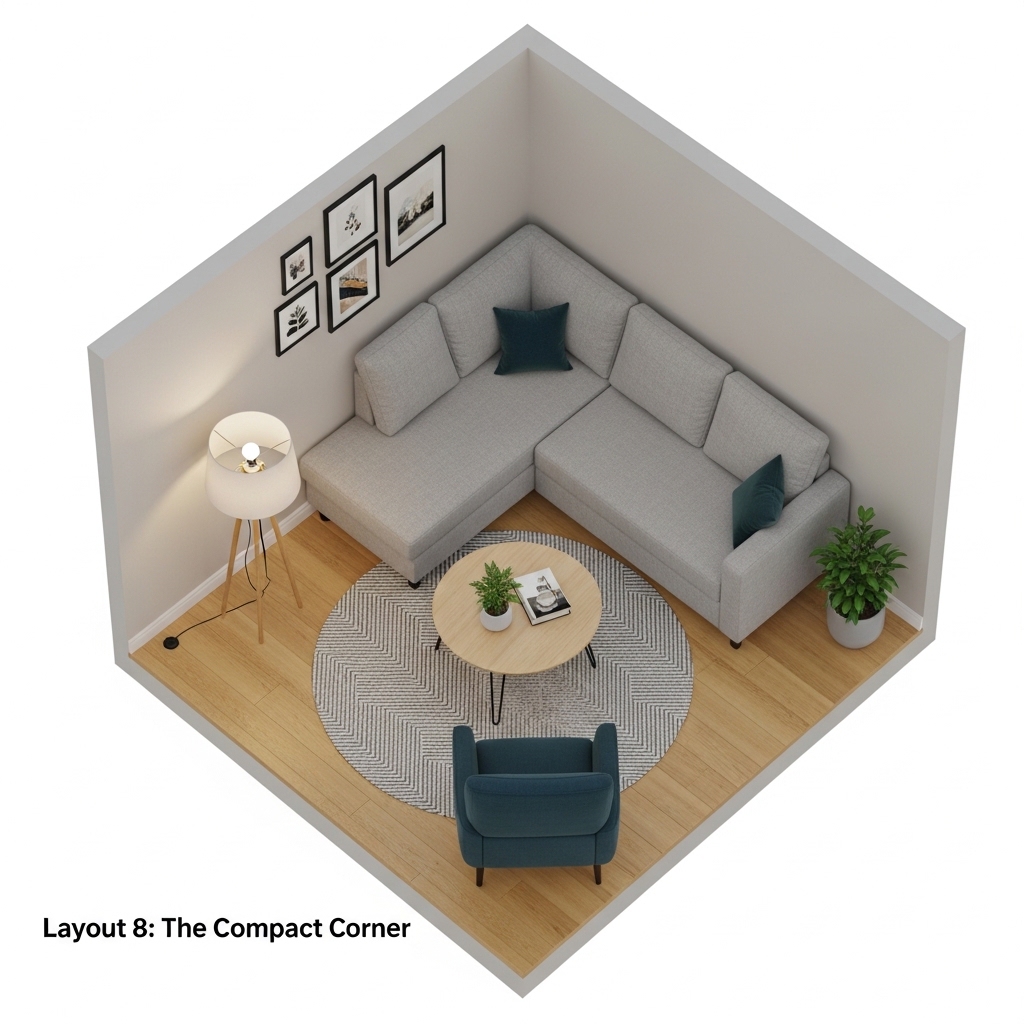
The compact corner layout works in very small rooms. It uses every inch efficiently.
When to Use This Layout
- The room is under 100 square feet
- You need maximum floor space
- You have a small sofa or loveseat
How to Arrange It
Place the sofa in a corner, angled or flush against both walls. Place a small chair opposite the sofa. Place a small round coffee table between them.
The rest of the floor stays empty.
| Element | Placement | Distance |
|---|---|---|
| Sofa | In corner | Flush against both walls |
| Chair | Opposite sofa | 36-48″ from sofa |
| Coffee table | Between them | Small, round |
| Empty floor | Rest of room | For walking and play |
Why This Layout Works
The corner placement anchors the seating area. The rest of the floor stays open for walking. The room does not feel crowded.
Pro Tip: Use a wall-mounted lamp instead of a floor lamp. Wall-mounted lamps save floor space and still provide light.
Mistake to Avoid: Do not add more furniture. The compact corner layout works because it uses minimal pieces.
Layout 9: The Multi-Directional
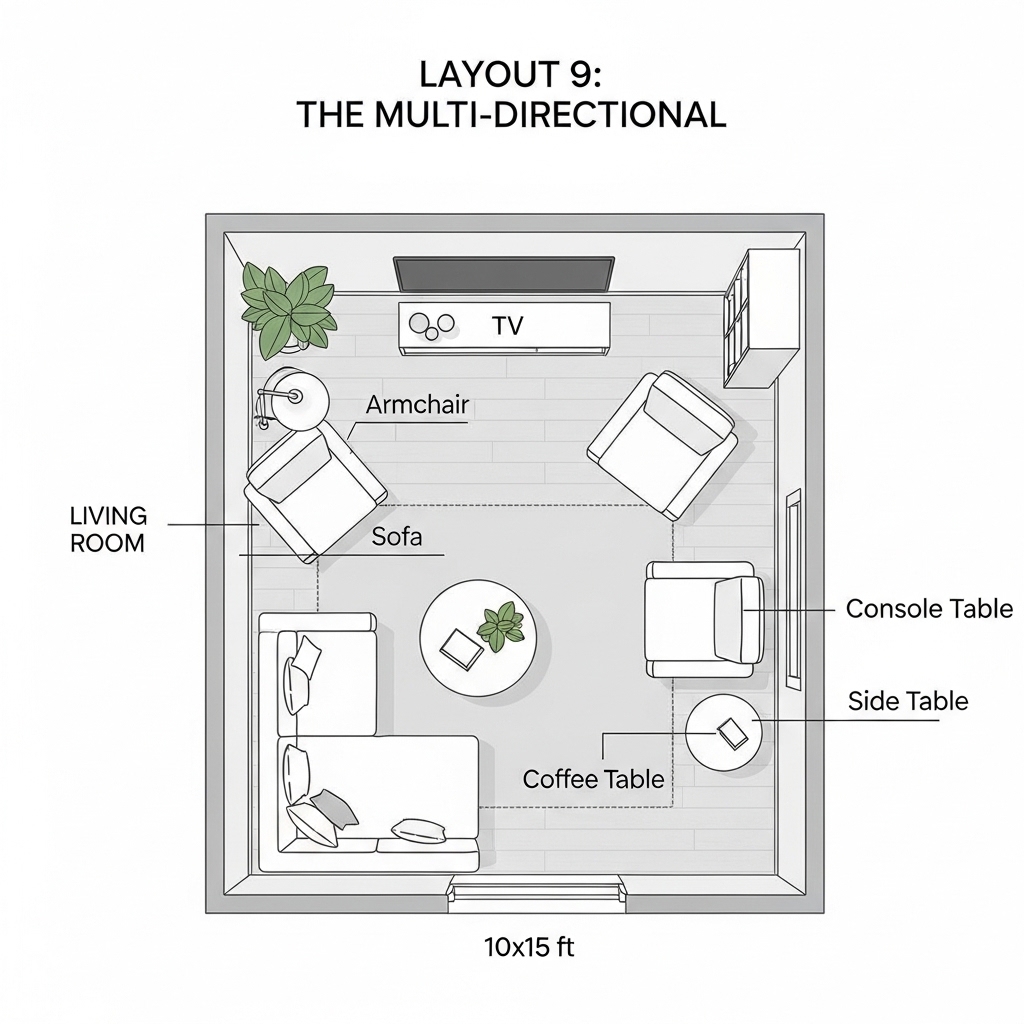
The multi-directional layout is flexible. Seating faces different directions for different activities.
When to Use This Layout
- The room serves multiple purposes (TV watching, conversation, reading)
- You have modular or lightweight furniture
- You like to rearrange often
How to Arrange It
Place the sofa facing the TV. Place a chair facing the sofa (for conversation). Place another chair facing the window (for reading).
The coffee table sits in the center, accessible from all seating.
| Element | Placement | Facing |
|---|---|---|
| Sofa | Against wall | TV |
| Chair 1 | Opposite sofa | Sofa |
| Chair 2 | In corner | Window |
| Coffee table | Centered | Accessible from all |
Why This Layout Works
The room adapts to different activities. Watch TV from the sofa. Talk to someone from chair 1. Read by the window from chair 2.
Pro Tip: Use lightweight chairs that can be moved easily. The multi-directional layout works best when furniture is flexible.
Mistake to Avoid: Do not use this layout if the room is very small. Multiple directions need multiple walking paths.
Layout 10: The Minimalist
The minimalist layout uses the fewest pieces. It is the best choice for very small rooms.
When to Use This Layout
- The room is under 80 square feet
- You prefer a sparse, clean look
- You only need seating for 2-3 people
How to Arrange It
Place one small sofa against the longest wall. Place one small coffee table in front of it. Add one floor lamp in the corner. Nothing else.
The rest of the room stays completely empty.
| Element | Placement | Distance |
|---|---|---|
| Sofa | Against longest wall | Flush or 6″ away |
| Coffee table | In front of sofa | 18″ from sofa |
| Floor lamp | In corner | Next to sofa |
| Empty floor | Rest of room | For walking and yoga |
Why This Layout Works
Less is more. The room feels spacious because it is mostly empty. The few pieces that remain get noticed.
Pro Tip: Choose a sofa with legs. Visible floor underneath makes the room feel larger.
Mistake to Avoid: Do not add extra pieces. The minimalist layout fails when you add one more chair or one more table.
How to Choose the Right Layout for Your Room
With 10 layouts to choose from, how do you pick the right one?
The Decision Flowchart
| Question | Yes | No |
|---|---|---|
| Is the room under 100 sq ft? | Try Layout 8 or 10 | Continue |
| Are there two doorways on opposite walls? | Try Layout 2 | Continue |
| Is there a corner fireplace or TV? | Try Layout 3 | Continue |
| Do you entertain often? | Try Layout 1 or 5 | Continue |
| Do you need two zones in one room? | Try Layout 6 | Continue |
| Is the window the best feature? | Try Layout 7 | Try Layout 4 |
The Tape Method
Before moving any furniture, use painter’s tape to outline the layout on the floor.
- Tape the footprint of the sofa
- Tape the footprint of the chairs
- Tape the coffee table
- Tape the walking paths
- Live with the tape for a day
The tape reveals problems before you move heavy furniture.
Pro Tip: Take a photo of the taped layout from above. The overhead view shows proportions more clearly than standing in the room.
Mistake to Avoid: Do not skip the tape method. Moving furniture twice takes hours. The tape method takes minutes.
Common Layout Mistakes (And How to Fix Them)
Mistake 1: Blocking the Walking Path
The room has two doorways. Furniture sits between them. People squeeze through.
The fix: Create a clear path from one doorway to the other. The path should be at least 30 inches wide. No furniture should sit in the path.
Mistake 2: Pushing Everything Against the Walls
The sofa is against one wall. The chairs are against the opposite wall. The coffee table floats in the no man’s land in the middle.
The fix: Pull the sofa forward. Float it. Create an intimate seating area closer to the center of the room.
Mistake 3: Furniture That Is Too Large
The sofa is too deep. The coffee table is too wide. The chairs are too bulky.
The fix: Measure before buying. For a small room, choose apartment-sized furniture. Sofas under 80 inches wide. Chairs without wide arms. Coffee tables under 36 inches wide.
Mistake 4: No Focal Point
The room has no focal point. The eye wanders. Nothing anchors the arrangement.
The fix: Choose one focal point. A window. A fireplace. A TV. A large piece of art. Arrange furniture to face it.
Pro Tip: If your room has no natural focal point, create one. A large mirror. A gallery wall. A colorful rug.
Mistake to Avoid: Do not arrange furniture without a focal point. The room will feel aimless and unfinished.
Before and After: A Small Living Room Transformation
| Element | Before | After |
|---|---|---|
| Sofa | Against longest wall | Floating 12″ from wall |
| Chairs | Against opposite wall | Angled toward sofa |
| Coffee table | Centered, too far from sofa | 18″ from sofa, reachable |
| Walking path | Blocked by chair | Clear 36″ path |
| Rug | Too small, floating | 8×10, front legs on rug |
| Focal point | None | Window with art above |
| Room feel | Waiting room, cramped | Cozy, conversational |
Time invested: 2 hours (including tape method and moving furniture)
Cost: $0
Frequently Asked Questions
What is the best layout for a very small living room (under 100 sq ft)?
The compact corner (Layout 8) or the minimalist (Layout 10). Use fewer pieces. Leave more empty floor space. The empty space is what makes the room feel larger.
Can I use a sectional in a small living room?
Yes, but choose a small sectional. Apartment-sized sectionals are under 80 inches wide. Avoid sectionals with chaise lounges. Chaises eat up floor space.
How far should the coffee table be from the sofa?
18 inches. Close enough to reach from the sofa. Far enough to walk between the sofa and the table.
How much space should be between furniture?
| Between | Minimum |
|---|---|
| Sofa and coffee table | 18″ |
| Sofa and chair (facing) | 48″ |
| Sofa and wall (walking path) | 30″ |
| Coffee table and TV stand | 30″ |
What if my room has no focal point?
Create one. Hang a large piece of art. Place a large mirror. Paint one wall an accent color. Add a colorful rug. The focal point does not need to be architectural. It just needs to be intentional.
Conclusion
A small living room can feel spacious. The difference is not square footage. The difference is layout.
Ten layouts work in small living rooms. The classic L-shape. The floating sofa. The corner focus. The symmetrical face-off. The U-shape. The zone divide. The window focus. The compact corner. The multi-directional. The minimalist.
Each layout serves a different room shape and different needs. Choose the one that fits your space.
The Most Important Lesson
Test before you commit. Use painter’s tape. Outline the layout. Live with the tape for a day. Move furniture once, not twice.
Start with one layout today. Tape it out. Move the sofa. Adjust the chairs.
Small changes add up to dramatic transformations. The small living room can feel open, functional, and comfortable.
Take back your living room starting today. Layout by layout. Inch by inch. Decision by decision.