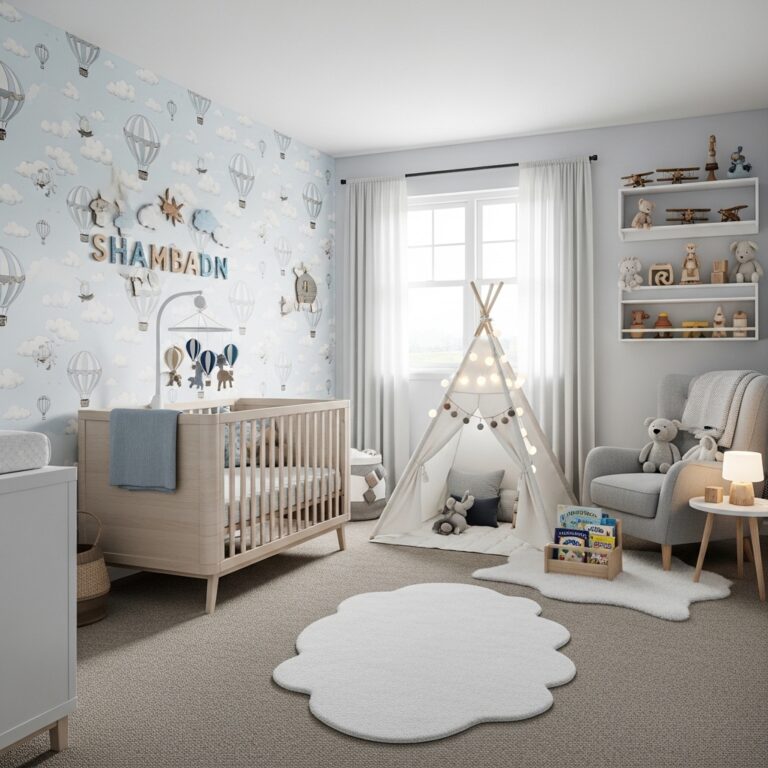
15 Nursery Organization Ideas That Eliminate Clutter and Make Every Inch Work Harder
A disorganized nursery creates stress every time you need to find a clean onesie at 3 AM.
You want systems that work. Systems that save time. Systems that grow with your baby.
This guide delivers 15 nursery organization ideas tested by parents who survived the newborn trenches.
From closet solutions to diaper stations, each idea prioritizes accessibility, visibility, and real daily use.
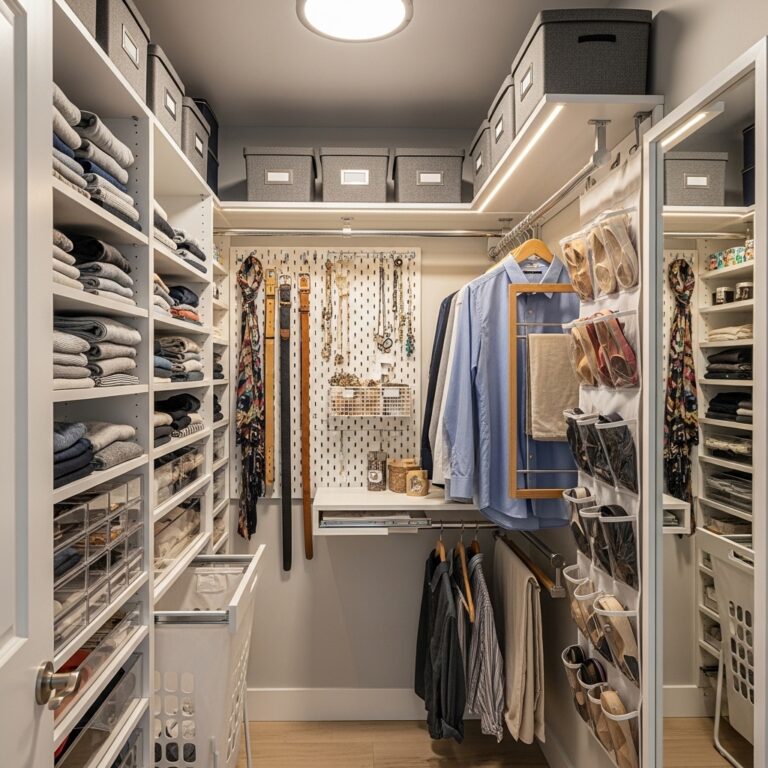
1. Install Double Hanging Rods in Your Nursery Closet
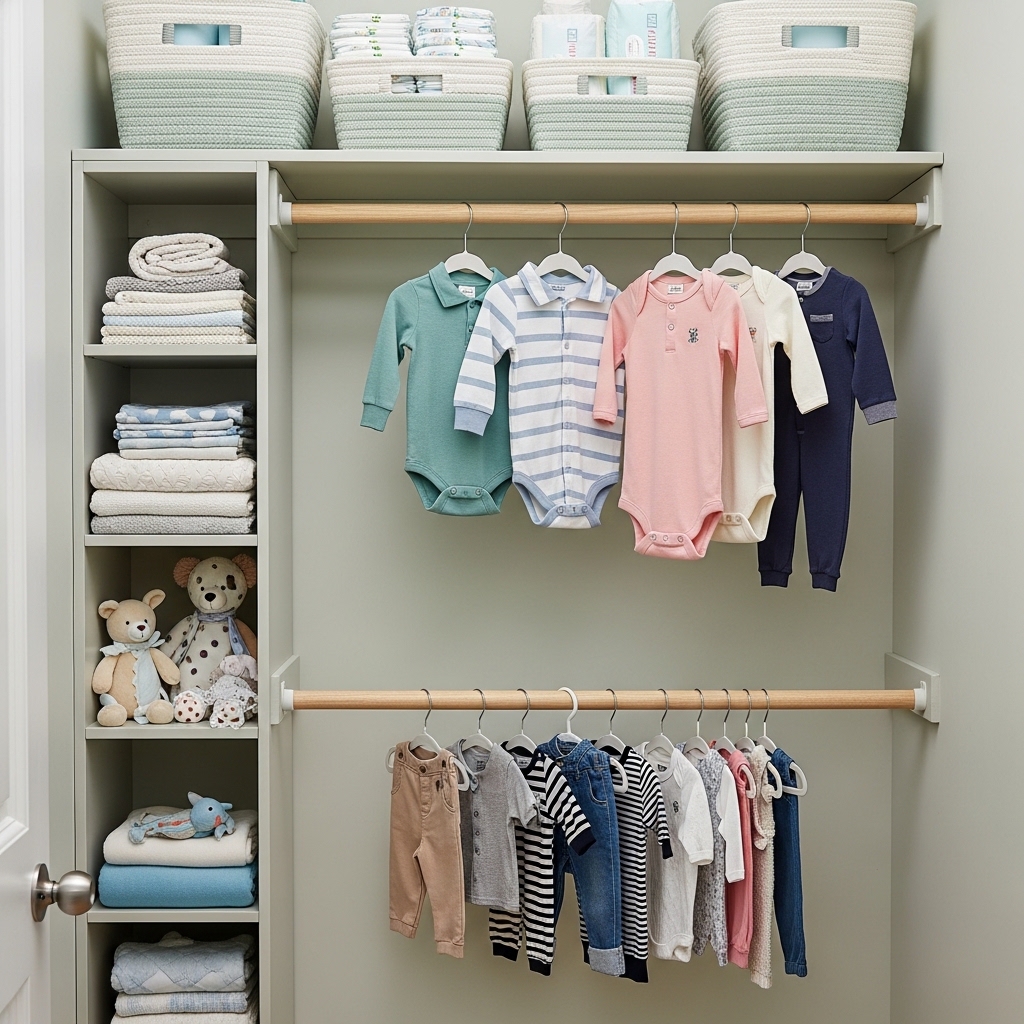
Use this idea when your nursery closet has one rod wasting all the vertical space above and below.
Install a second rod directly below your existing rod. Use the top rod for hanging clothes and bottom for shorter items.
Double rods double your hanging space instantly. Bodysuits and pants go on the bottom rod at baby height.
A single rod wastes half your closet vertical space. Double rods give you two tiers of organization in the same footprint.
Pro Tip: Use the top rod for clothes up to 12 months and bottom rod for clothes 12 to 24 months.
Mistake to Avoid: Do not install your second rod lower than 36 inches. You cannot reach the floor below it.
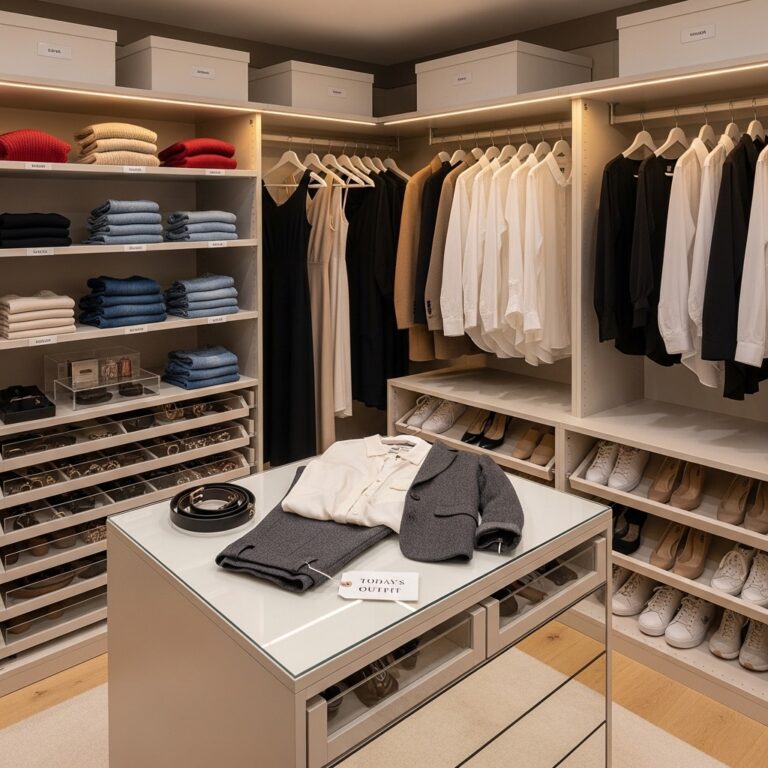
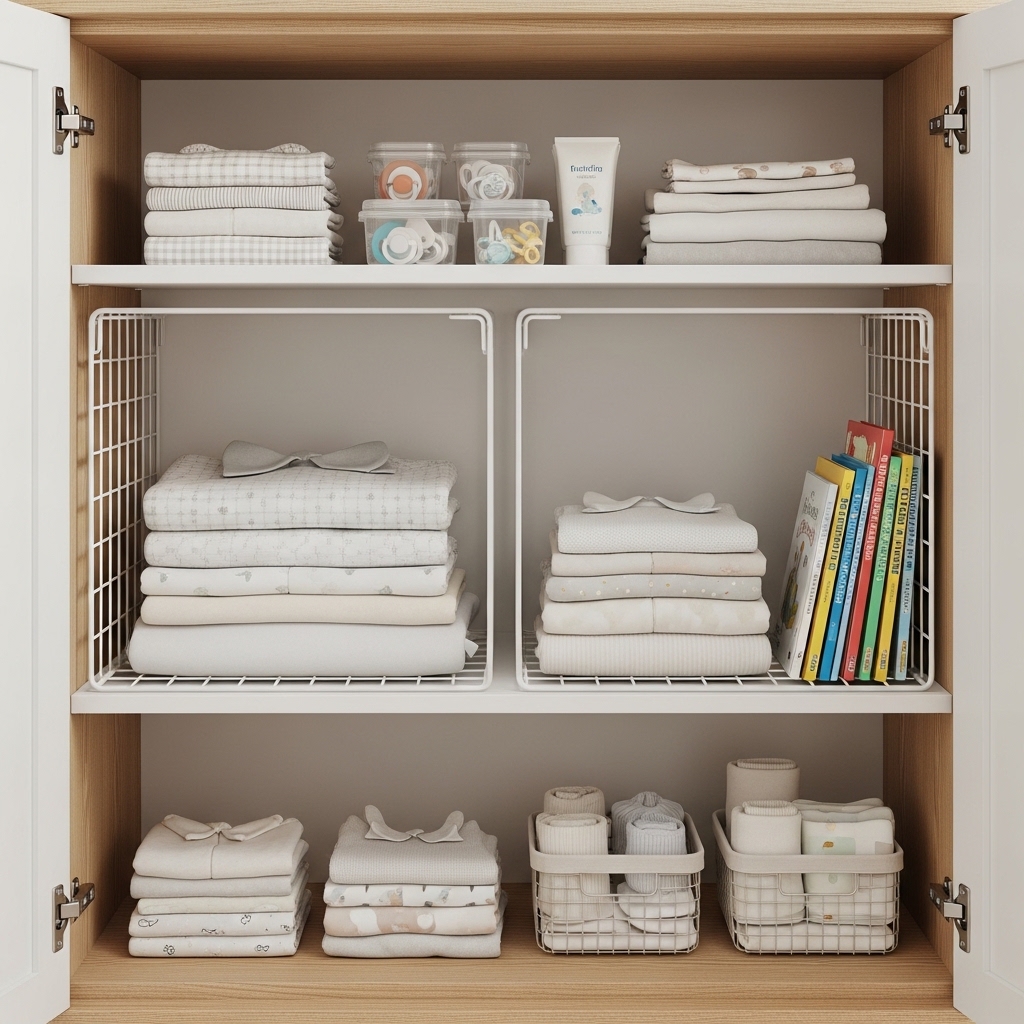
2. Use Clear Bins with Labels Inside a Cube Storage Unit
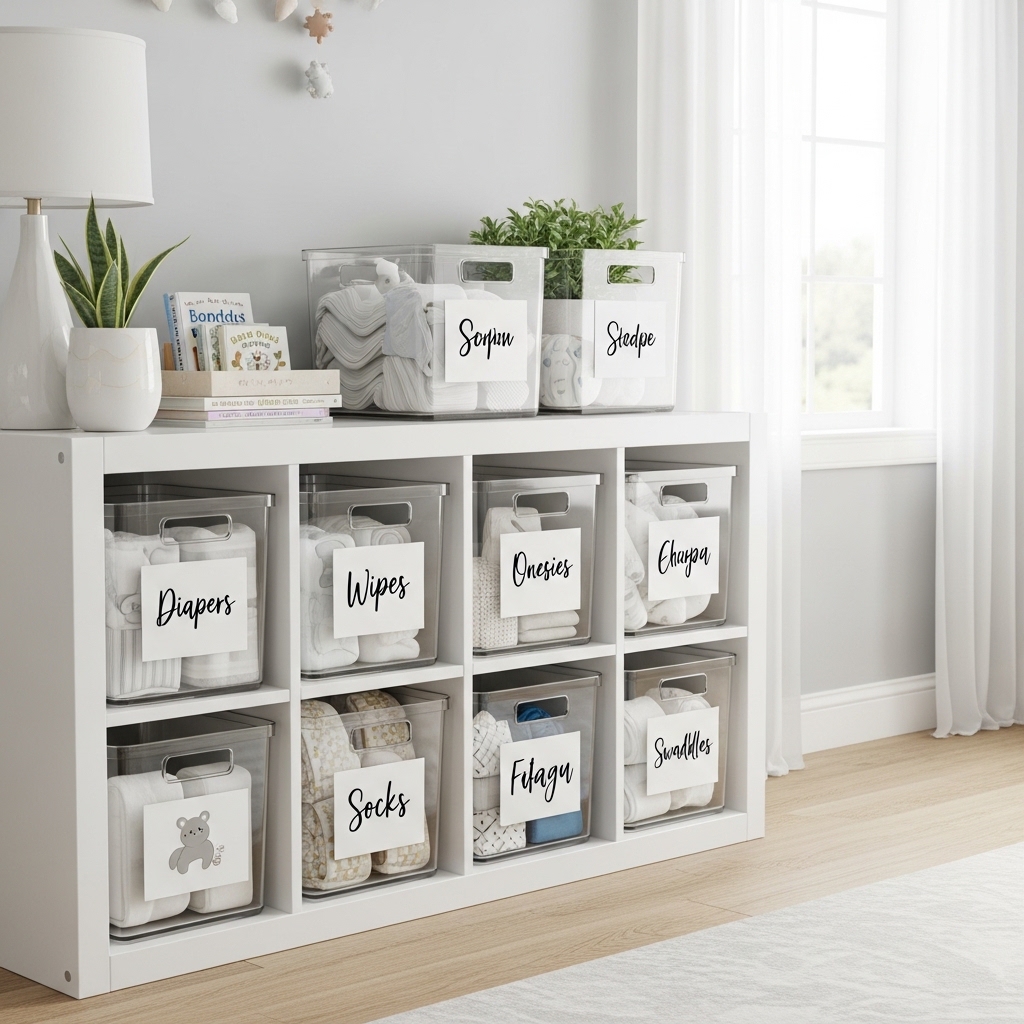
Choose this approach when you need to store small items but cannot see what is inside solid bins.
Buy clear plastic bins that fit inside cube storage shelves. Label each bin with a waterproof label maker.
Clear bins let you see contents at a glance. Labels tell you exactly what belongs in each bin.
Solid bins hide everything. You dump five bins on the floor searching for one pacifier at 2 AM.
Pro Tip: Take a photo of each bin’s contents. Tape the photo to the bin front for even faster identification.
Mistake to Avoid: Do not overfill your bins. Bins that bulge cannot slide in and out of cube shelves easily.
3. Hang a Over-the-Door Shoe Organizer for Baby Essentials
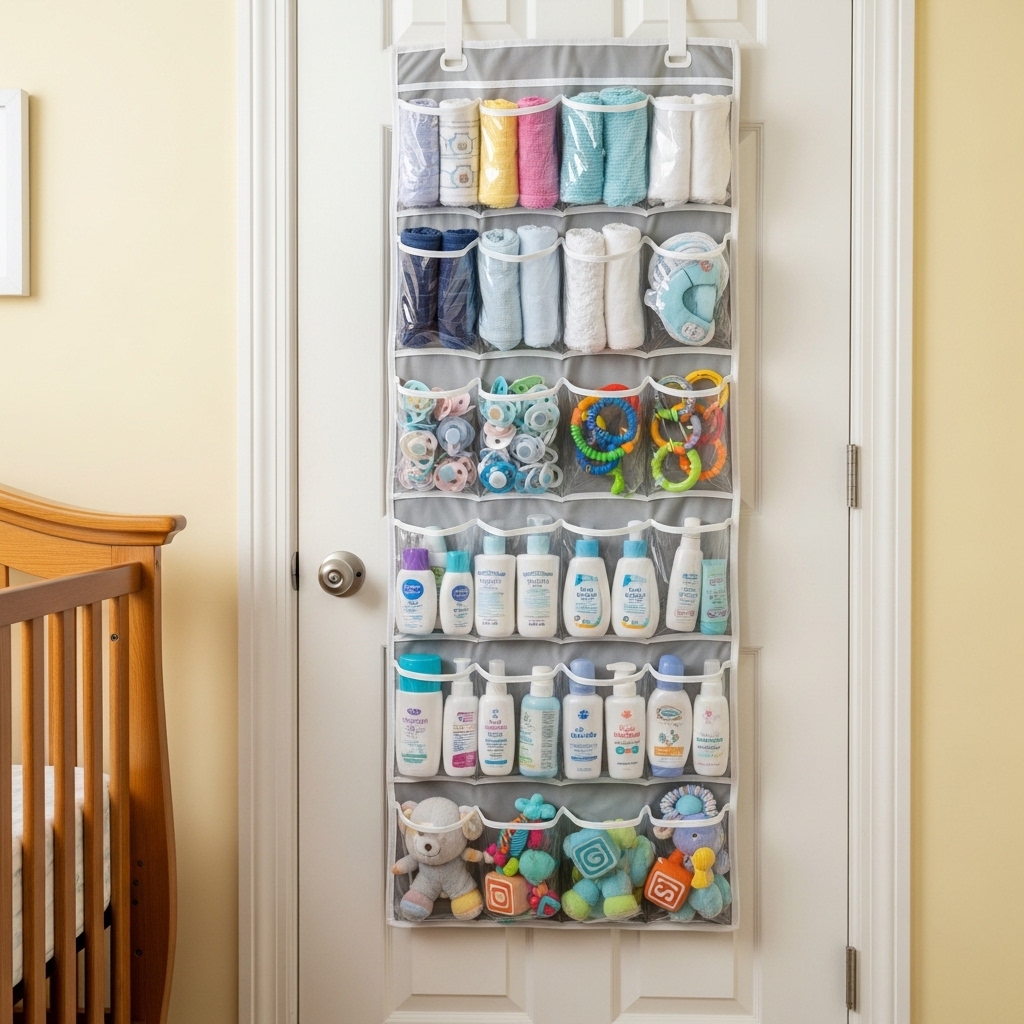
Apply this method when you have no drawer space left but your nursery door is completely unused.
Hang a clear over-the-door shoe organizer on your nursery door. Fill pockets with burp cloths, bibs, socks, and lotion.
Shoe organizers have 12 to 24 pockets. Each pocket holds a different category of baby gear.
Drawers hide everything in a jumbled mess. A door organizer keeps everything visible and within arm’s reach.
Pro Tip: Label each pocket with a permanent marker. “Bibs,” “Burp cloths,” “Socks,” “Lotion.”
Mistake to Avoid: Do not hang your organizer on a door that opens into a hallway. The organizer will hit the wall.
4. Install Pull-Out Drawers Inside Lower Cabinet Spaces
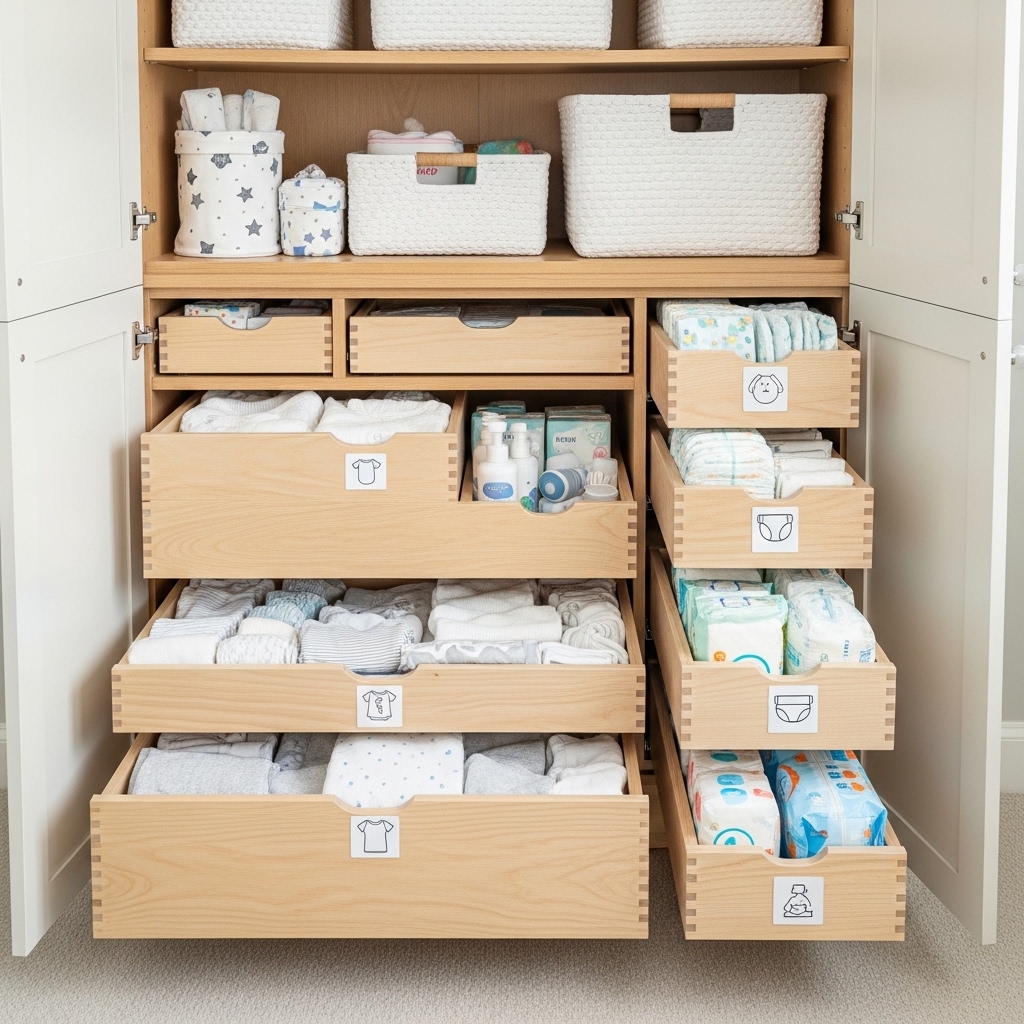
Use this strategy when you have deep lower cabinets that become black holes for baby gear.
Install pull-out drawers on slides inside your lower cabinets. Pull the drawer out to access everything in back.
Pull-out drawers bring items in the back to you. No more crawling into cabinets to find the nasal aspirator.
Standard shelves hide items in the back permanently. You buy duplicates of things you already own.
Pro Tip: Use drawer dividers inside your pull-outs. Keep pacifiers separate from medicine from grooming tools.
Mistake to Avoid: Do not install drawers deeper than 18 inches. Deep drawers still hide items in the back.
5. Create a Rolling Cart Diaper Station
Choose this approach when your changing table has no storage and you change diapers all over the house.
Buy a three-tier rolling cart. Load top tier with diapers and wipes. Middle tier with creams and lotions.
Bottom tier with extra clothes and burp cloths. Roll the cart to wherever you change your baby.
A fixed changing station means walking to the nursery for every diaper change. A rolling cart comes to you.
Pro Tip: Choose a cart with locking casters. Lock the wheels when your baby starts pulling up on the cart.
Mistake to Avoid: Do not overload the top tier. A top-heavy cart tips over when rolled across carpet.
6. Use Drawer Dividers Inside Every Dresser Drawer
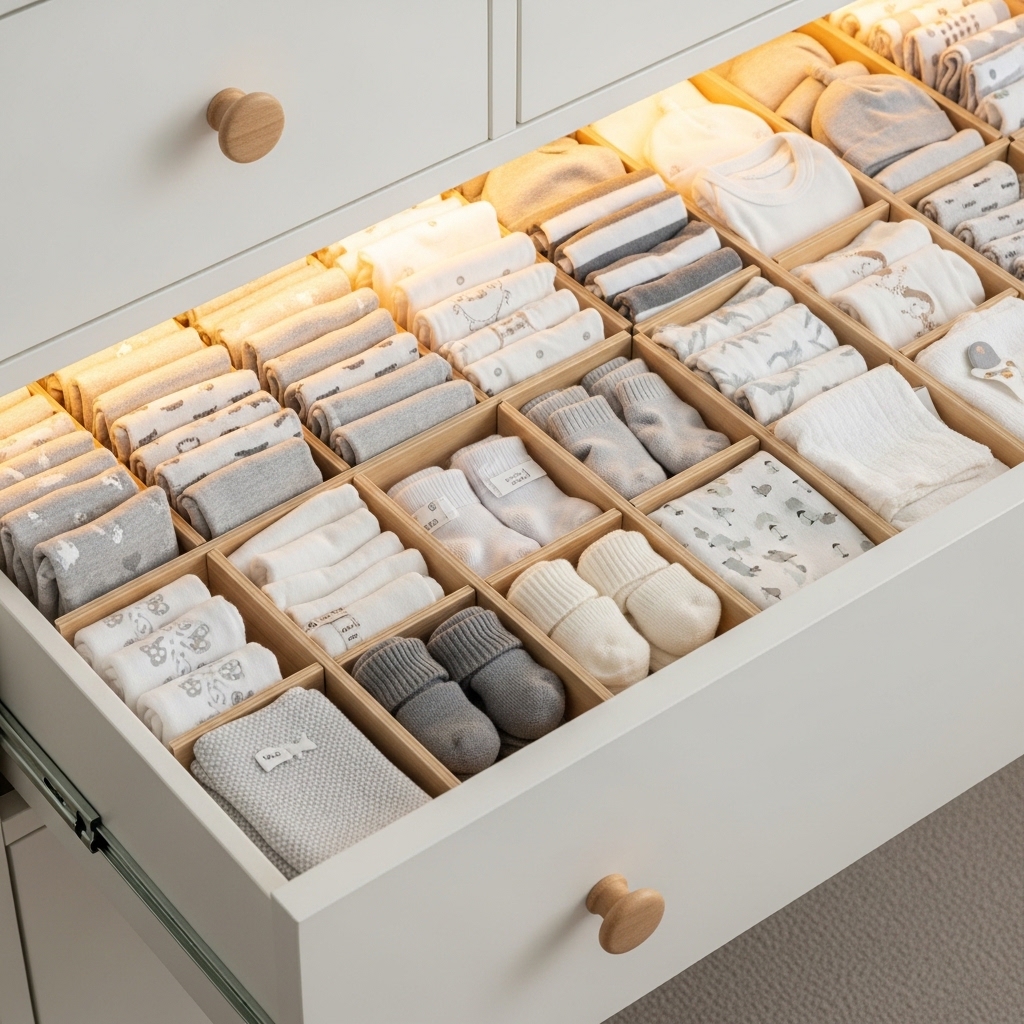
Apply this method when your dresser drawers become a tangled mess of onesies and socks every week.
Insert adjustable drawer dividers inside each dresser drawer. Separate onesies, pants, socks, and pajamas.
Drawer dividers keep categories separated. You grab what you need without destroying the entire drawer.
No dividers means everything migrates together. You spend 10 minutes searching for matching socks every morning.
Pro Tip: Roll onesies and pants instead of folding. Rolled items stand up in dividers and you see everything.
Mistake to Avoid: Do not use permanent dividers in a baby dresser. You will reconfigure categories every few months.
7. Hang a Wall-Mounted Foldable Drying Rack
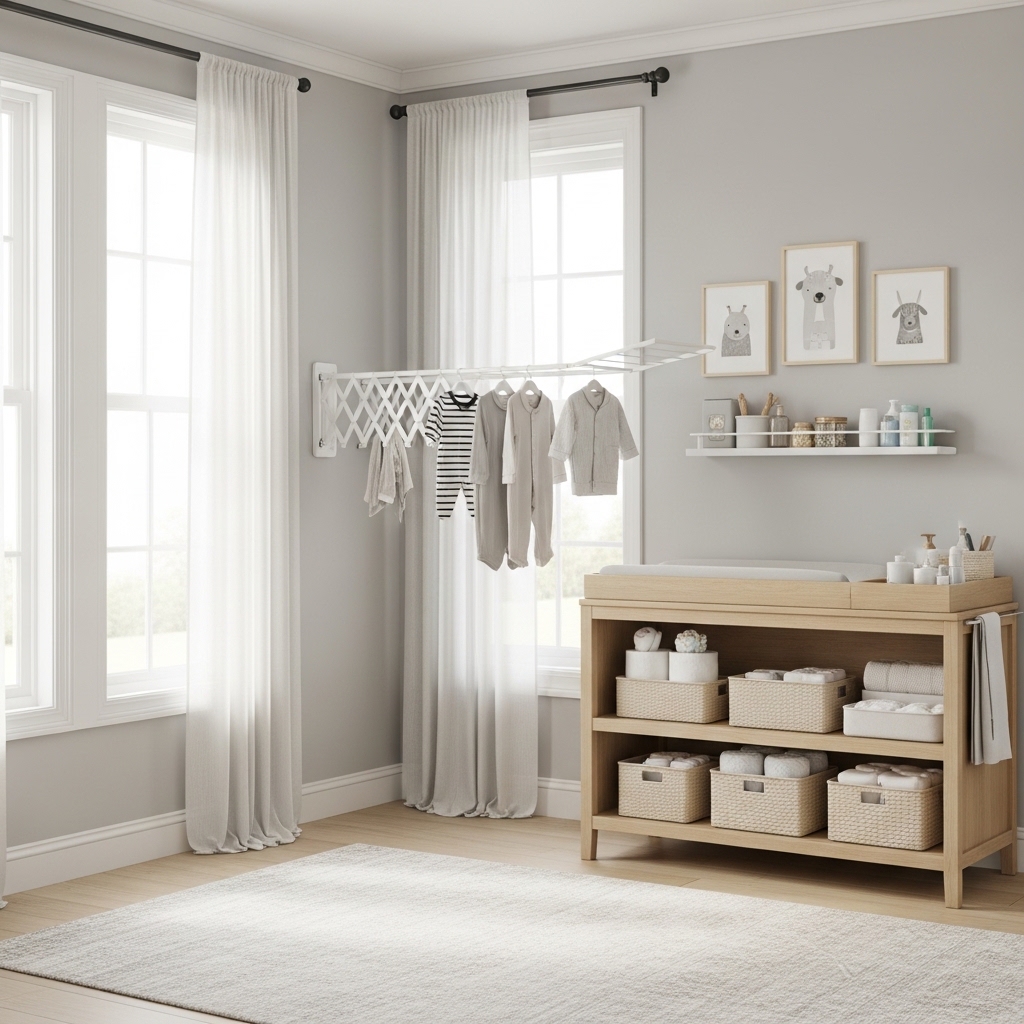
Use this idea when your baby generates endless laundry and your bathroom has no drying space.
Mount a wall-mounted foldable drying rack above your changing table or inside your closet.
The rack folds flat against the wall when not in use. Open it for drying hand-washed bottles and pump parts.
Laundry piled on countertops looks messy and breeds bacteria. A drying rack organizes wet items properly.
Pro Tip: Install a small shelf below your drying rack to catch drips from bottles and pump parts.
Mistake to Avoid: Do not mount your drying rack above electrical outlets. Water drips create shock hazards.
8. Install Shelf Risers Inside Cabinets for Double Storage
Choose this approach when your cabinets have tall vertical space that is completely wasted.
Place shelf risers inside your cabinets. These create a second tier of storage above the first tier.
Shelf risers double your cabinet storage instantly. Small items go on top. Larger items go underneath.
Single-shelf cabinets waste half their vertical space. Shelf risers unlock that space without any tools.
Pro Tip: Use wire shelf risers for bathroom cabinets. Wire lets light through so you see bottom tier items.
Mistake to Avoid: Do not use risers that are taller than your cabinet. Measure cabinet height before buying.
9. Use Vacuum Storage Bags for Outgrown Clothes
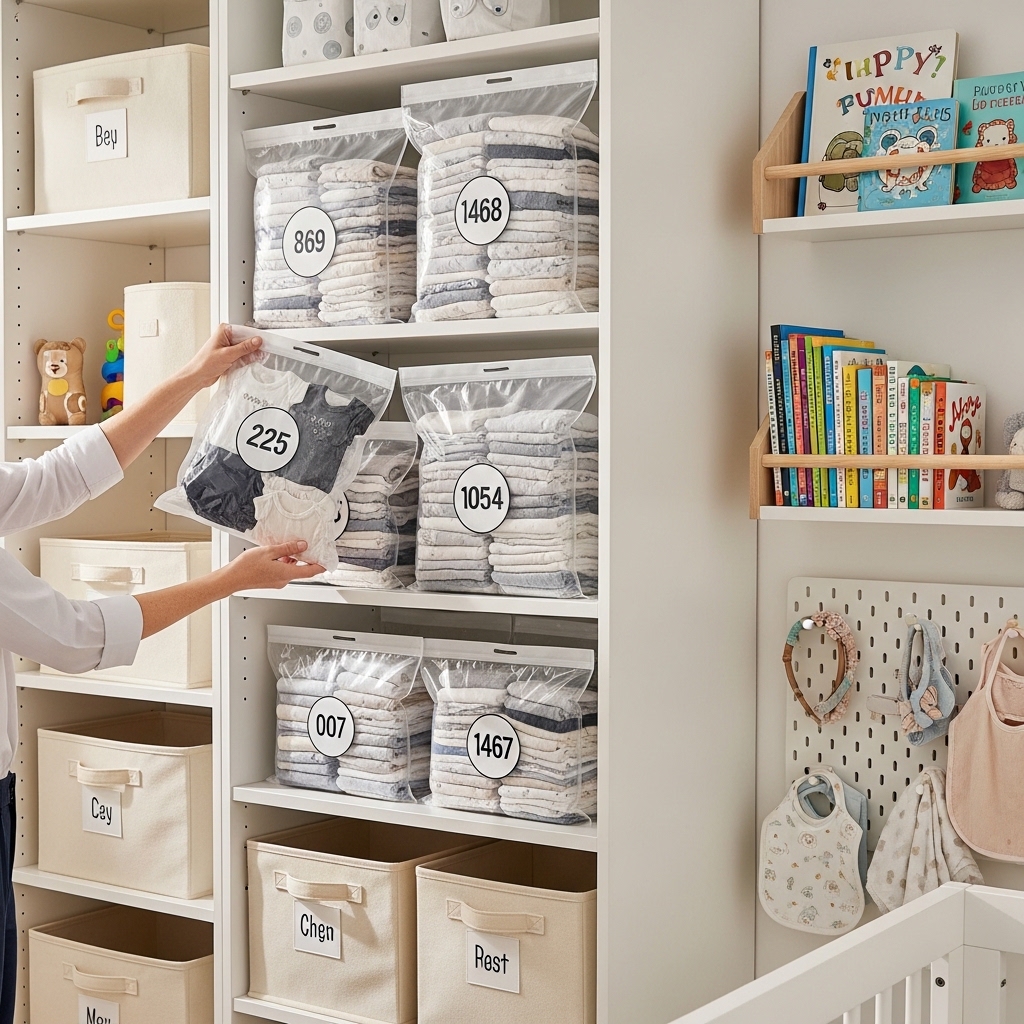
Apply this method when outgrown baby clothes are taking over your nursery closet and floor.
Stuff outgrown clothes into vacuum storage bags. Use a vacuum to suck all the air out of the bag.
Vacuum bags shrink clothes to one quarter of their original size. Store flat bags under the crib or on closet top shelves.
Loose clothes pile up and consume space. Vacuum bags condense an entire wardrobe into a 2-inch thick package.
Pro Tip: Label each bag with size and season. “0-3 months winter,” “3-6 months summer,” “6-9 months all.”
Mistake to Avoid: Do not overstuff your vacuum bags. Overstuffed bags do not seal properly and reinflate.
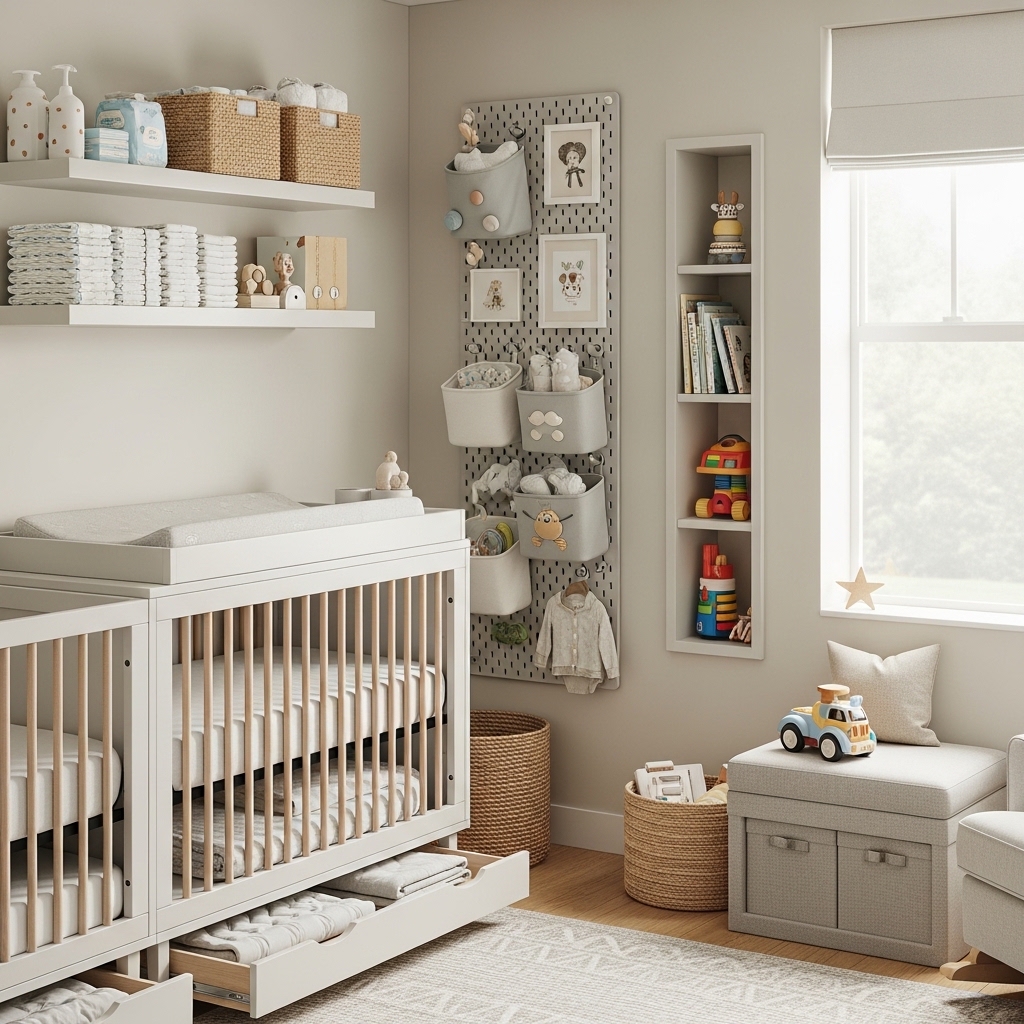
10. Install a Pegboard Wall for Frequently Used Items
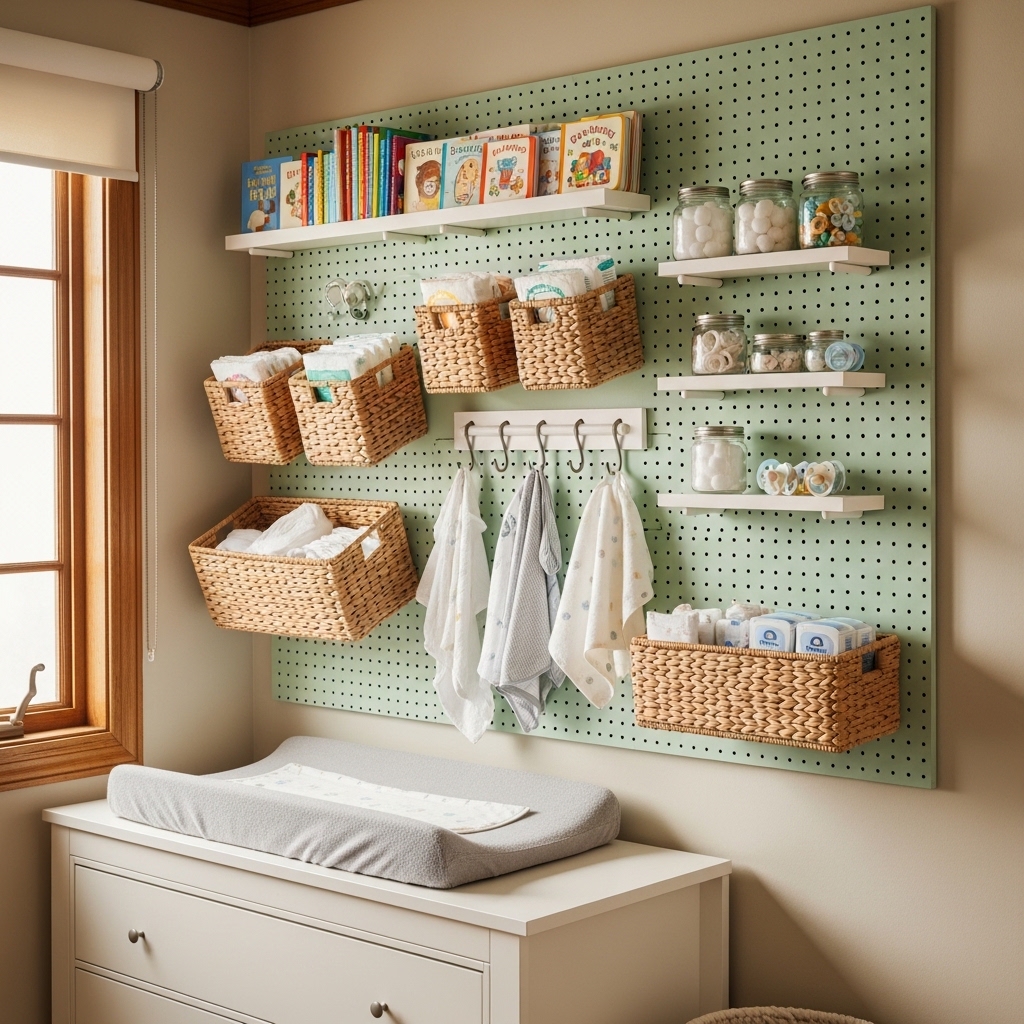
Use this strategy when you need easy access to everyday items but have no drawer space left.
Mount a large pegboard on one wall. Add hooks for baby carriers, swaddles, hooded towels, and robes.
Pegboards keep frequently used items visible and reachable. No digging through drawers during fussy moments.
Drawers hide items in a jumbled mess. A pegboard displays everything so you grab and go instantly.
Pro Tip: Paint your pegboard to match your nursery wall. A matching pegboard blends in and looks like decor.
Mistake to Avoid: Do not hang heavy items on pegboard hooks. Use hooks rated for the weight of each item.
11. Create a Diaper Caddy for Every Floor of Your Home
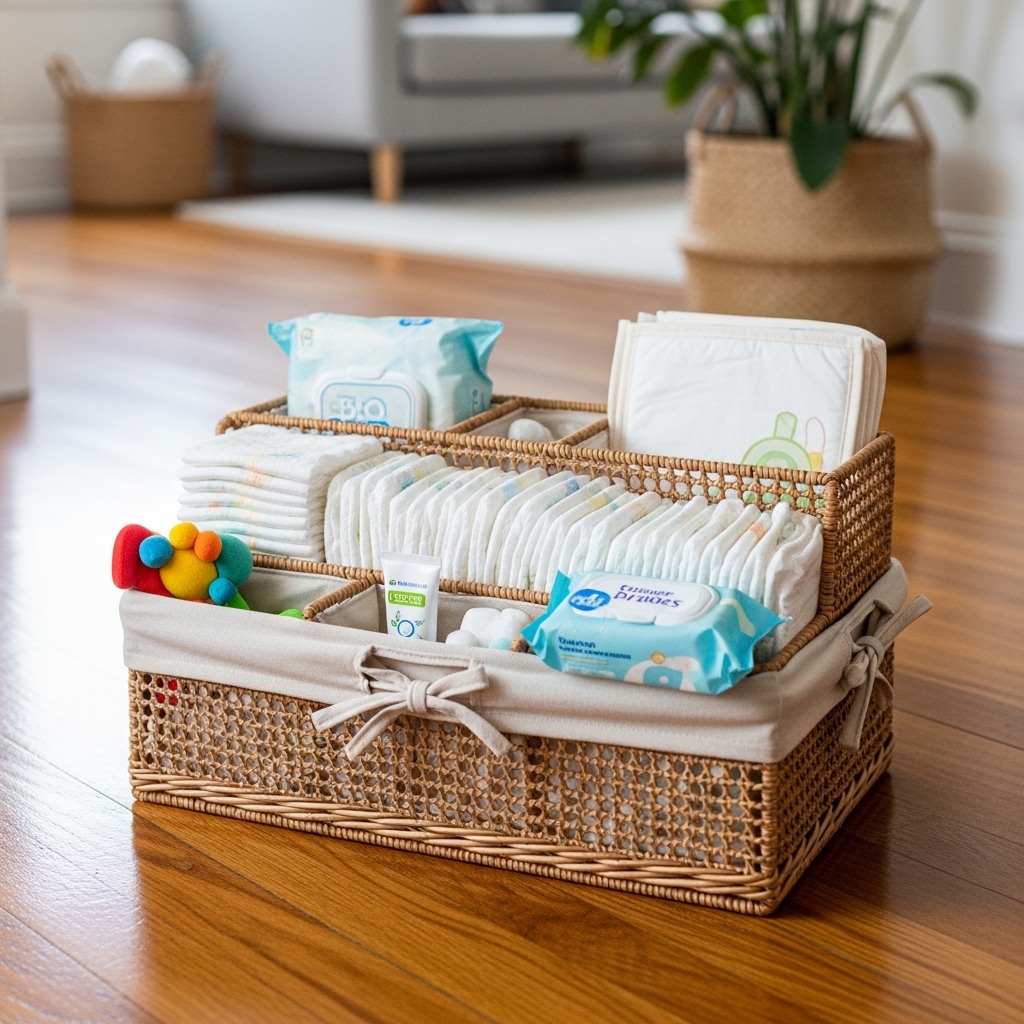
Choose this approach when you have a multi-level home and run out of diapers on the wrong floor.
Buy three identical diaper caddies. Fill one for each floor of your home. Keep one in your car too.
Each caddy holds 10 diapers, wipes, cream, a changing pad, and one spare onesie.
Running upstairs for a diaper takes 2 minutes. A caddy on every floor saves those 2 minutes dozens of times daily.
Pro Tip: Refill caddies every Sunday night. Start each week with fully stocked caddies on every floor.
Mistake to Avoid: Do not use different caddies on different floors. Identical caddies prevent confusion about what is where.
12. Install Pull-Out Trash and Recycling Bins in a Cabinet
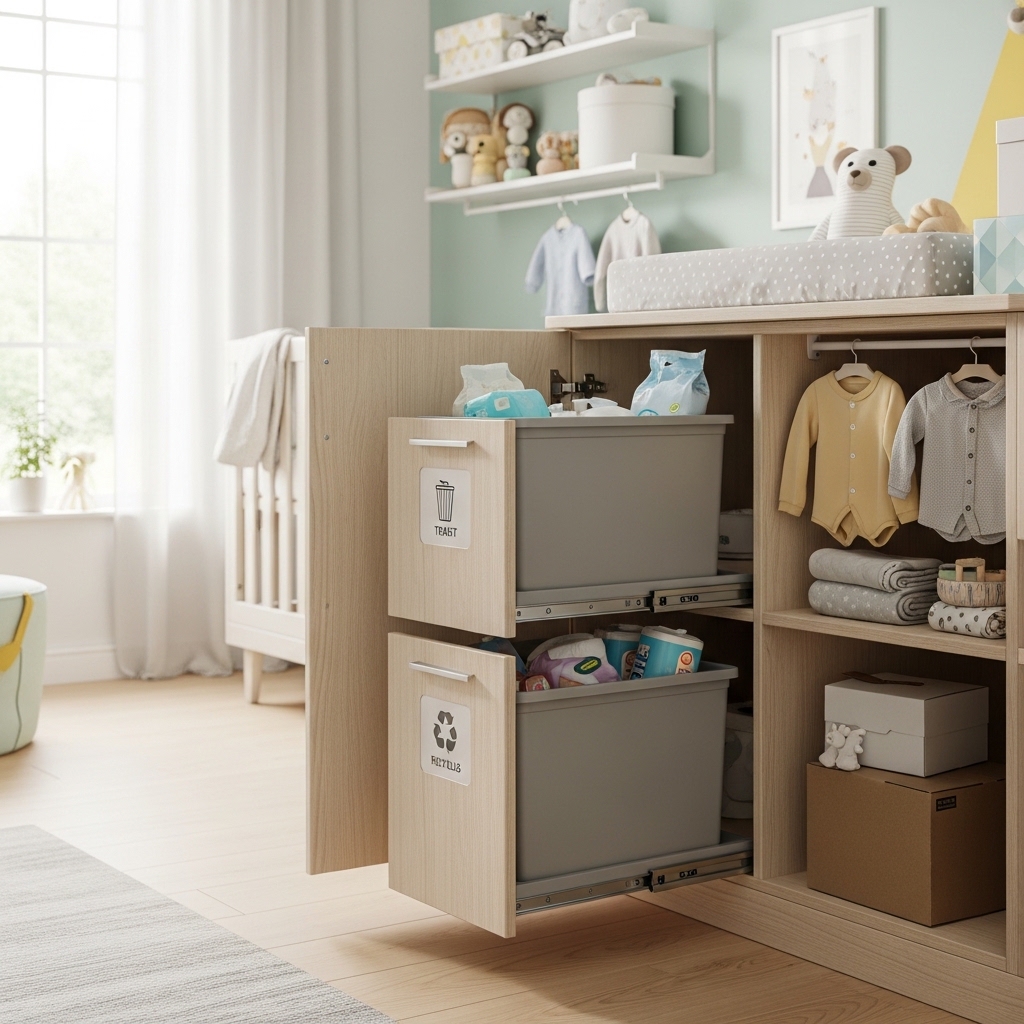
Apply this method when diaper trash smells up your nursery and you have no covered bin.
Install pull-out trash and recycling bins inside a lower cabinet. Use a step can for hands-free opening.
A covered bin contains diaper smells. Pull-out bins hide the mess inside a cabinet.
Open trash cans stink up your nursery. Diaper genies work but cost money forever. A covered bin solves both problems.
Pro Tip: Line your trash bin with odor-blocking bags. These bags contain smells better than standard kitchen bags.
Mistake to Avoid: Do not install your trash bin near a heat vent. Heat makes diaper smells worse.
13. Use Basket Labels with Pictures for Toddler Independence
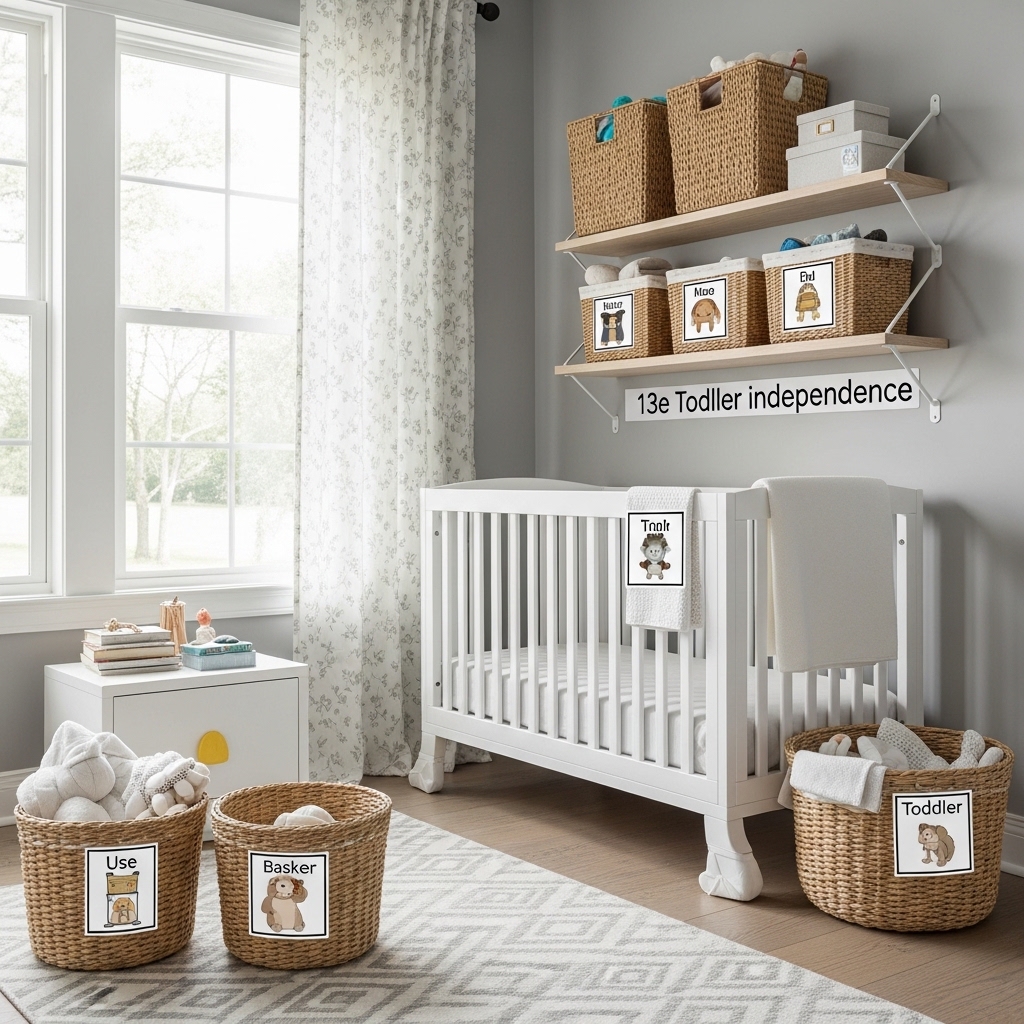
Use this idea when your child becomes a toddler and wants to choose their own toys and clothes.
Label low storage baskets with picture labels. A photo of socks on the sock basket. A photo of books on the book basket.
Picture labels let pre-reading toddlers find what they want and put things away independently.
Word labels are useless to a two-year-old who cannot read. Picture labels empower your child to help.
Pro Tip: Laminate your picture labels. Laminated labels survive sticky toddler hands and wipe clean easily.
Mistake to Avoid: Do not put picture labels on baskets above toddler height. Keep all labeled baskets at floor level.
14. Install a Wall-Mounted Folding Table for Extra Surface
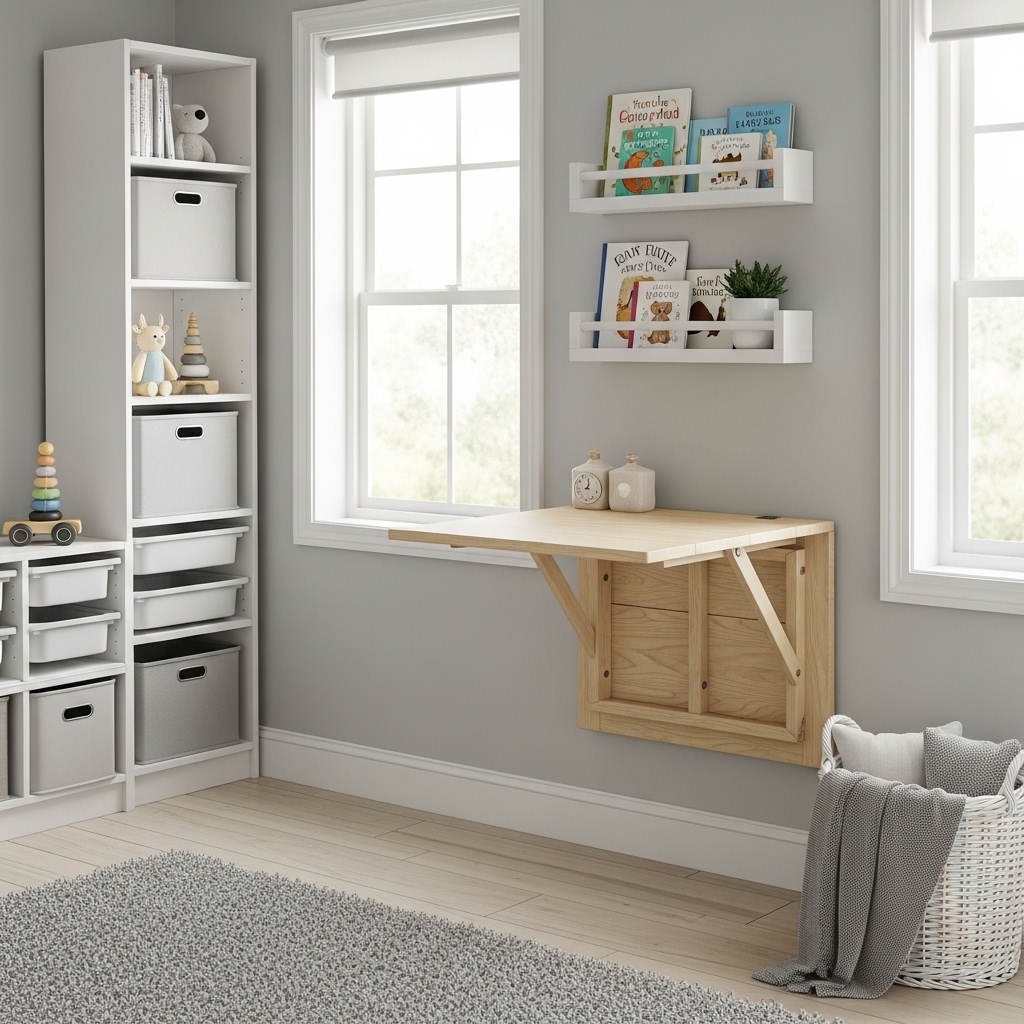
Choose this approach when your nursery has no flat surface for folding laundry or sorting clothes.
Mount a wall-mounted folding table that folds flat against the wall when not in use.
Open the table for folding baby laundry. Close it when you need floor space for play.
Your bed or floor becomes your folding surface without a table. A folding table gives you a dedicated spot.
Pro Tip: Install your folding table at 36 inches high. This is standard counter height for comfortable folding.
Mistake to Avoid: Do not mount your folding table above a heat vent. Hot air blows laundry off the table.
15. Create a Toy Rotation System with Labeled Bins
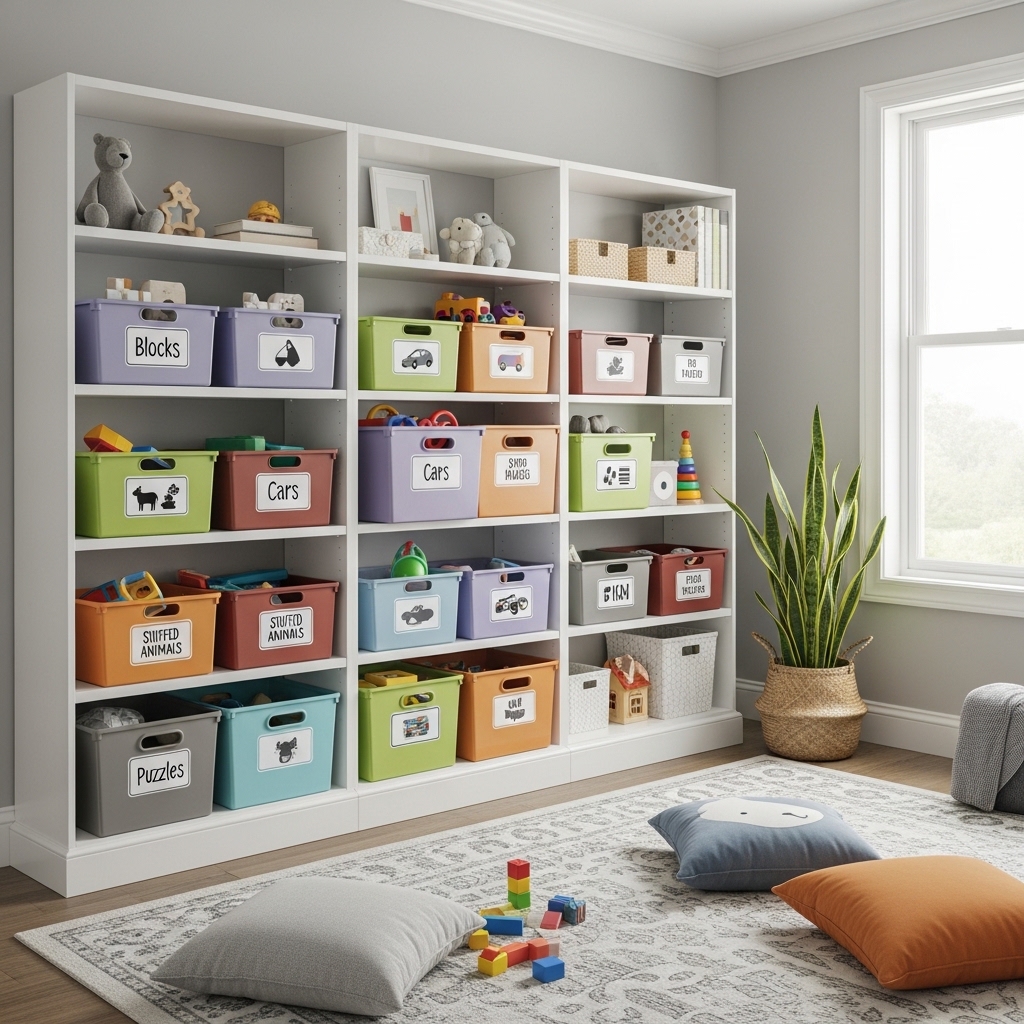
Apply this method when your baby has too many toys and plays with none of them.
Divide toys into three bins. Label bins “Week 1,” “Week 2,” and “Week 3.” Keep one bin accessible.
Rotate bins every Sunday. Your baby rediscoveres old toys each week and stays engaged.
All toys accessible at once overwhelms your baby. A rotation system keeps play fresh and reduces clutter.
Pro Tip: Store rotation bins in a closet or under the crib. Out of sight means out of mind until rotation day.
Mistake to Avoid: Do not rotate books. Keep all books accessible. Reading the same book repeatedly builds language skills.
Conclusion
An organized nursery is not about having less stuff. It is about having better systems for your stuff.
The 15 ideas above prove that organization is achievable regardless of nursery size or budget.
Install double hanging rods in your closet. Use clear bins with labels. Hang an over-the-door shoe organizer.
Install pull-out drawers in cabinets. Create a rolling cart diaper station. Use drawer dividers in every drawer.
Hang a wall-mounted drying rack. Install shelf risers. Use vacuum bags for outgrown clothes.
Install a pegboard wall. Create a diaper caddy for every floor. Install pull-out trash bins.
Use basket labels with pictures. Install a wall-mounted folding table. Create a toy rotation system.
Start with one idea that solves your biggest frustration. Implement it this weekend.
Then add a second idea next month. Your future self at 3 AM with a fussy baby will thank you.
Take back your nursery from clutter starting today. You deserve a space that works for you, not against you.