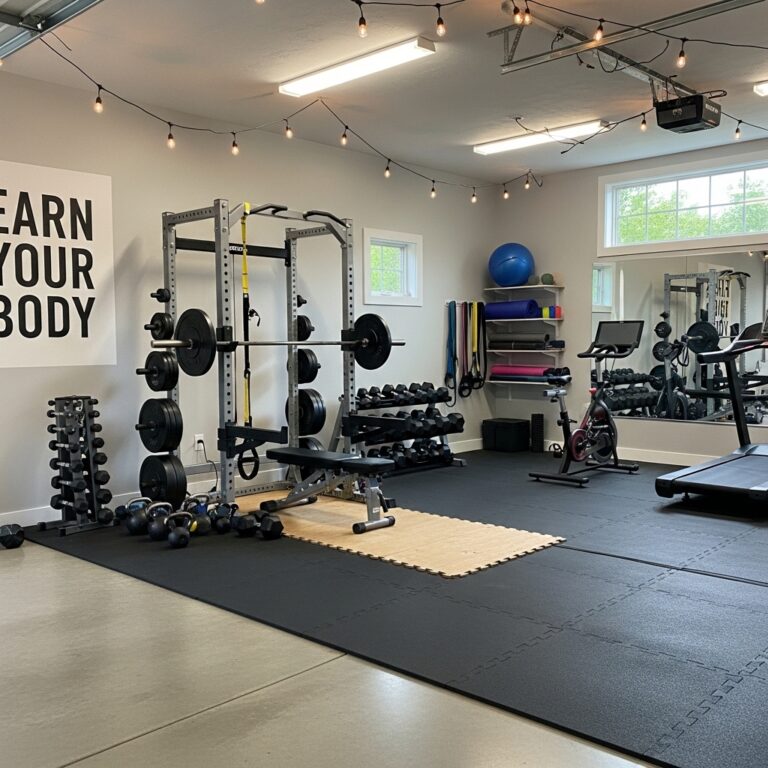
20 Garage Workshop Ideas That Transform Concrete and Chaos into Craftsmanship
The average garage workshop is a disaster zone. Tools buried under tools. Projects abandoned mid-cut. Sawdust in every corner.
Ask any serious DIYer. They spend half their shop time searching for the wrench they just held.
A well-designed workshop changes everything. Projects move faster. Frustration disappears. The craft becomes enjoyable again.
Smart systems make the difference. Not expensive tools. Not a bigger space. Just better thinking.
The ideas below come from decades of workshop mistakes. Each one solves a specific problem that plagues home garages.
This guide delivers 20 garage workshop ideas that transform concrete and chaos into pure craftsmanship.
From dust control to clamping stations, each solution pays for itself in time saved and frustration avoided.
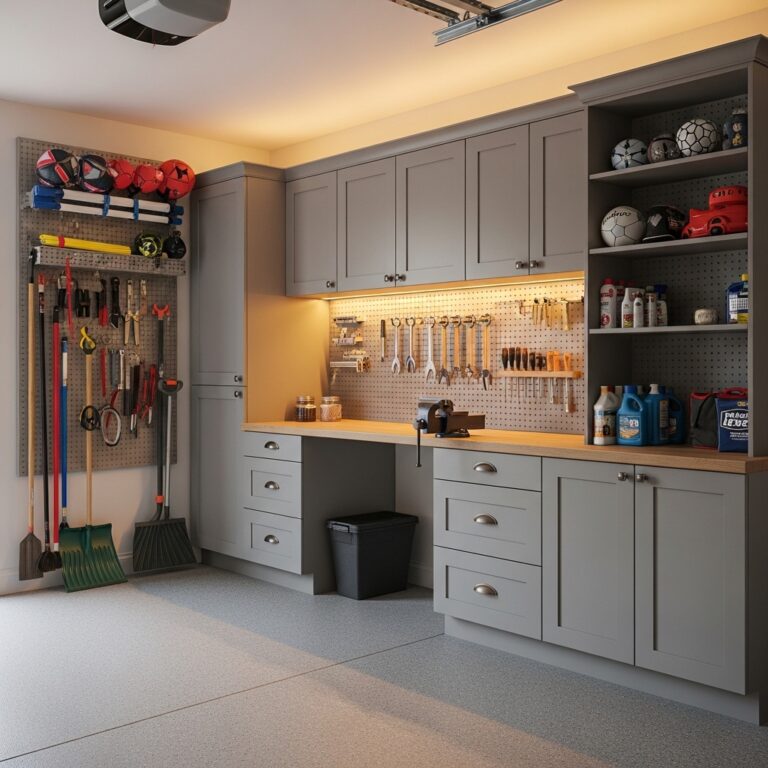
1. Build a French Cleat Wall for Limitless Tool Organization
Standard pegboards lock you into fixed hole patterns. Want a hook in a specific spot? Too bad.
Cut a long strip of plywood at a 45-degree angle. Mount a matching strip on every tool holder.
The cleat system lets you hang anything anywhere. Move tool holders in seconds. No new holes.
French cleats turn your entire wall into customizable storage that evolves with your tool collection.
Pro Tip: Paint your cleat wall white before installing. White reflects light and makes small tools visible against the background.
Mistake to Avoid: Never use particle board for cleats. Particle board crumbles under tool weight. Use Baltic birch or solid hardwood.
2. Install Anti-Fatigue Mats Where You Stand Most
Concrete floors transfer shock straight to your spine. Three hours of standing feels like ten.
Buy interlocking foam mats. Lay them in front of your workbench, table saw, and miter saw station.
The foam compresses slightly under your weight. Your knees and lower back absorb less impact.
A $50 mat investment saves you years of joint pain. Skipping it costs you mobility.
Pro Tip: Choose black mats. Black hides sawdust, glue drips, and grease stains better than light gray or blue.
Mistake to Avoid: Never place anti-fatigue mats near welding areas. Hot metal droplets melt foam and create fire hazards.
3. Mount a Power Strip Along Your Workbench Front Edge
Reaching behind a workbench for outlets means bending, stretching, and knocking over projects.
Screw a heavy-duty power strip along the front lip of your workbench. Facing upward or outward.
Every tool plugs in right where you stand. No bending. No reaching. No tripping over extension cords.
A front-mounted strip also keeps cords off the floor. Walk freely around your bench.
Pro Tip: Choose a strip with a 15-foot cord and a right-angle plug. The flat plug sits flush against the wall outlet.
Mistake to Avoid: Never use a power strip without surge protection. Workshop motors create power spikes that kill electronics.
4. Build a Mobile Workbench on Locking Casters
Fixed workbenches trap you in one spot. Your project moves to the bench. The bench never moves to your project.
Build a bench on four heavy-duty locking casters. Make it the same height as your table saw.
Roll the bench for outfeed support. Roll it for assembly. Roll it against the wall when not needed.
One mobile bench replaces a stationary bench, an outfeed table, and a assembly table.
Pro Tip: Use casters where each wheel locks independently. Locked wheels prevent bench movement during heavy hammering or planing.
Mistake to Avoid: Never buy casters rated for less than 300 pounds per wheel. A loaded workbench exceeds 500 pounds easily.
5. Add a Remote-Controlled Dust Collector
Sawdust covers everything. Your lungs suffer. Your tools clog. Your floor becomes an ice rink.
Mount a dust collector against a wall. Hard-pipe it to your table saw, miter saw, and planer.
Wire a remote switch to the collector. Turn it on and off from anywhere in your shop.
A remote means you actually use the collector. No walking back and forth. No excuses.
Pro Tip: Install blast gates at each tool connection. Close gates for tools you are not using. Open only the active tool.
Mistake to Avoid: Never use a shop vac as your primary dust collector. Shop vacs lack the airflow volume for stationary tools.
6. Hang Magnetic Strips for Daily-Use Metal Tools
Screwdrivers and wrenches live in drawers. You dig through layers. You curse. You dump the whole drawer.
Mount magnetic strips on your wall above your workbench. Use multiple strips for different categories.
Metal tools stick to the strip instantly. Arrange them by size. Grab what you need in one second.
Magnetic storage keeps your most-used tools visible and within a single arm’s reach.
Pro Tip: Use one strip for screwdrivers. One strip for combination wrenches. One strip for pliers and cutters.
Mistake to Avoid: Never store heavy tools like hammers on magnetic strips. A falling hammer destroys whatever is below it.
7. Build a Wall-Mounted Clamp Rack with Pegs
Clamps are the most awkward tools to store. They fall over. They tangle. They consume massive shelf space.
Drill a series of 3/4-inch holes in a board. Glue wooden pegs into the holes. Space pegs six inches apart.
Hang each clamp by its jaw over a peg. Clamps stay open. Clamps stay separated. Clamps stay organized.
A wall rack stores thirty clamps in the same floor space as two clamps in a pile.
Pro Tip: Arrange clamps by size on your rack. Small bar clamps on the left. Large pipe clamps on the right.
Mistake to Avoid: Never hang clamps by their handles. Handles are not weight-bearing. Hang by the jaw only.
8. Install a Ceiling-Mounted Retractable Air Hose Reel
Air hoses live on the floor. You step on them. You trip over them. You coil them poorly.
Mount a retractable hose reel on your ceiling directly above your main work area.
Pull the hose down to the length you need. The reel locks. Give it a tug when finished. It retracts.
No coiling. No tangling. No tripping. The hose disappears into the ceiling when not in use.
Pro Tip: Choose a reel with a hybrid hose. Hybrid hoses are lighter than rubber and more flexible than vinyl in cold garages.
Mistake to Avoid: Never buy a reel rated for less pressure than your compressor delivers. Match the pressure ratings exactly.
9. Build a Miter Saw Station with Extending Wings
A miter saw alone cannot cut long boards. The board tips. The cut wanders. Your finger gets nervous.
Build a station with the saw in the center. Add wings on both sides at the exact same height.
The wings support eight-foot and ten-foot boards. No helpers needed. No tipping. No crooked cuts.
A proper station also stores saw blades, squares, and measuring tapes directly below the saw.
Pro Tip: Install a stop block on one wing with a tape measure embedded. Make repeat cuts at exact lengths every single time.
Mistake to Avoid: Never make wings shorter than four feet. Short wings defeat the entire purpose of supporting long stock.
10. Mount Paper Towel Holders at Every Station
Every workshop task creates mess. Glue on hands. Grease on tools. Sawdust on safety glasses.
Mount a wall-mounted paper towel holder at your workbench, miter saw, and assembly table.
Each station has its own roll. Clean up messes immediately without walking across the shop.
Paper towels within reach mean you actually clean as you go. No piles of dirty rags.
Pro Tip: Buy paper towels in bulk cases. Keep one case under your workbench. Refill rolls when empty.
Mistake to Avoid: Never use cloth rags for glue cleanup. Rags spread glue. Paper towels absorb it completely.
11. Install Dedicated Lights Over Every Workstation
One ceiling light casts shadows everywhere. Your hands block the light. Your work surface stays dark.
Install a separate LED shop light directly over each station. Workbench. Table saw. Miter saw. Assembly table.
Each station has bright, shadow-free light. See your cut lines. See your measurements. See your mistakes before they happen.
Station lighting also reveals dust and debris you would otherwise miss until it ruins a finish.
Pro Tip: Choose lights with 5000K color temperature. True daylight white shows wood colors accurately. Warm light distorts everything.
Mistake to Avoid: Never use warm yellow lights in a workshop. Yellow hides sawdust and makes glue lines invisible.
12. Build a Rolling Plywood Cart with Vertical Slots
Plywood sheets lean against walls. They fall over. You step over them. You trip on them constantly.
Build a rolling cart with vertical slots spaced four inches apart. Slide plywood scraps into slots by size.
Small sheets in small slots. Large sheets in large slots. Every piece visible. Nothing falls.
A plywood cart keeps scraps organized and mobile. Roll it to your saw. Roll it back to storage.
Pro Tip: Label each slot with size ranges. “0-12 inches.” “12-24 inches.” “24-36 inches.” “36+ inches.”
Mistake to Avoid: Never store plywood flat on the floor. Flat storage hides sheets underneath. Vertical storage shows everything.
13. Hang Tool Hooks Near Your Entry Door
Tools come into the shop. Tools get set down. Tools disappear into the chaos.
Install a row of heavy-duty hooks on the wall next to your garage entry door.
Hang your tool belt, apron, hearing protection, and safety glasses on the hooks immediately upon entry.
Dedicated hooks mean your daily gear has one home. Never search for your tape measure again.
Pro Tip: Use different colored hooks for different family members. Red hooks for you. Blue hooks for your partner.
Mistake to Avoid: Never hang heavy tool belts on adhesive hooks. Screw hooks directly into wall studs for real weight support.
14. Add a Folding Shelf to Your Table Saw Side
Table saws come with tiny side tables. Wide panels have no support. You wrestle every cut.
Build a folding shelf that attaches to your saw’s existing side table. Use heavy-duty hinges.
Flip the shelf up for wide panel support. Flip it down flat against the saw when not needed.
A folding shelf gives you massive support when you need it and zero footprint when you do not.
Pro Tip: Make the folding shelf the exact same height as your saw bed. Even 1/8 inch difference causes boards to catch.
Mistake to Avoid: Never use a folding shelf as permanent storage. Shelves are for temporary work support only.
15. Create a Finishing Station with a PVC Drying Rack
Finished projects need to dry. They sit on your workbench. Your workbench becomes unusable for days.
Build a PVC pipe rack with horizontal arms spaced four inches apart. Use 3/4-inch PVC.
Slide freshly painted boards between the arms. Air circulates on all sides. Drying happens faster.
A finishing station keeps your workbench clear and your projects dust-free while curing.
Pro Tip: Wrap PVC arms with foam pipe insulation. The soft foam prevents marks on wet paint and fresh finishes.
Mistake to Avoid: Never use wood for a drying rack. Wood absorbs paint and becomes permanently sticky. PVC stays clean.
16. Install Motion-Sensor Lights Inside Storage Cabinets
Storage cabinets are dark holes. You cannot see what is on the shelves. You buy tools you already own.
Stick battery-operated motion-sensor lights on the ceiling of each cabinet.
Open the cabinet door. The light turns on. See every tool. Close the door. The light turns off.
Motion lights turn dead dark spaces into visible, usable storage.
Pro Tip: Use one light for every two feet of cabinet width. Single lights leave corners dark. Multiple lights cover everything.
Mistake to Avoid: Never use plug-in lights inside cabinets. Cords get crushed in doors. Battery lights only.
17. Build a Lumber Rack Against One Full Wall
Lumber leans in corners. Boards warp. Boards crack. You cannot find the straight piece you need.
Build a lumber rack with arms extending from wall studs. Use 2×4 arms spaced 16 inches apart.
Stack lumber by species and size. Hardwoods together. Softwoods together. Long boards on bottom.
A wall rack keeps lumber flat, straight, and organized. No more digging through piles.
Pro Tip: Cut a slight upward angle on each arm. Angled arms prevent boards from sliding off toward the floor.
Mistake to Avoid: Never store lumber directly on concrete. Concrete wicks moisture. Wood warps. Use a rack or pallet.
18. Hang a Whiteboard for Project Planning
You have project ideas. You have cut lists. You have measurements. You forget them all.
Mount a large whiteboard on your wall. Use it for project sketches, cut lists, and supplier phone numbers.
Write down everything. Erase when the project finishes. Start fresh on the next build.
A whiteboard captures your thoughts before they disappear. Your memory does not have to work so hard.
Pro Tip: Use different colored markers for different categories. Red for measurements. Blue for cut lists. Green for shopping.
Mistake to Avoid: Never use a small whiteboard in a workshop. Small boards run out of space. Buy the largest board your wall fits.
19. Install a Pop-Up Power Outlet in Your Workbench Surface
Power strips mounted on the bench front work well. Cords still drape across your work surface.
Install a pop-up power outlet directly into your workbench top. The outlet sits flush when not used.
Push the button. The outlet rises. Plug in your sander, router, or soldering iron.
A pop-up outlet brings power to the exact center of your workbench. No cords across the edge.
Pro Tip: Choose an outlet with USB ports as well as standard outlets. Charge your phone and listen to music while working.
Mistake to Avoid: Never install a pop-up outlet near your vise. Hammering vibrations damage the internal mechanism.
20. Create a Sharpening and Tuning Station
Dull tools are dangerous tools. You will not sharpen if the setup takes fifteen minutes.
Dedicate a small corner of your workshop to sharpening. Mount a vise. Store stones and guides nearby.
Keep diamond stones, honing oil, and a leather strop within arm’s reach of the vise.
A dedicated station means you sharpen immediately when a tool feels dull. No excuses. No delays.
Pro Tip: Mount a small magnifying light above your sharpening station. Magnification reveals burrs your naked eye misses.
Mistake to Avoid: Never store sharpening stones in a drawer. Stones in drawers stay out of sight and out of mind. Keep them visible.
Conclusion
The garage workshop should be a place of creation, not frustration. The ideas above make that possible.
French cleats give you limitless wall storage. Anti-fatigue mats save your spine. Mobile benches adapt to every project.
Dust collectors with remote switches keep the air clean. Magnetic strips put daily tools at your fingertips.
Clamp racks end the daily clamp tangling ritual. Air hose reels clear your floor of trip hazards.
Miter saw stations with wings support long boards properly. Paper towels at every station encourage cleanup.
Dedicated lights over each station eliminate shadows. Plywood carts organize scrap. Tool hooks near the door prevent lost gear.
Folding shelves provide temporary support. PVC drying racks keep finished projects off your bench.
Motion-sensor lights illuminate dark cabinets. Lumber racks keep wood flat and straight.
Whiteboards capture project thoughts. Pop-up outlets bring power to your bench center.
Sharpening stations make tool maintenance easy enough to do immediately.
Start with one workshop idea this weekend. Build a clamp rack. Install magnetic strips. Add a mobile bench.
Then add another idea next month. A great workshop evolves over years, not days.
Every hour spent organizing your shop saves three hours of future searching.
Take back your workshop starting today. Creation awaits. Frustration ends now.