45 Trendy Backyard Ideas on a Budget You’ll Wish You Knew
budget backyard ideas | affordable landscaping | DIY outdoor projects | inexpensive patio decor | cheap garden upgrades | low-cost backyard makeover | thrifty outdoor living
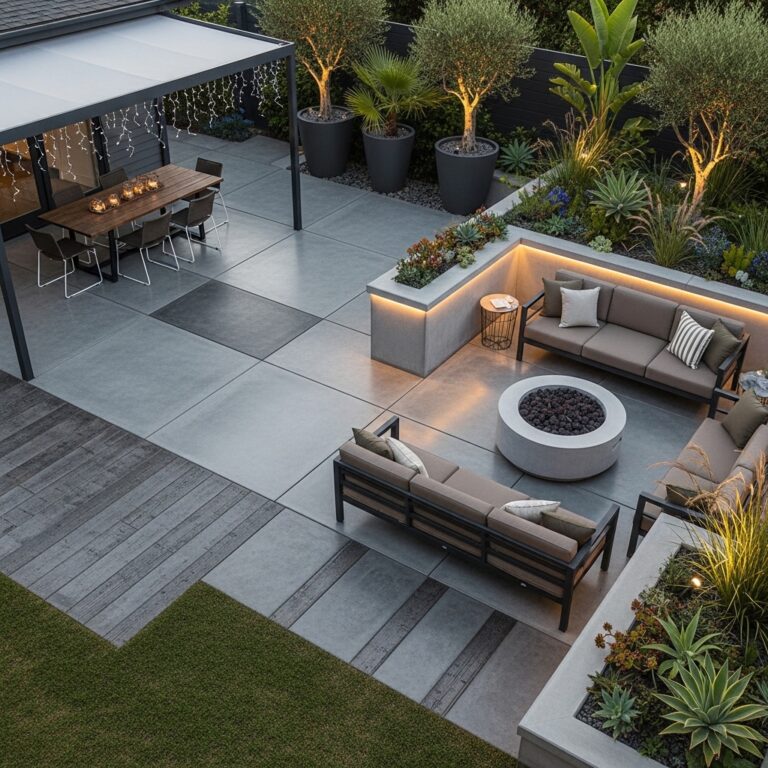
A beautiful backyard should not require a second mortgage. Many homeowners assume that creating a relaxing outdoor oasis means hiring a landscape designer or installing a costly patio. That assumption is wrong and expensive.
With a strategic approach, a bit of DIY effort, and a focus on high-impact, low-cost changes, you can transform your yard for a few hundred dollars. The key is knowing which projects deliver the most visual impact for the least money.
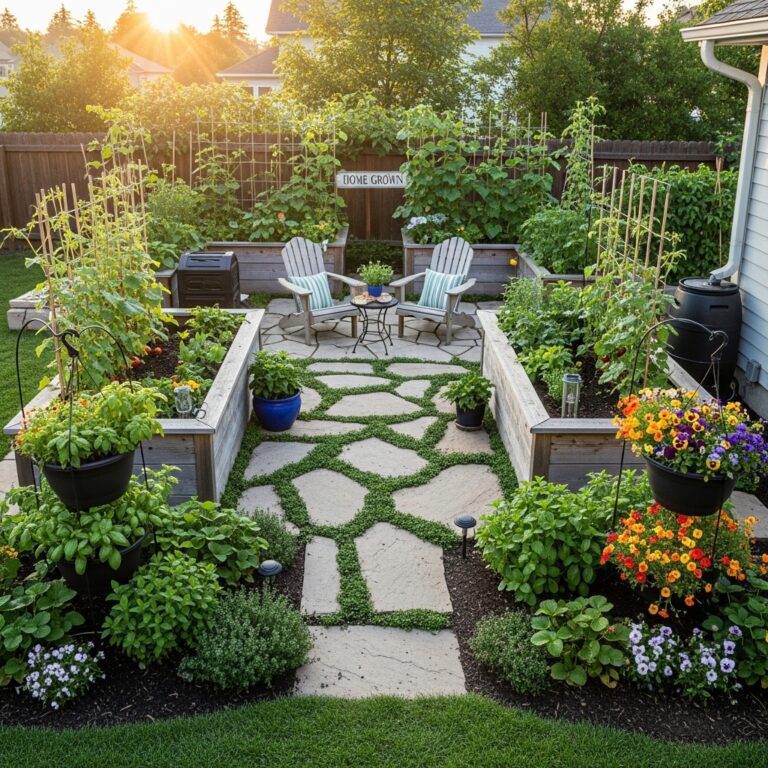
This guide shares 45 actionable backyard ideas on a budget, organized by category. No project requires specialized skills, expensive tools, or a contractor. Each idea is designed to be completed in a weekend or less.
Part 1: Low-Cost Landscaping & Garden Beds (Ideas 1-10)
1. Define Garden Borders with Recycled Materials
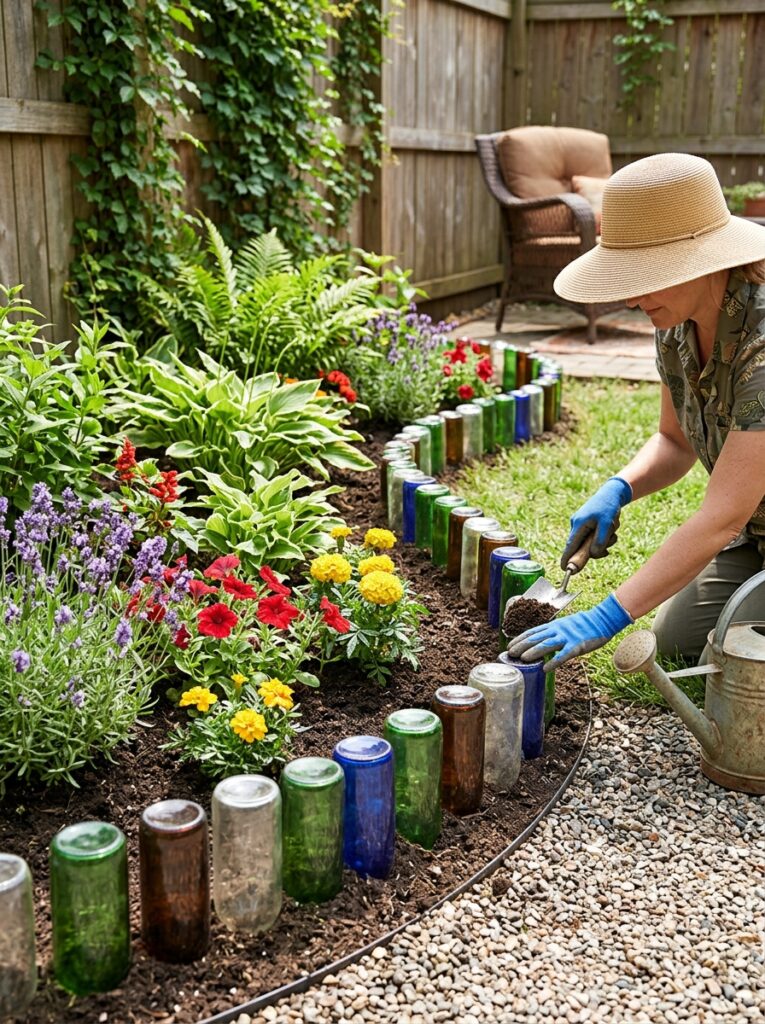
Skip expensive steel or plastic edging that costs $2 per linear foot. Use salvaged bricks, broken concrete pieces (urbanite), or wine bottles buried neck-down instead.
This repurposed look is trending in modern landscape design and costs nothing if you source locally. The irregular border adds character that store-bought edging cannot replicate.
Pro Tip:
Check Facebook Marketplace for “free fill dirt” or “used bricks.” People often give these away to avoid disposal fees.
Mistakes To Avoid:
Do not use treated wood from old decks or pallets marked “MB.” Chemicals leach into the soil.
2. Start Plants from Seeds or Cuttings
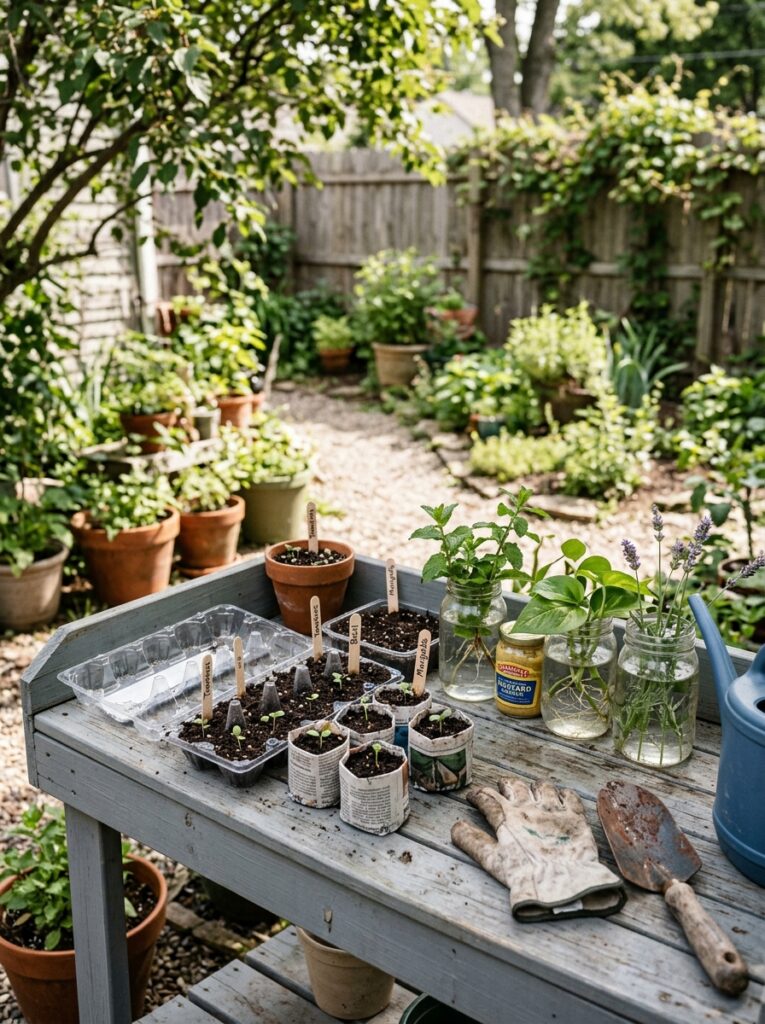
A single mature perennial costs 15−30 at a garden center. A packet of seeds costs 2−4 and can yield 50 or more plants.
For shrubs, learn to take softwood cuttings from a friend’s established plant. Root them in water or moist soil for free new plants.
Pro Tip: Join a local “plant swap” or “seed exchange” group on Facebook. Trade cuttings or extra seedlings for free genetic diversity.
Mistake to Avoid: Do not start seeds too early indoors without sufficient light. Leggy seedlings will not thrive when transplanted.
3. Use Mulch to Instantly Polish Garden Beds

Fresh mulch is the single cheapest way to make a bed look professionally maintained. It suppresses weeds, retains moisture, and provides a uniform dark background that makes plants pop.
Use shredded hardwood, pine straw, or free wood chips from local tree service companies. A 2-3 inch layer is sufficient for most beds.
Pro Tip: Call local arborists—they often dump wood chips for free to save disposal costs. You just need space for the pile.
Mistake to Avoid: Do not pile mulch against plant stems or tree trunks. This causes rot and invites pests.
4. Build a Pallet Compost Bin for Free Soil
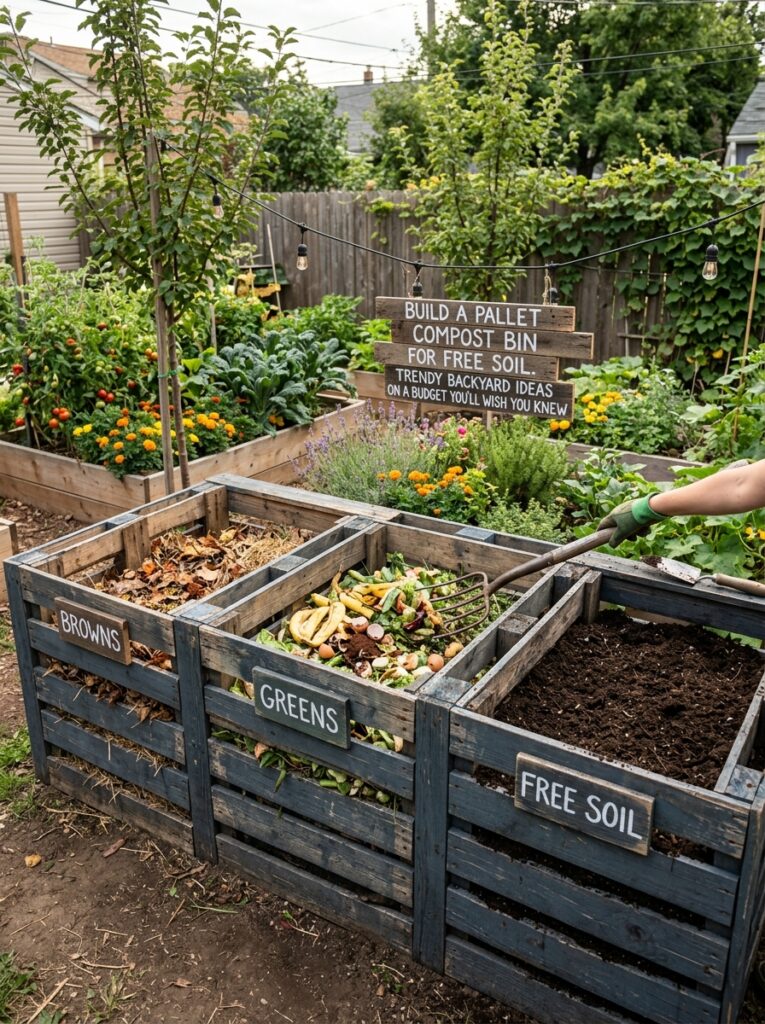
Healthy soil is the foundation of a thriving garden, but bagged soil and compost add up quickly. Build a three-bin composting system from free wooden pallets.
Stack kitchen scraps and yard waste to create “black gold” for your garden at zero cost. The compost will enrich your soil without expensive fertilizers.
Pro Tip: Locate the compost bin in a partially shaded area near a water source. Turn the pile every few weeks to speed decomposition.
Mistake to Avoid: Do not add meat, dairy, or oily foods to your compost. These attract rodents and create foul odors.
5. Create a Fire Pit from a Washer Drum
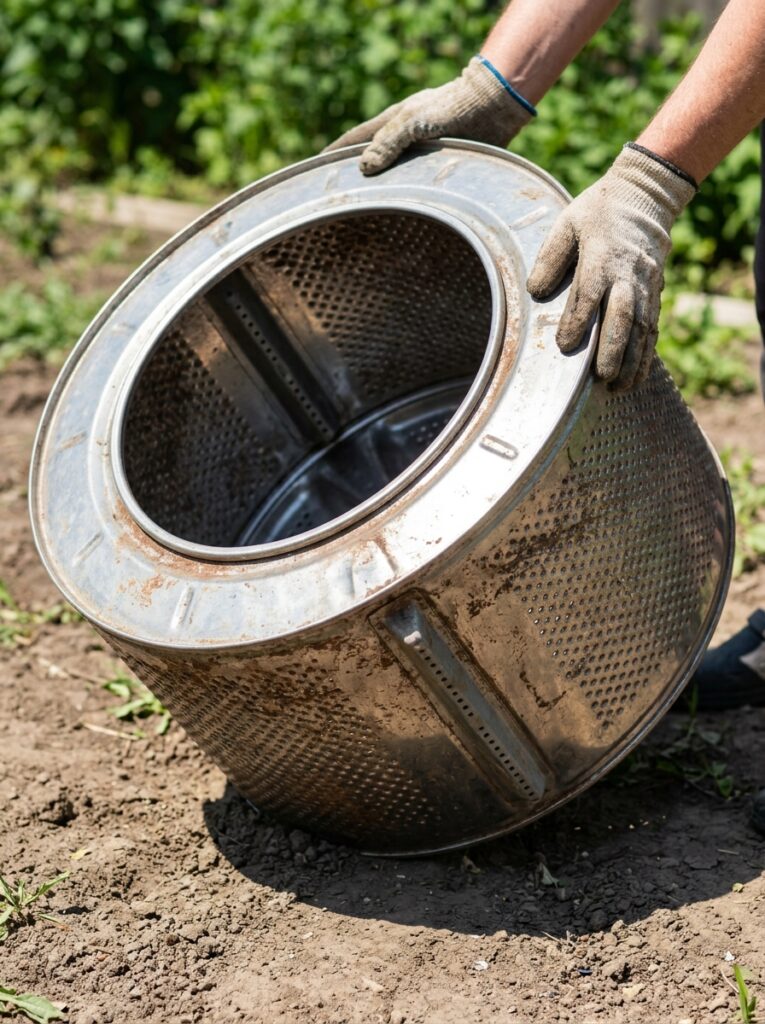
The drum of an old top-loading washing machine makes a perfect, industrial-chic fire pit. Remove the plastic agitator and place it on a few fire-safe bricks or a concrete paver.
This DIY fire pit costs only the price of a used appliance (10−20) and has built-in ventilation holes for proper airflow. The industrial look is stylish and functional.
Pro Tip: Look for free or cheap washers on Facebook Marketplace. People often give them away just to have them hauled away.
Mistake to Avoid: Do not use a dryer drum. It is not designed to withstand high heat and may warp or release toxins.
6. Propagate Succulents and Ground Covers for Free
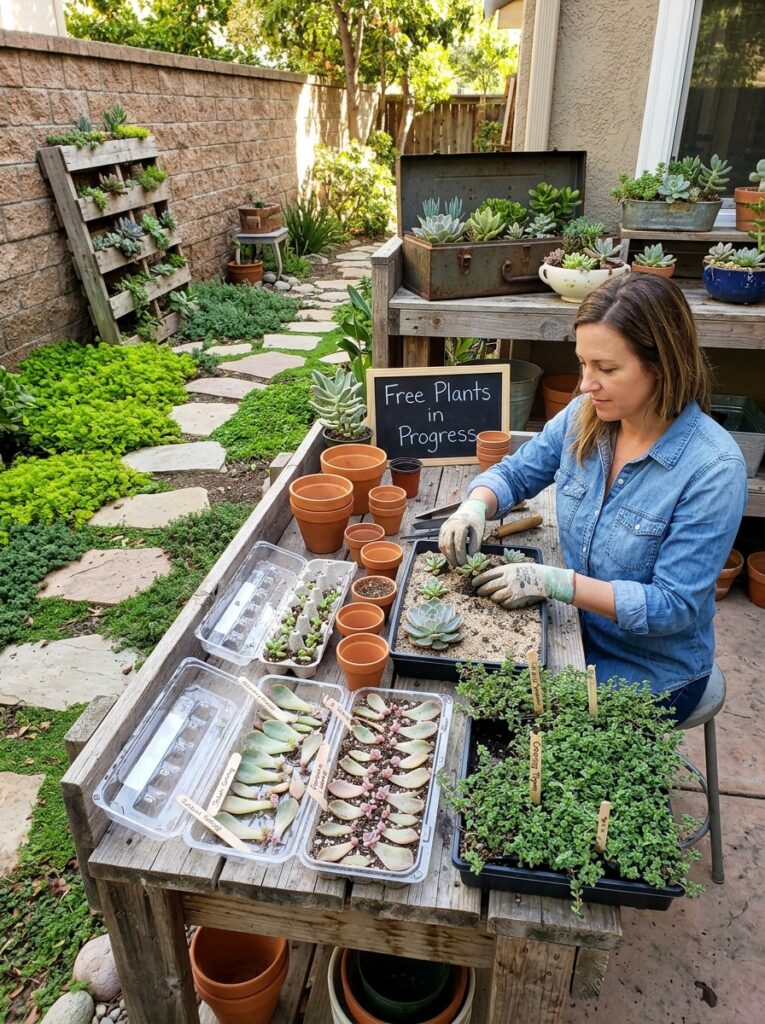
Many ground covers like creeping thyme, sedum, and ajuga are expensive to buy in flats but extremely easy to propagate. Pull apart small sections and replant them spaced 6-12 inches apart.
Within one season, they will fill in to create a lush, weed-suppressing carpet that looks like a professional installation. Succulents also propagate from single leaves laid on soil.
Pro Tip: Take cuttings or divisions in early spring or fall when temperatures are mild. Water them regularly until established.
Mistake to Avoid: Do not overwater newly propagated succulents. They rot easily. Wait for the soil to dry completely between waterings.
7. Make Stepping Stones from Concrete Mix
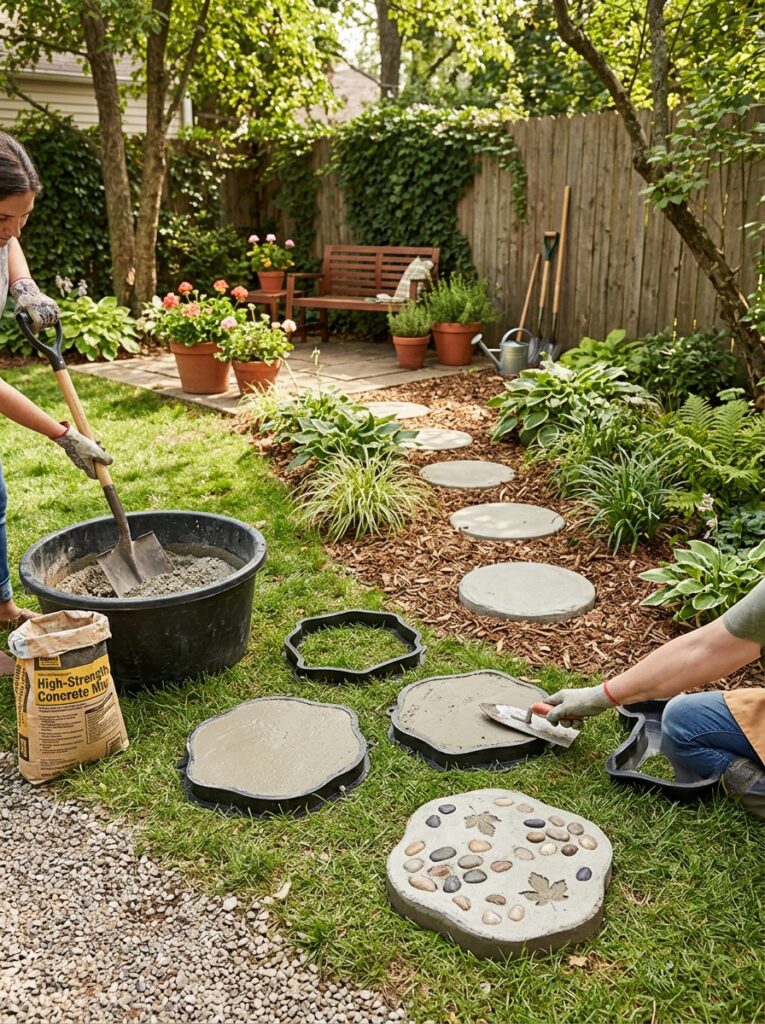
Buy a bag of concrete mix (5−7) and a few cheap molds or use a DIY form from scrap wood or a flexible plastic tub. Pour the concrete and let it set for 24 hours.
Embed marbles, colored glass, or ceramic tiles for a personalized mosaic look before the concrete hardens. These custom stones cost a fraction of store-bought versions.
Pro Tip: Spray the mold with cooking spray before pouring concrete. The stones will release easily without breaking.
Mistake to Avoid: Do not make stones thinner than 2 inches. Thin stones crack under foot traffic or freeze-thaw cycles.
8. Install a Rain Barrel to Save on Water Bills
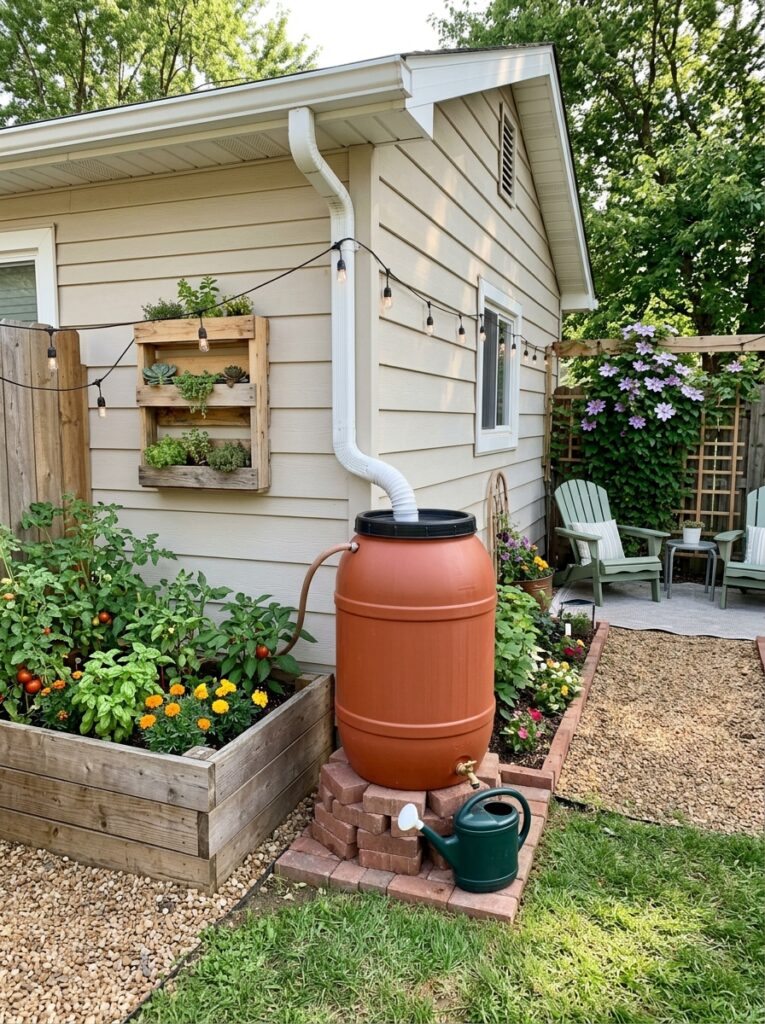
Water bills add up significantly in summer when gardens need consistent moisture. Connect a food-grade plastic barrel to your downspout to collect free rainwater for your garden.
Look for used barrels on marketplace or buy a conversion kit for a standard trash can. Your plants prefer chlorine-free rainwater anyway, and the savings add up quickly.
Pro Tip: Elevate the barrel on cinder blocks. The height provides enough pressure to fill a watering can or attach a hose.
Mistake to Avoid: Do not leave the barrel uncovered without a screen. Mosquitoes will breed in standing water.
9. Edge Beds with a Spade for Free
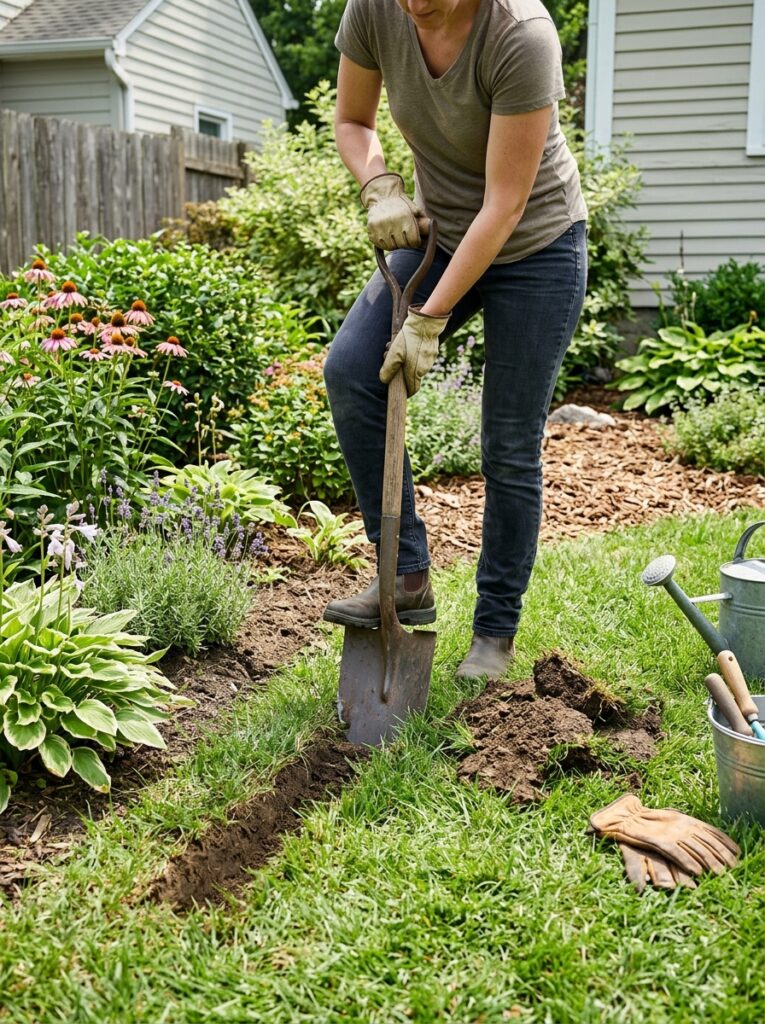
A clean, sharp edge is the mark of a well-tended garden. Use a flat spade to cut a V-shaped trench between your lawn and garden beds every spring.
This simple technique creates a natural barrier that prevents grass from creeping in and instantly makes the lawn look neater. The cost is absolutely zero.
Pro Tip: Edge beds in early spring when the soil is moist but not soggy. The spade will cut cleanly without tearing.
Mistake to Avoid: Do not edge beds when the soil is bone dry. You will struggle to get a clean cut, and the trench will look ragged.
10. Divide Overgrown Hostas for Free Plants
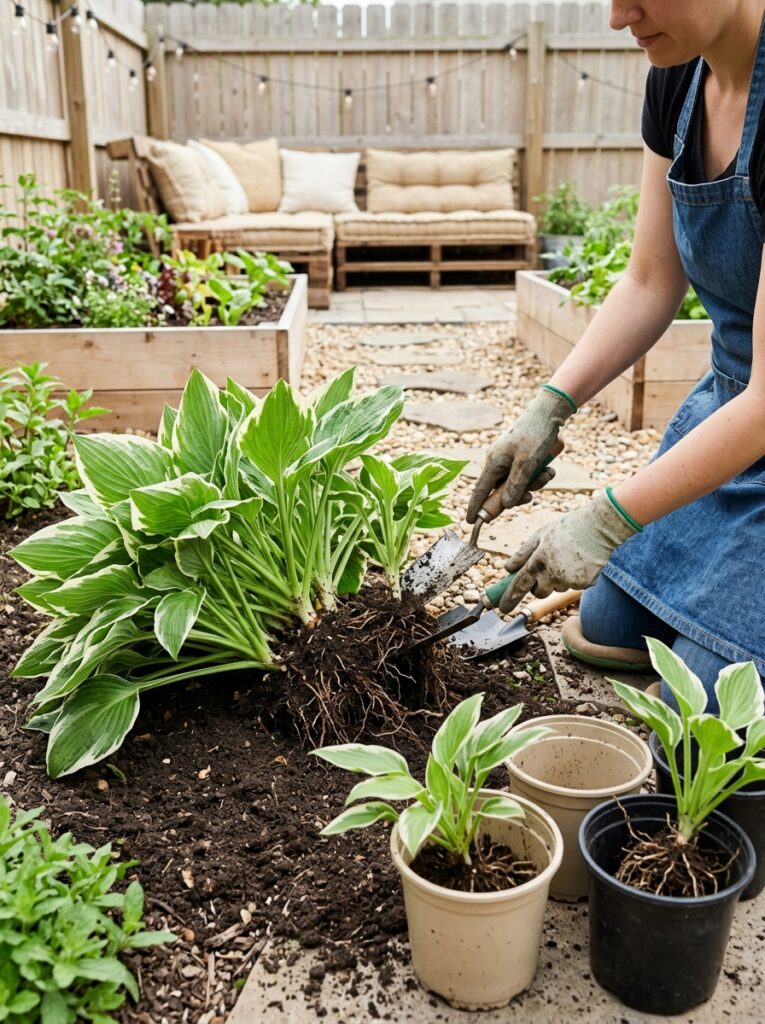
Hostas are shade-loving perennials that are incredibly easy to divide. One mature plant can be split into 6-10 smaller plants in early spring before new growth emerges.
Plant them en masse for a lush, low-maintenance ground cover that looks expensive and fills bare shady spots quickly. This free propagation technique works for many perennials.
Pro Tip: Water the hosta thoroughly a day before dividing. The roots will be more flexible and less likely to break.
Mistake to Avoid: Do not divide hostas in hot summer weather. The heat stress will kill the divisions before they establish.
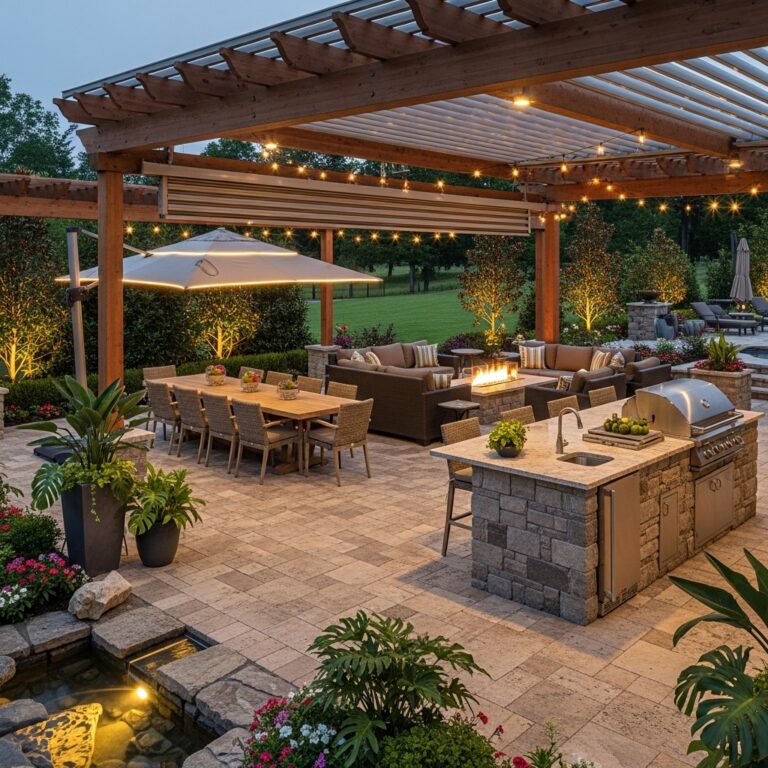
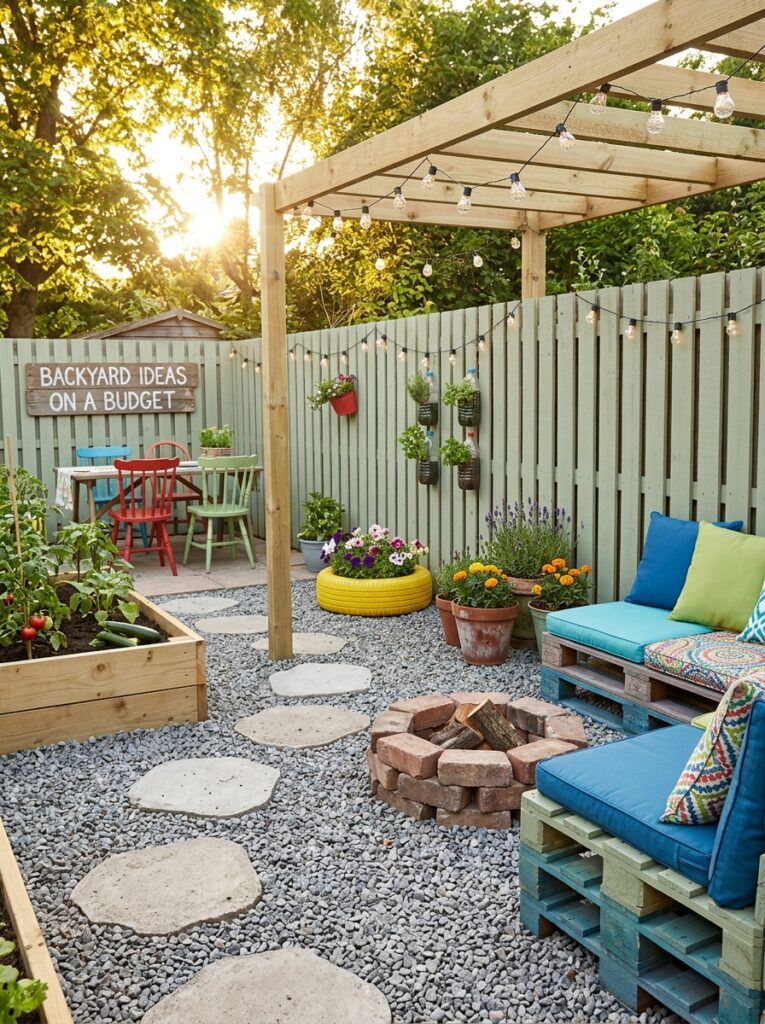
Part 2: DIY Patio & Seating Area Upgrades (Ideas 11-20)
A dedicated seating area makes a yard feel like an outdoor room. You do not need to pour concrete or lay a full stone patio to create a functional and inviting space for relaxing or entertaining.
11. Build a Pallet Couch for Outdoor Lounging
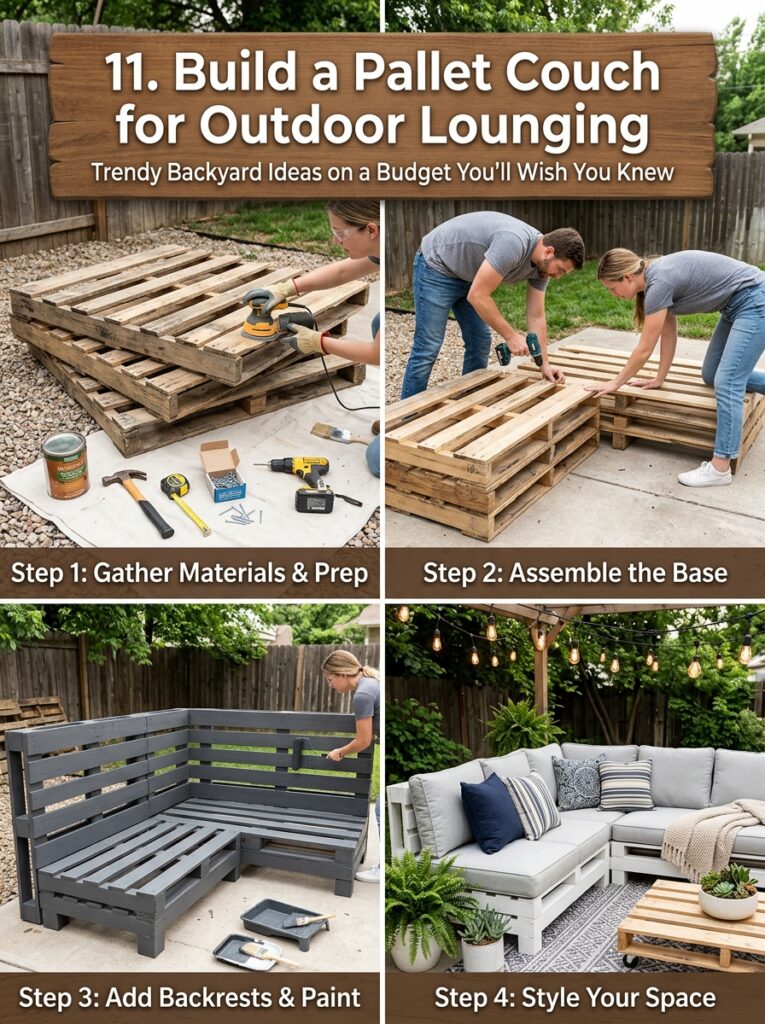
Wooden pallets are often free from local businesses. Stack, sand, and paint them to create modular outdoor sofas that can be arranged in any configuration.
Seal them with exterior-grade sealant and add weather-proof cushions from discount stores. The entire project can cost under $50 and look like a high-end build.
Pro Tip: Look for heat-treated pallets stamped “HT” (not “MB”). They are safer for handling and furniture construction.
Mistake to Avoid: Do not skip sanding. Pallets have rough edges and splinters that will snag fabric and skin.
12. Level a Section for a Gravel Patio
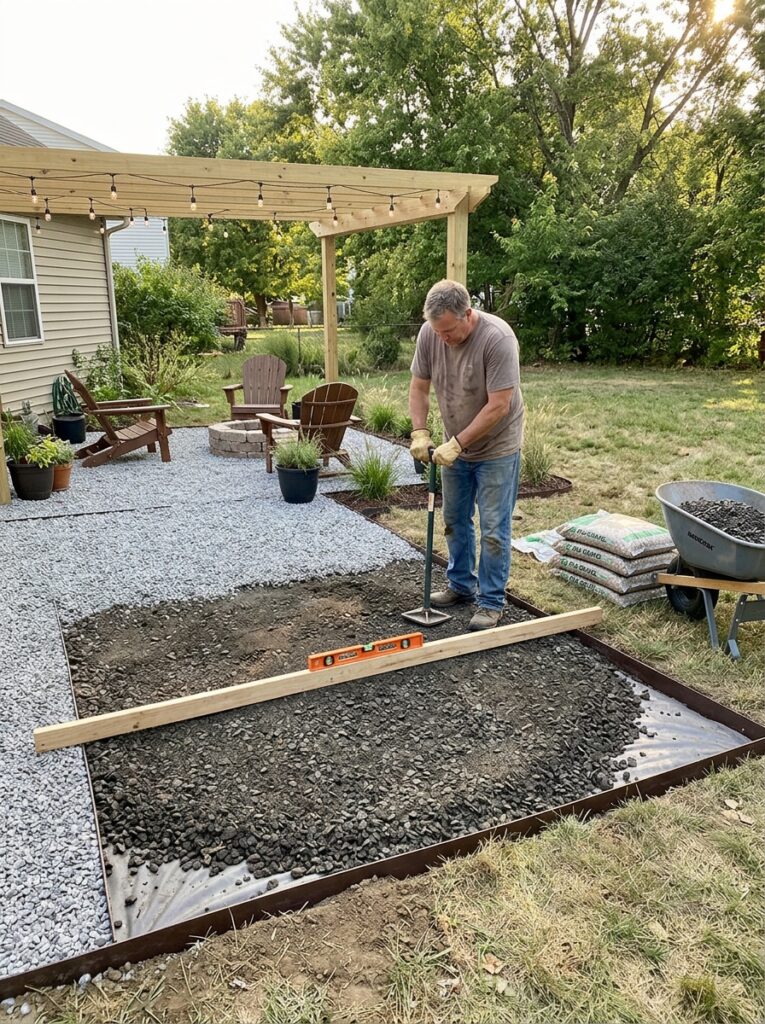
A gravel patio is one of the cheapest, most forgiving projects for a DIYer. Excavate 4 inches of soil, lay landscape fabric to block weeds, and fill with pea gravel or decomposed granite.
A 10×10 foot area costs around 150−200 and can be completed in a single weekend. No special skills are required, and the materials are widely available.
Pro Tip: Use a hand tamper to compact the gravel. Loose gravel shifts underfoot and makes walking difficult.
Mistake to Avoid: Do not skip the landscape fabric. Weeds will grow up through the gravel within months without a barrier.
13. Use Cinder Blocks as Modular Seating
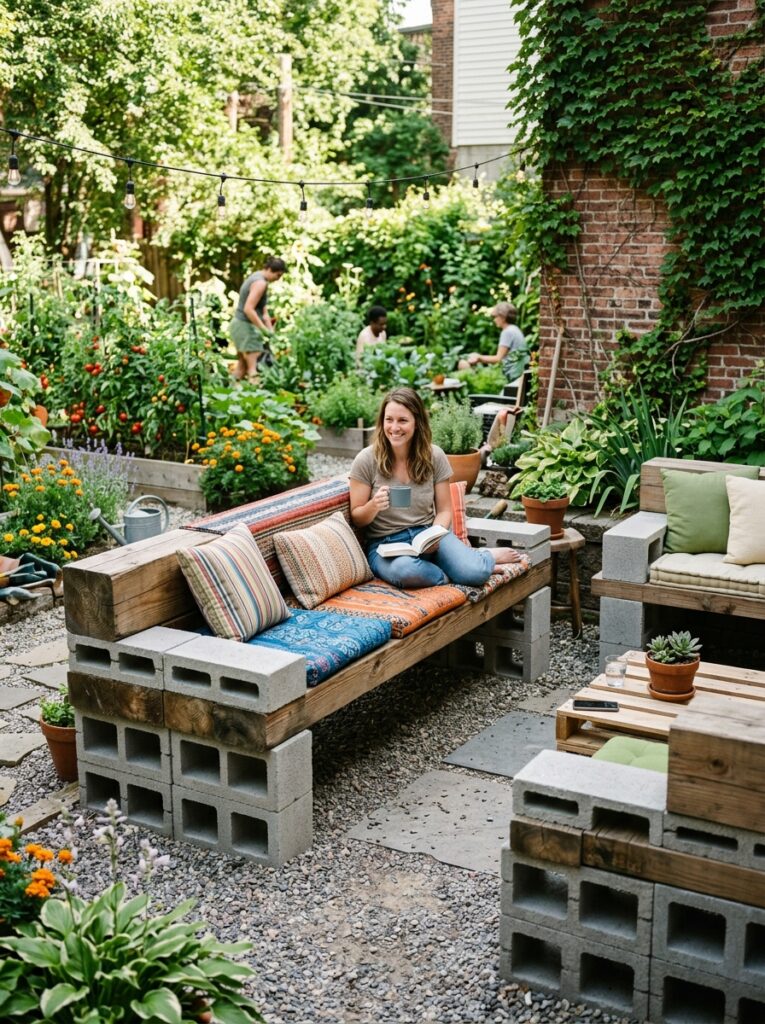
Plain gray cinder blocks (1.50−2 each) can be stacked to create tough, industrial-style benches. Add a plywood top and thick cushions for comfort.
The holes in the blocks can also hold potted plants, drinks, or small lanterns. This modular seating can be reconfigured anytime your needs change.
Pro Tip: Paint the cinder blocks with exterior masonry paint for a more finished, colorful look. Black or white modernizes them significantly.
Mistake to Avoid: Do not stack blocks more than two high without securing them. Unstable stacks can tip and cause injury.
14. Create a Table from a Free Cable Spool
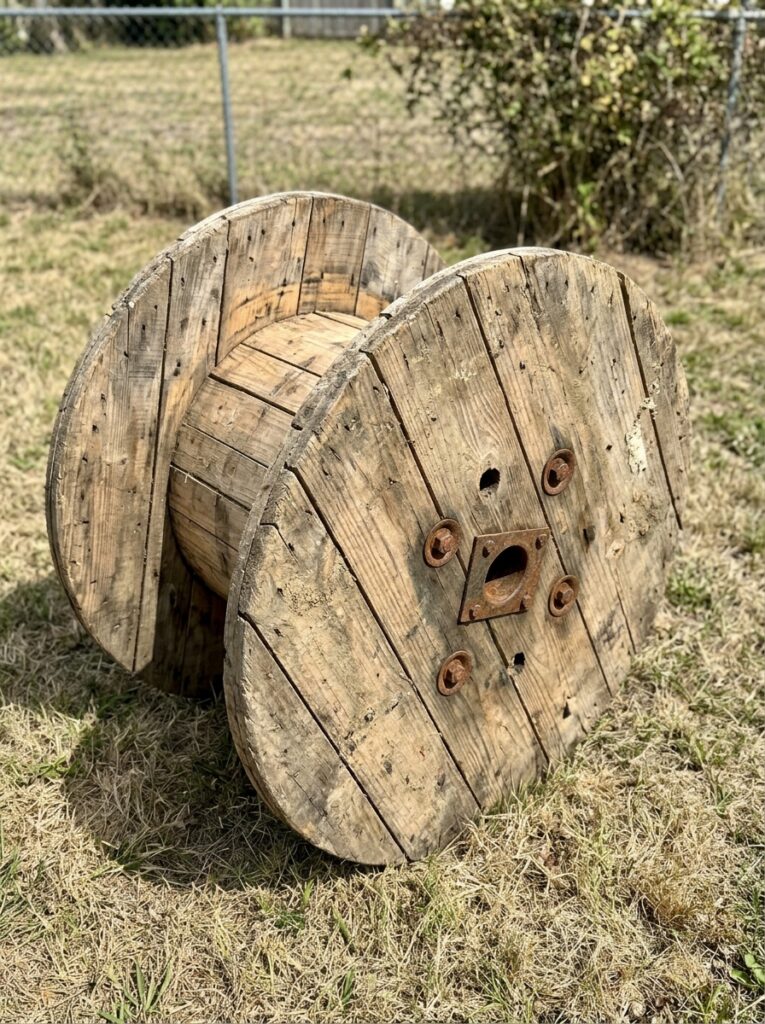
Electrical or cable companies often give away large wooden spools for free. Sand the top, paint it with outdoor paint, or cover it with tile to create a massive outdoor dining table.
The spool is sturdy, weather-resistant, and already has a central hole for an umbrella. This is one of the best free furniture finds you can score.
Pro Tip: Add locking casters to the bottom of the spool. The table becomes mobile and can be moved for mowing or parties.
Mistake to Avoid: Do not use a spool that has been treated with chemicals. Ask the company about the original use of the spool.
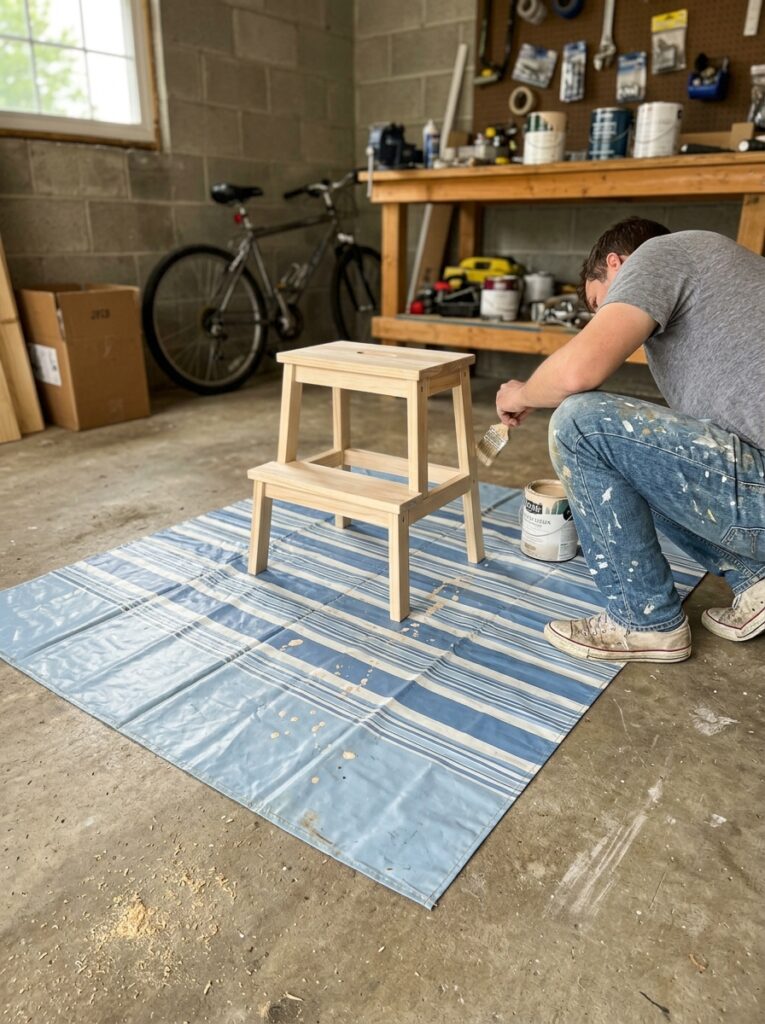
15. Repurpose an Old Dresser as an Outdoor Bar
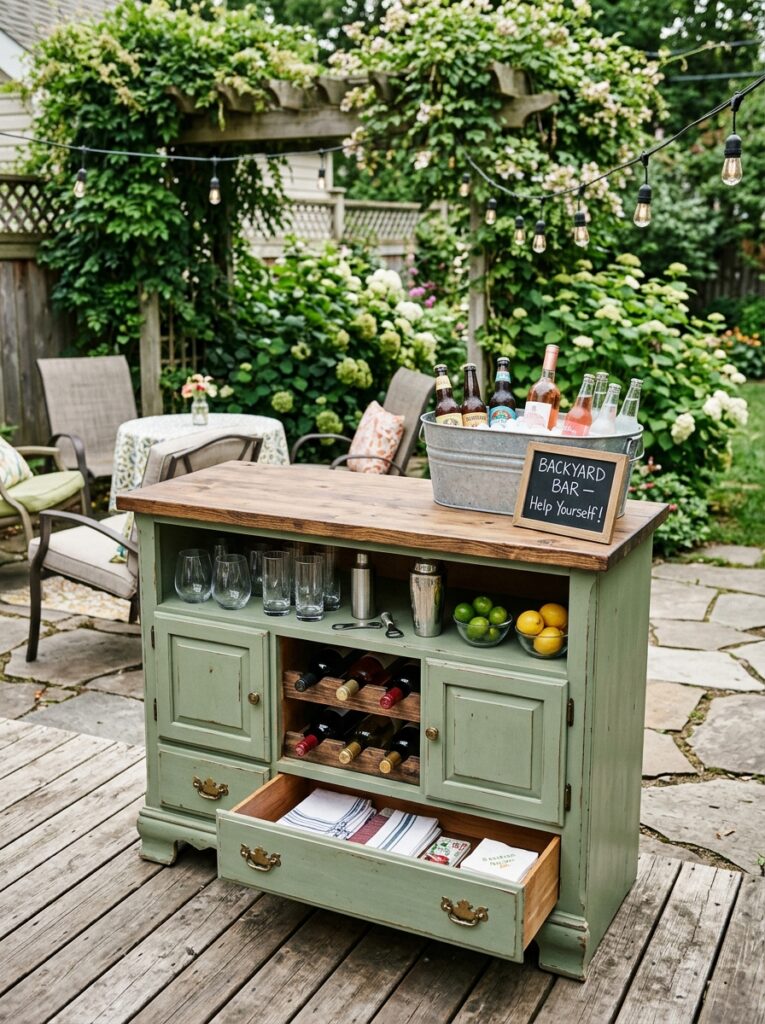
Take an old dresser, remove the drawers, and sand the exterior thoroughly. Paint it with exterior-grade paint or sealant to protect against moisture.
The open drawer cavities become shelves for drinks, glasses, and ice buckets. Add hooks to the sides for towels or bottle openers for a functional party piece.
Pro Tip: Apply two coats of exterior polyurethane to seal the wood completely. Water damage will ruin the dresser within one season.
Mistake to Avoid: Do not use a dresser with particle board construction. It will swell and crumble when exposed to moisture.
16. Make a Mosaic Tabletop from Broken Dishes
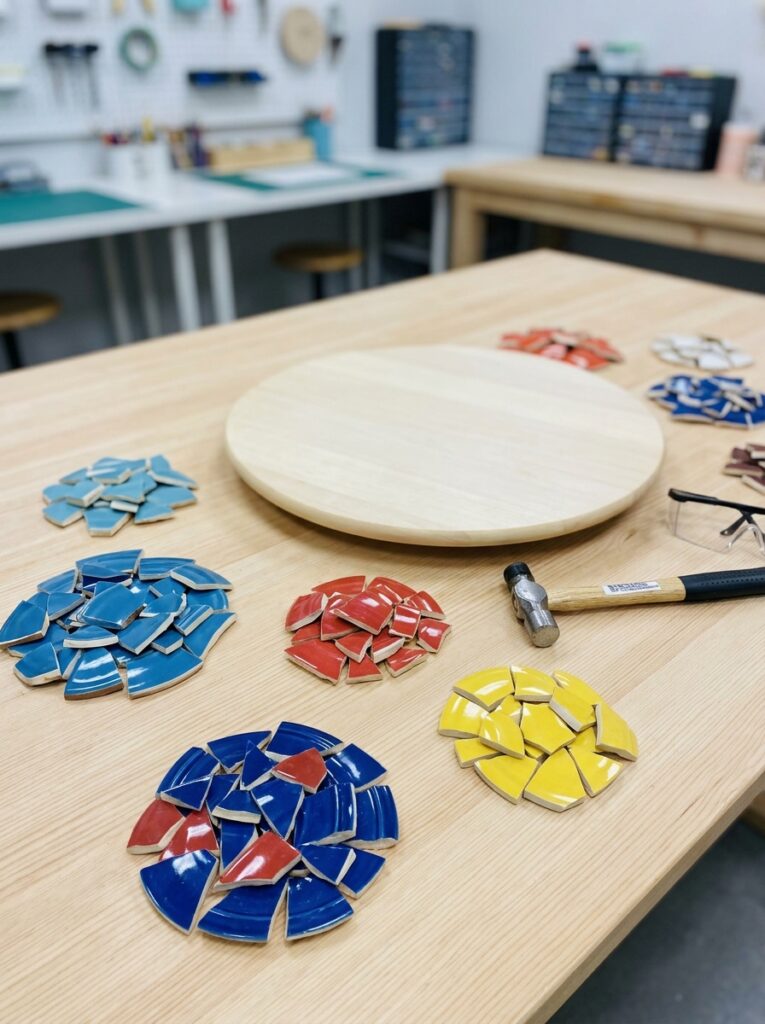
Find a cheap plywood side table or cut a log slice for the base. Use leftover ceramic tiles, broken dishes, or mirror shards to create a mosaic top.
Arrange the pieces, glue them down, grout the gaps, and seal the surface. The result is a unique, artsy table that looks expensive and costs almost nothing.
Pro Tip: Use a pair of tile nippers to cut ceramic pieces into manageable shapes. Safety glasses are essential for this step.
Mistake to Avoid: Do not skip sealing the grout. Unsealed grout absorbs moisture and cracks during freeze-thaw cycles.
17. Use Tree Stumps as Natural Stools
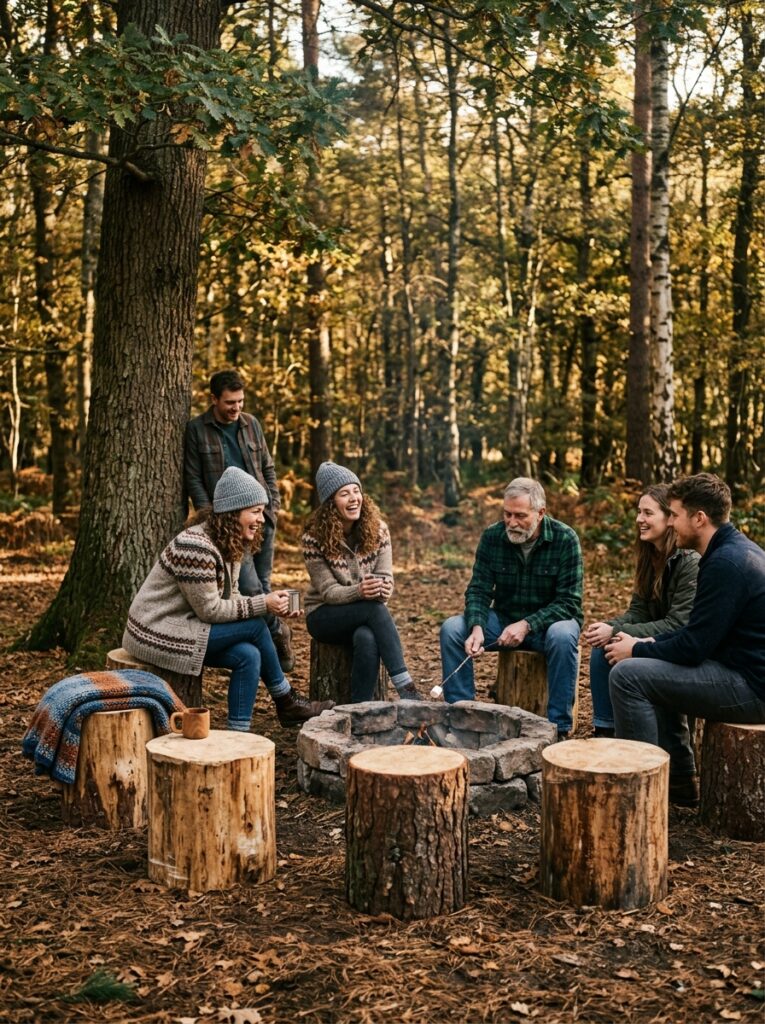
If you have a felled tree, cut the trunk into 12-16 inch sections. Sand the tops smooth and seal them with spar urethane for weather protection.
These stumps become organic, sculptural stools around a fire pit or under a tree. The natural look fits perfectly with rustic or woodland garden styles.
Pro Tip: Cut the stumps in late fall when the sap is down. The wood will be drier and less likely to crack as it seasons.
Mistake to Avoid: Do not use stumps from diseased trees. The rot will continue and the stump will crumble within months.
18. String Christmas Lights for Evening Ambiance
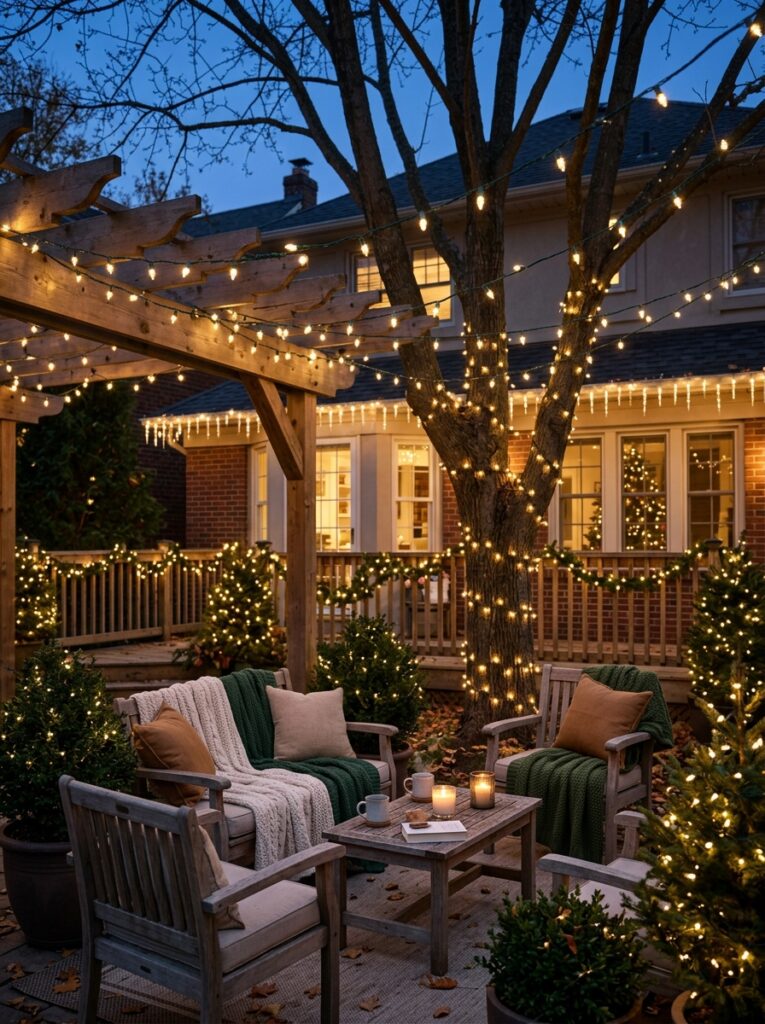
String lights instantly create a magical atmosphere in any backyard. Skip expensive solar path lights and buy strands of incandescent Christmas lights after the holidays at 90% off.
String them overhead between trees, along a fence, or across a pergola. The warm glow costs pennies to run and transforms the space completely.
Pro Tip: Use outdoor-rated extension cords and waterproof connectors. Safety is essential when mixing electricity and outdoor elements.
Mistake to Avoid: Do not use indoor lights outdoors. They are not weather-sealed and pose a serious fire risk.
19. Build a Simple A-Frame Shade Canopy

For under $50, you can make an A-frame shade structure using three long poles (or PVC pipes) and a drop cloth or old bed sheet. Lash the poles together at the top.
Spread the legs wide and drape the fabric over the frame. This creates a boho, shaded lounge area that can be taken down easily when not needed.
Pro Tip: Use metal tent stakes to secure the legs to the ground. Wind will catch the fabric and blow the structure away otherwise.
Mistake to Avoid: Do not use a white sheet if you want shade. White lets UV light through. Use a dark or thick fabric for real protection.
20. Create a Tea Light Chandelier from a Basket
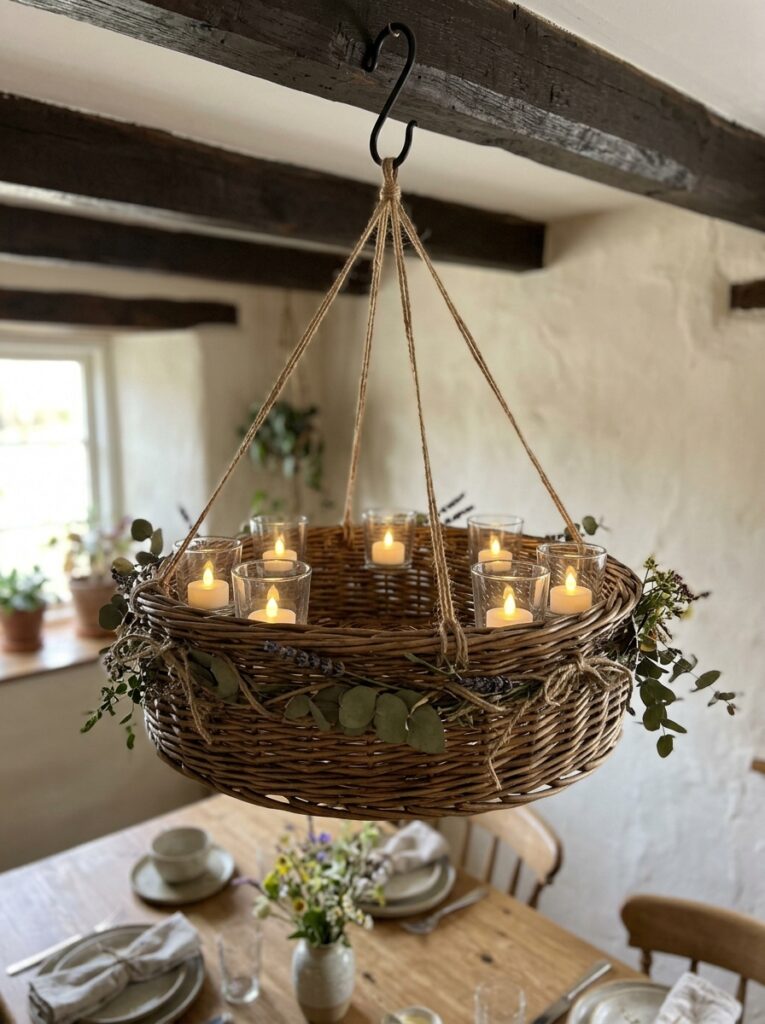
Find an old metal basket or a discarded hanging light fixture from a thrift store. Spray paint it a bright color or matte black for a modern look.
Hang it from a tree branch or a shepherds hook. Use wire to hang glass votive holders filled with tea lights. The flickering effect is romantic and dramatic at night.
Pro Tip: Use battery-operated LED tea lights. Real candles may blow out or pose a fire hazard in dry conditions.
Mistake to Avoid: Do not hang the chandelier too low. People should be able to walk underneath without hitting their heads.
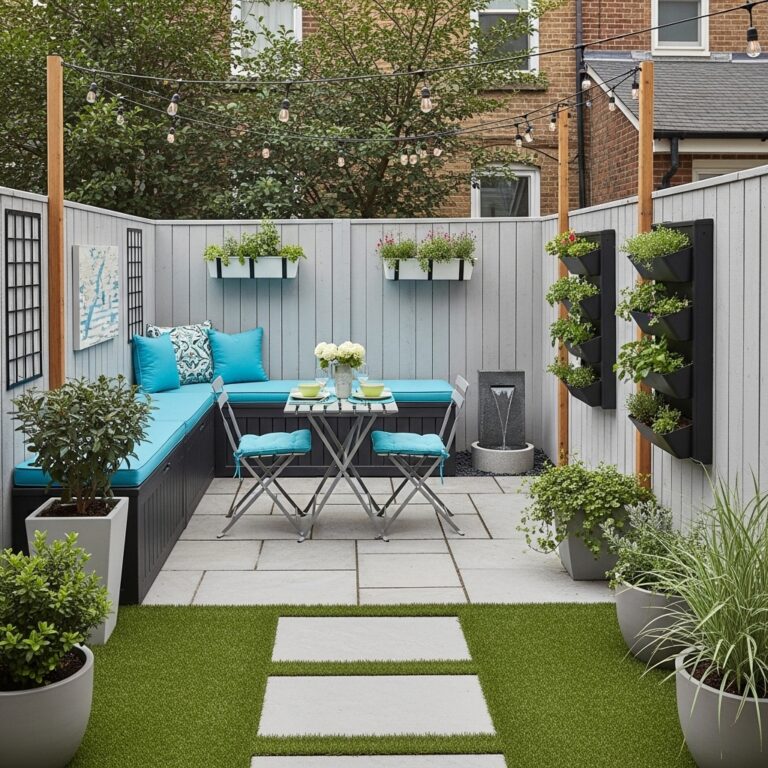
Part 3: Thrifty Decor & Accents (Ideas 21-30)
The difference between a yard and an “oasis” is often in the small details. These DIY decor ideas add massive personality for minimal cash and minimal effort.
21. Paint Rocks for Garden Labels or Markers
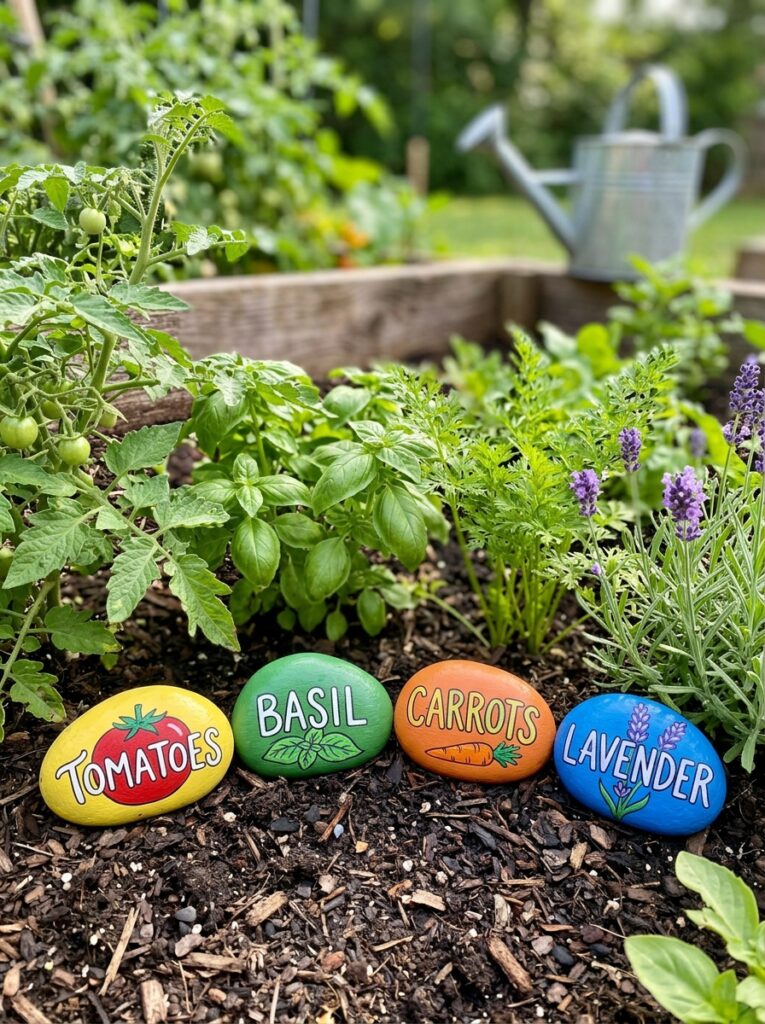
Collect smooth river rocks from your yard or a nearby creek. Use outdoor acrylic paint or paint pens to write herb or vegetable names on them.
These charming, weather-proof plant labels add a handcrafted feel to your beds and cost absolutely nothing. They also look much better than plastic tags.
Pro Tip: Seal the painted rocks with clear spray sealant. The paint will last through rain and snow without fading.
Mistake to Avoid: Do not use washable paint. It will wash off in the first rain and leave you with unlabeled plants.
22. Make Tin Can Lanterns for Pathway Lighting
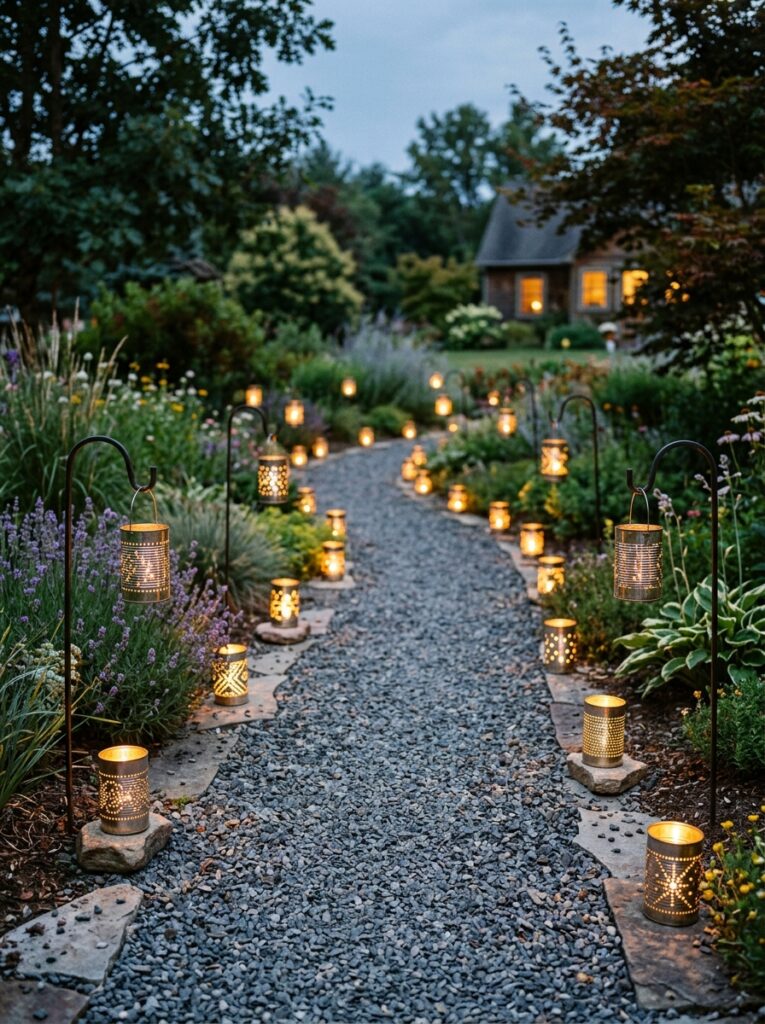
Save tin cans from beans, tomatoes, or soup. Fill them with water and freeze solid. This step prevents the can from denting while you punch holes.
Use a nail and hammer to punch a pattern of holes in the can. Paint the outside, place a tea light inside, and the ice will melt as the candle burns.
Pro Tip: Use a drill with a small bit for more precise holes. You can create intricate patterns that look like lace when lit.
Mistake to Avoid: Do not use real candles in dry grass or near flammable materials. Battery-operated tea lights are safer for unsupervised areas.
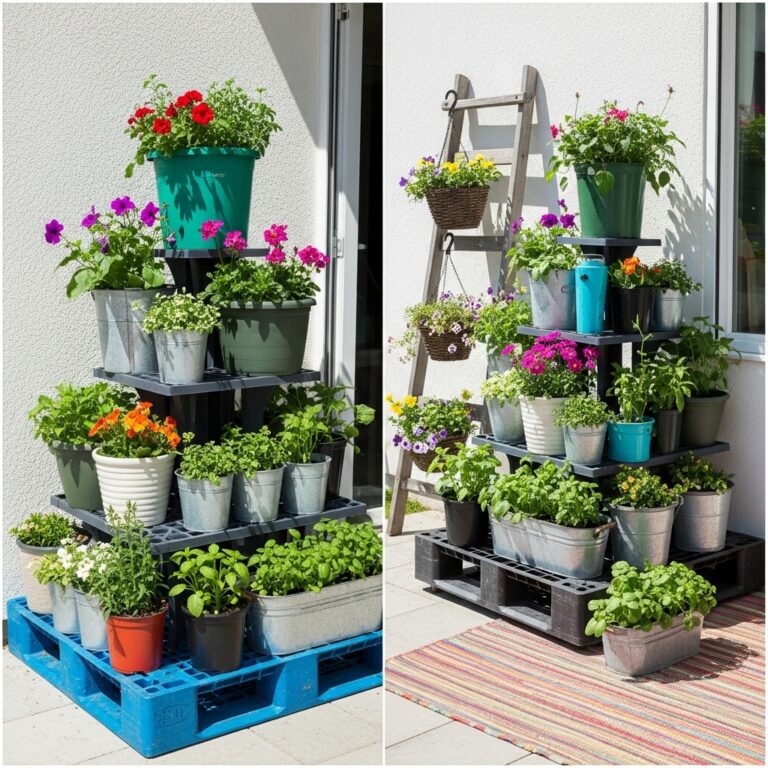
23. Use a Wooden Palette as a Vertical Garden
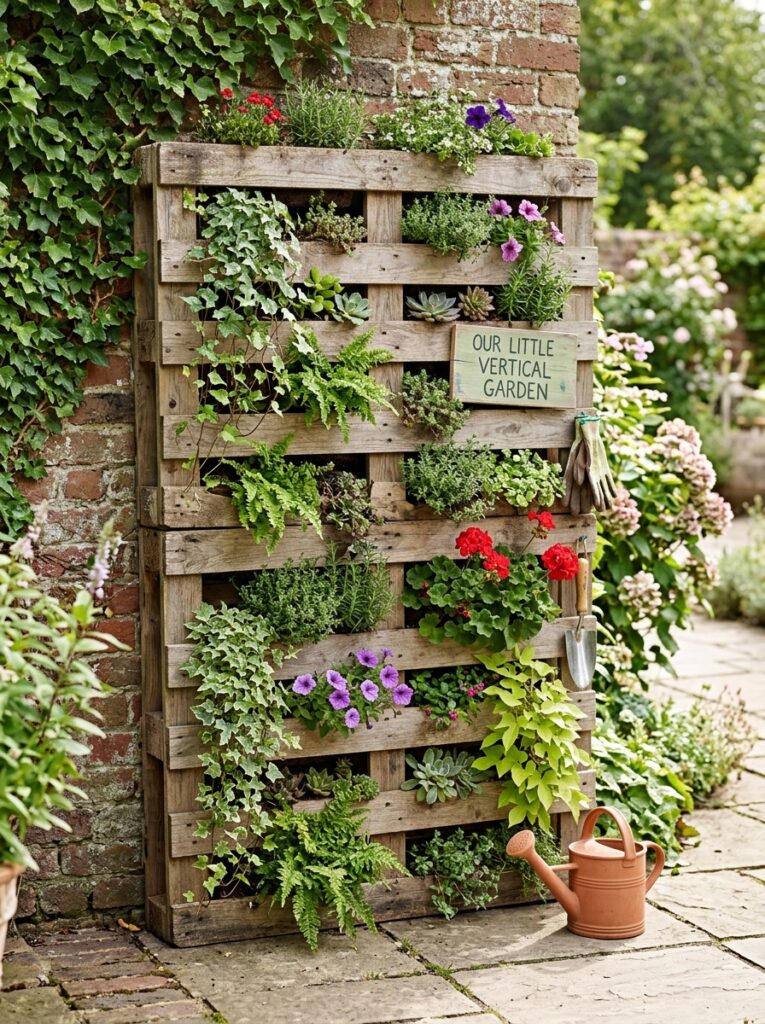
Stand a wooden palette upright and secure it to a fence or wall. Staple landscape fabric to the back and bottom slats to hold soil in place.
Fill with potting soil and plant succulents, herbs, or trailing annuals in the gaps between slats. This vertical garden saves floor space and looks artistic.
Pro Tip: Lay the palette flat for two weeks after planting. This allows roots to establish before you hang it vertically.
Mistake to Avoid: Do not use a palette treated with chemicals. Look for the “HT” (heat treated) stamp for safety.
24. Create a Bee and Butterfly Watering Station
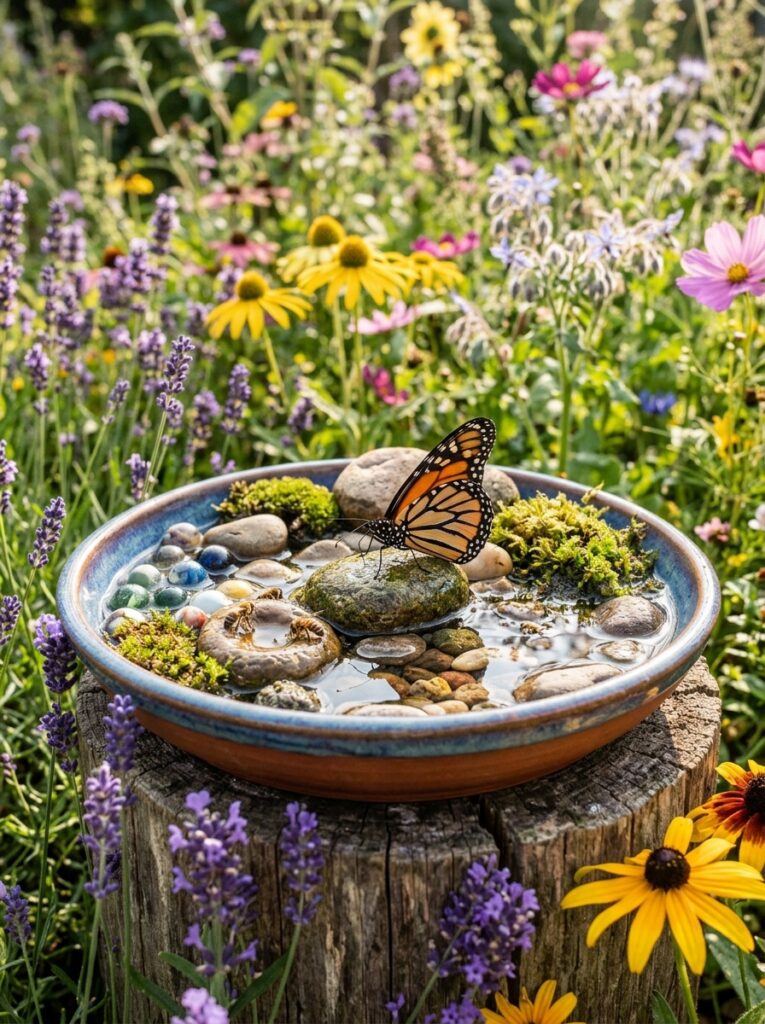
Take a shallow dish or a plant saucer. Fill it with clean marbles, stones, or glass gems. Add water until it reaches just below the top of the stones.
This gives bees and butterflies a safe place to drink without drowning. Place it near flowering plants for a vital addition to any pollinator garden.
Pro Tip: Add a pinch of salt to the water. Butterflies need minerals that salt provides for their nutrition.
Mistake to Avoid: Do not use a deep bowl. Insects will fall in and be unable to climb out. Shallow dishes are essential for safety.
25. Hang an Acrylic Mirror on a Fence
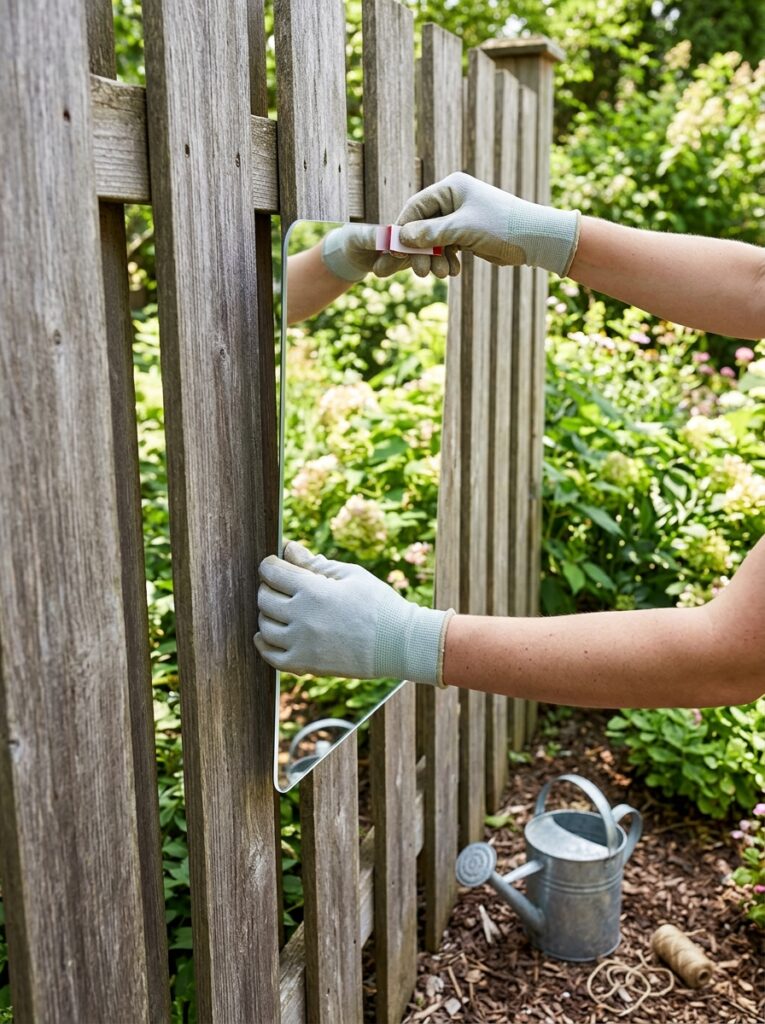
A weather-proof acrylic mirror (or a thrifted mirror with a frame you can seal) can be hung on a fence. It reflects light and greenery, creating the illusion of a hidden garden portal.
This trick visually doubles your space and adds light to shady corners. Make sure the mirror is securely mounted and angled away from direct sun.
Pro Tip: Angle the mirror slightly downward. This reflects the garden rather than the sky, creating a more natural illusion.
Mistake to Avoid: Do not use a glass mirror outdoors. It can shatter and create dangerous shards. Acrylic is safer and lighter.
26. Make Tin Can Wind Chimes for Garden Music
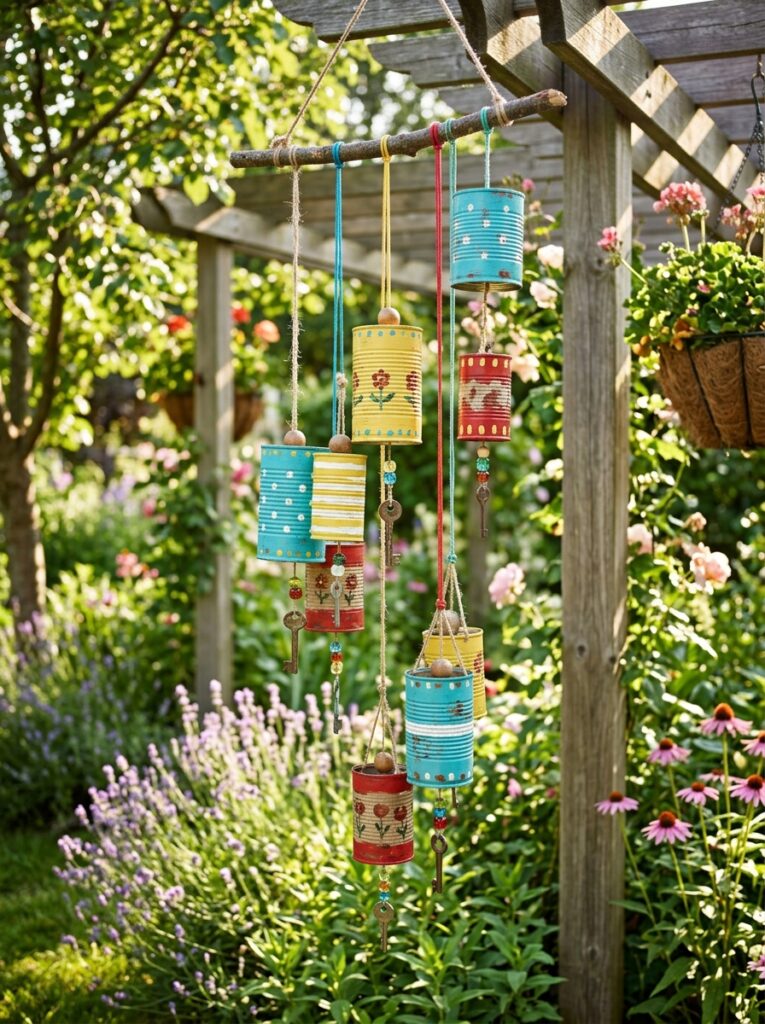
Punch a hole in the bottom of several tin cans of different sizes. Run a string through each can, tying a knot inside to hold it in place.
Attach them to a stick or branch at varying lengths. Paint them bright colors. The different sizes create different tones in the wind.
Pro Tip: Use cans of different materials (tin, aluminum, steel). Each material produces a distinct tone when the wind blows.
Mistake to Avoid: Do not hang wind chimes near seating areas if you prefer quiet. They can become annoying on windy days.
27. Use Glass Gems to Top Potted Plants
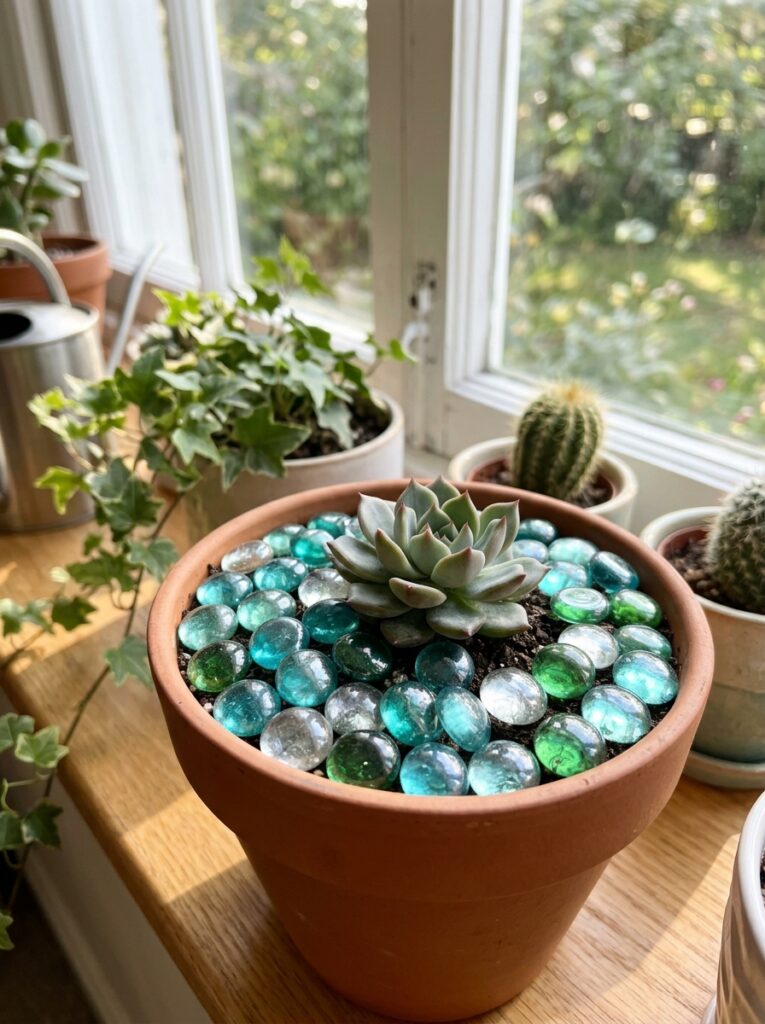
Dollar store glass gems (the kind used in vases) can be used to top off potted plants. They look like polished water or sea glass.
They add weight to prevent tipping, retain soil moisture, and prevent weeds from sprouting. Choose a single color for a cohesive, expensive look.
Pro Tip: Use blue or green gems for a water-like effect. Clear gems look like ice and work well with white or silver pots.
Mistake to Avoid: Do not use gems in pots that need frequent soil monitoring. You cannot check soil moisture easily with a gem layer.
28. Build a Cedar Plank Pathway
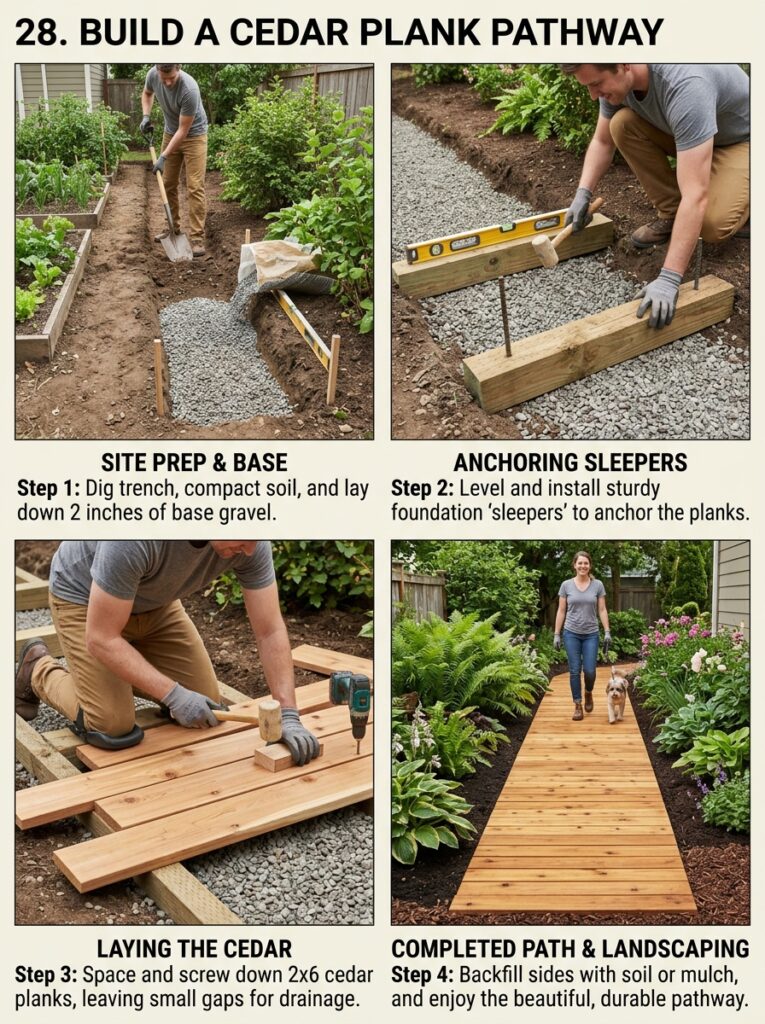
Buy a few untreated cedar fence pickets (about 2−3 each). Cut them into 12-18 inch lengths to create individual stepping stones.
Lay them across a mulched path in a repeating pattern. Cedar is naturally rot-resistant and smells amazing, making it perfect for outdoor pathways.
Pro Tip: Space the planks 2-3 inches apart. This allows rainwater to drain through and prevents puddles from forming.
Mistake to Avoid: Do not use pressure-treated lumber. The chemicals can leach into the soil and harm plants along the path.
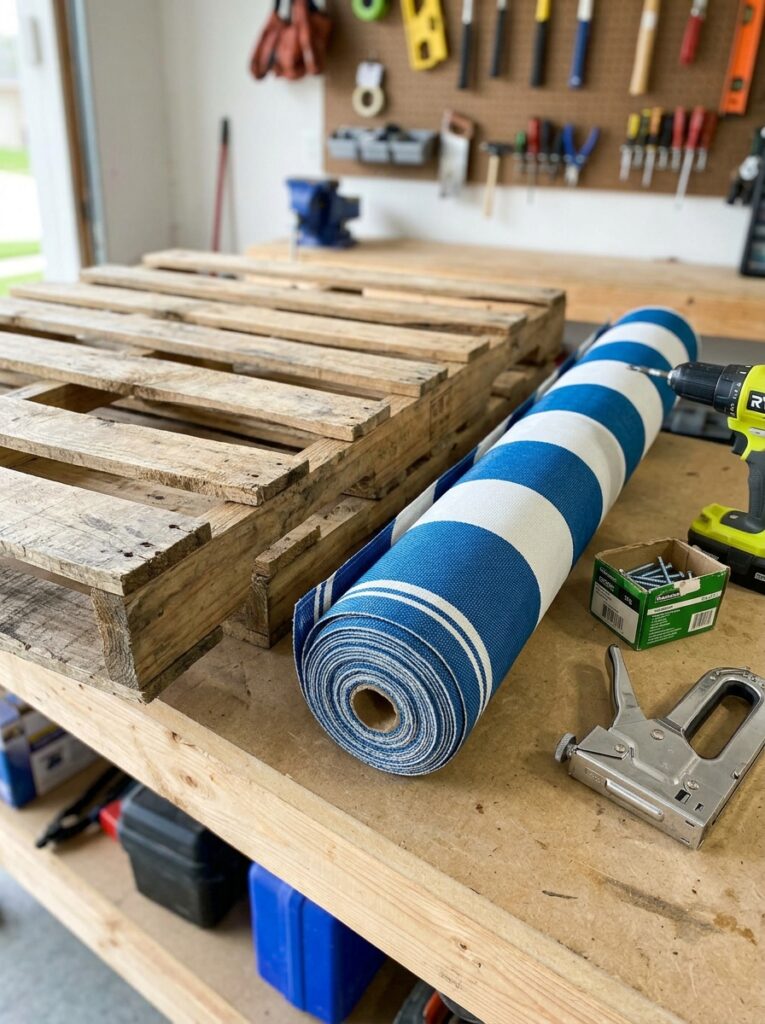
29. Hang a DIY Wind Sail for Shade and Art
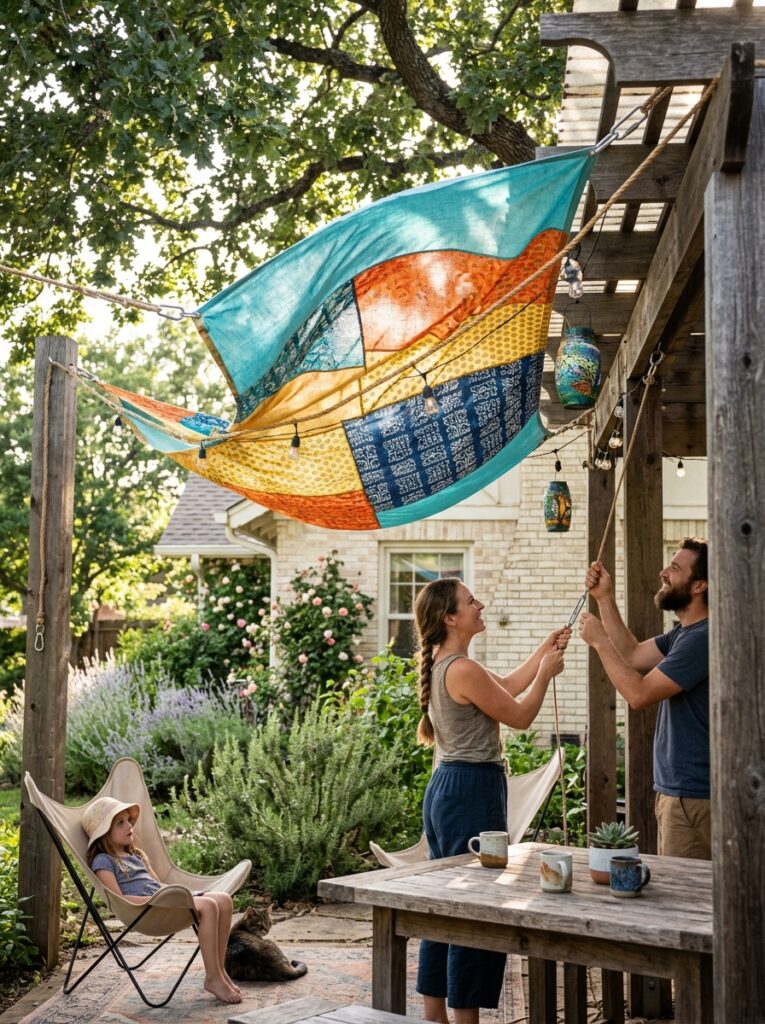
Buy a cheap canvas painter’s drop cloth. Cut it into a large triangle or curve. Sew a pocket on two edges to slide in lightweight wood poles or PVC pipes.
Attach the poles to your house and a fence post. Paint it with outdoor paint in a bold stripe. It adds shade and modern art movement to the yard.
Pro Tip: Use grommets instead of sewing pockets. Grommets are easier to install and allow quick removal for storage.
Mistake to Avoid: Do not use a white sail for shade. Choose a dark color that blocks UV rays more effectively.
30. Use Carabiners to Hang Tools or Mugs
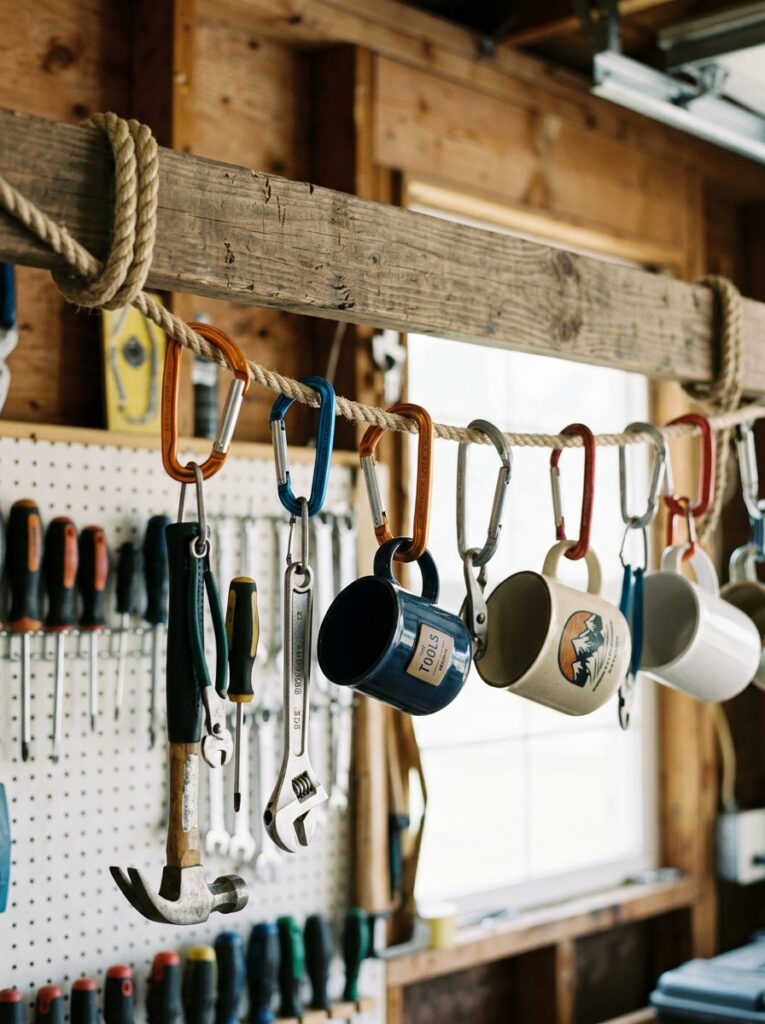
Install a simple metal rod or a piece of rebar on a wall or the side of a shed. Use cheap carabiners (dollar store) to hang gardening tools, string lights, or enamel coffee mugs.
This creates an organized, industrial-chic display that keeps frequently used items accessible and off the ground. The hardware is inexpensive and easy to install.
Pro Tip: Spray paint the carabiners a bright color like red or yellow. They become part of the decor rather than just hardware.
Mistake to Avoid: Do not use plastic carabiners. They will crack in sunlight and fail, dropping whatever they were holding.
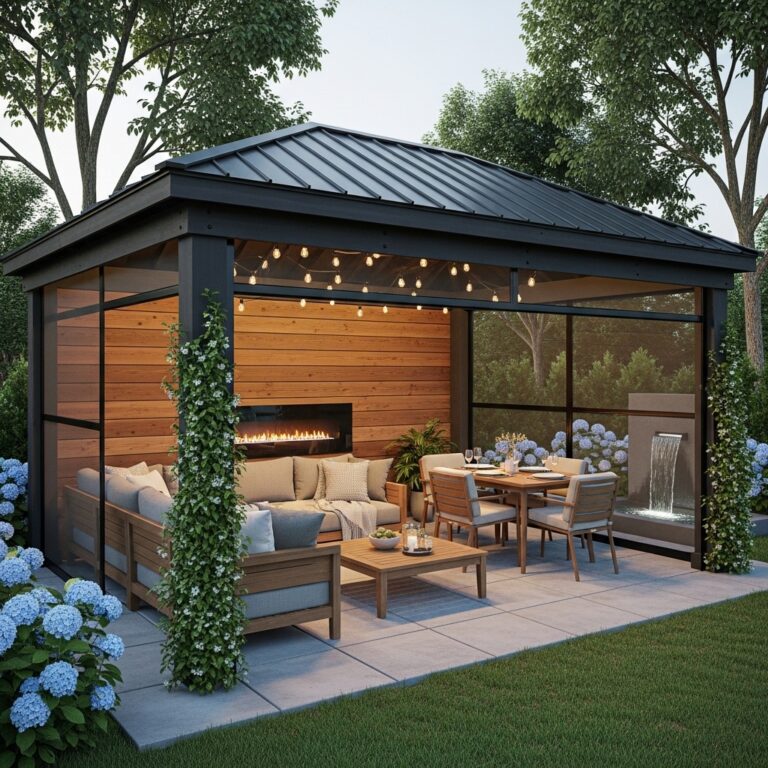
Part 4: Functional & Frugal Structures (Ideas 31-40)
Sometimes you just need a functional element: a place to store tools, a spot for kids to play, or a barrier for privacy. These structures solve real problems without a real budget.
31. Build a Potting Bench from Scrap Wood
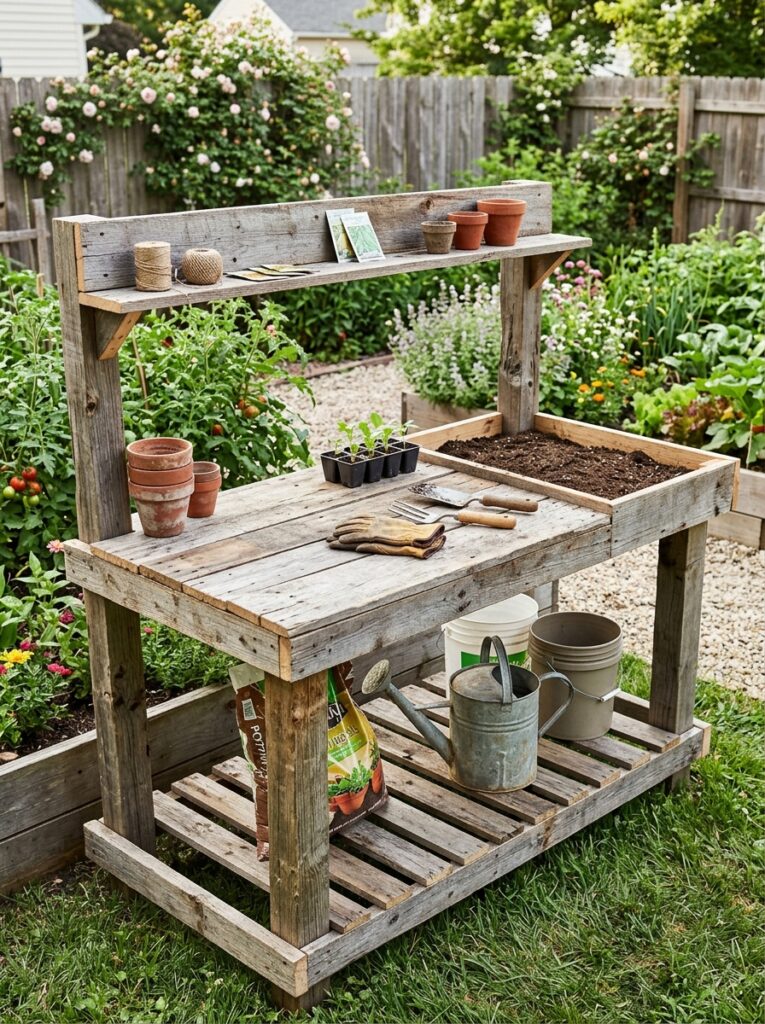
A potting bench saves your back and organizes your gardening supplies. Use an old pallet or shipping crate as the top, add 2×4 legs, and a lower shelf for storage.
Add hooks to the sides for hanging trowels and gloves. Free plans are available online, and the materials can often be scavenged for free.
Pro Tip: Add a galvanized metal top to the bench. Soil and water wipe off easily, and the metal prevents rot.
Mistake to Avoid: Do not make the bench too narrow. It should be at least 24 inches deep to accommodate standard nursery pots.
32. Use a Shower Curtain as a Tarp or Drop Cloth
When fabric shower curtains go on clearance (1−3), buy several. They are waterproof, have reinforced grommets, and can serve as tarps for DIY projects.
Use them as ground covers for messy painting, makeshift shade walls, or covers for outdoor furniture during rain. This is a versatile, ultra-cheap hack.
Pro Tip: Use bungee cords through the grommets to quickly attach the curtain to fence posts or tree branches.
Mistake to Avoid: Do not use a shower curtain as a permanent roof. UV light will degrade the fabric within months.
33. Create a Simple Sandbox from a Tarp
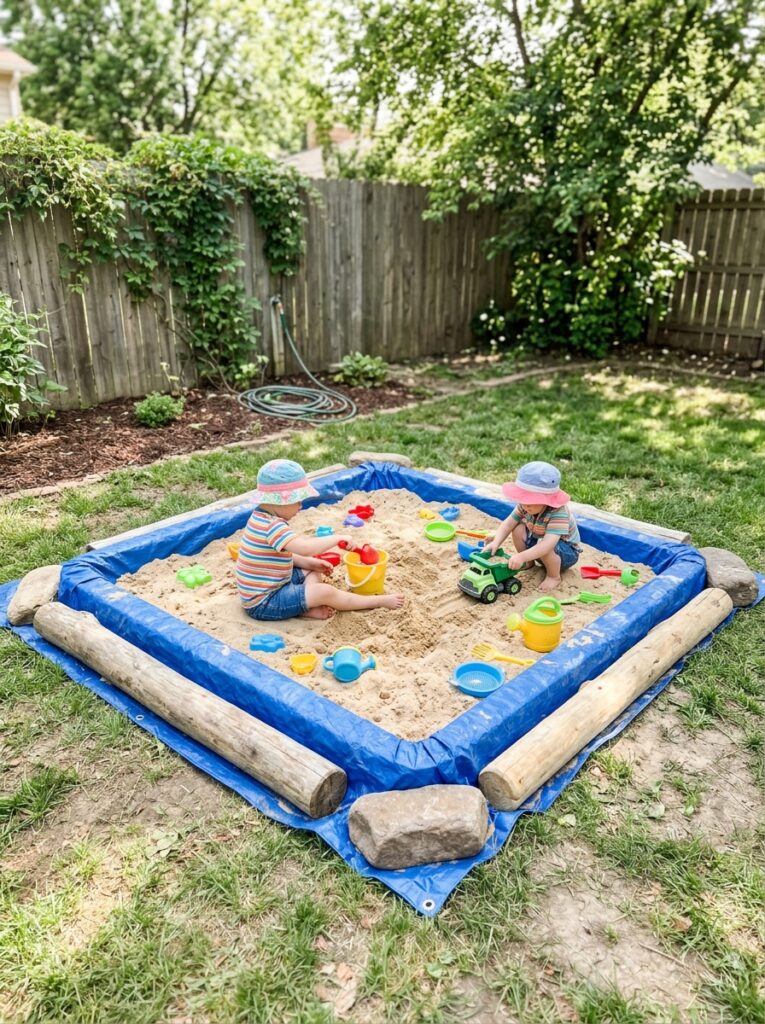
For kids, a sandbox does not need a wooden frame. Lay a large tarp on the ground, pile play sand in the center, and pull the edges of the tarp up around the sand.
Inflate the edges slightly with air to create a “crater.” It is cheap, portable, and can be folded up flat when not in use.
Pro Tip: Place the tarp sandbox in a shady area. The sand will stay cool, and the tarp will last longer without UV damage.
Mistake to Avoid: Do not use construction sand. Play sand is washed and sifted. Construction sand contains dust and sharp particles.
34. Build a Trellis from Fallen Branches
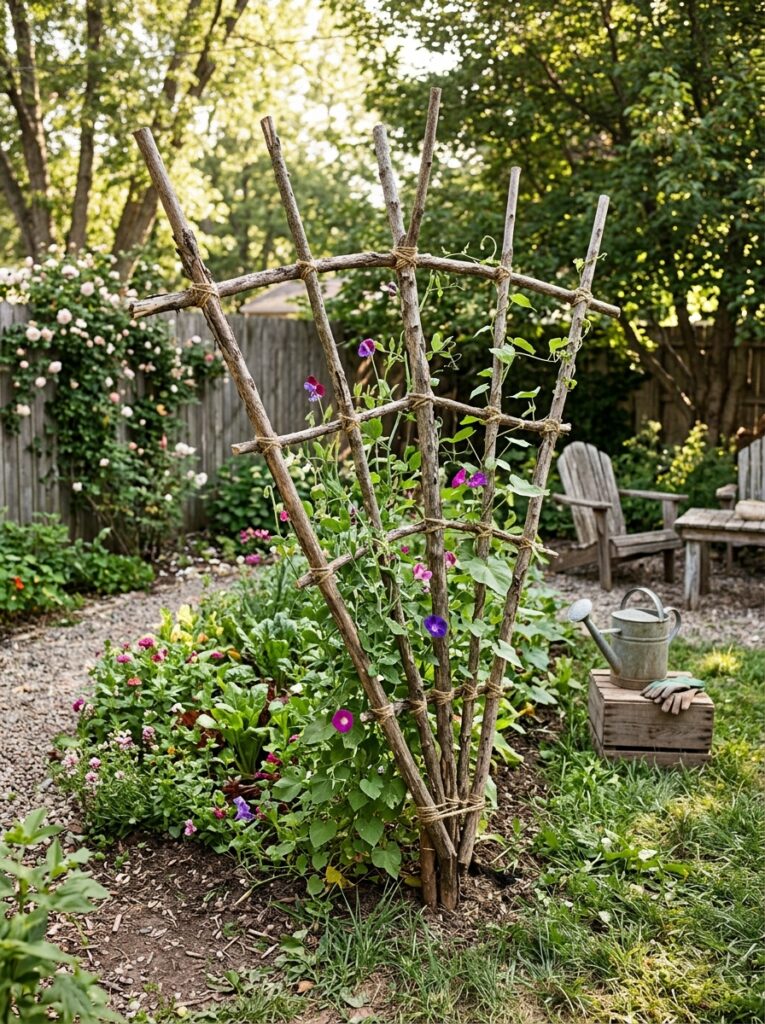
Collect long, straight branches from your property or a nearby wooded area. Look for branches about 1-2 inches thick with minimal side shoots.
Lash them together with jute twine to form a lattice, an arch, or a teepee. Train beans, peas, or morning glories up the structure for a natural, rustic support.
Pro Tip: Soak the branches in water overnight before bending them. Steamed or wet wood bends more easily without breaking.
Mistake to Avoid: Do not use weak or rotting branches. The trellis will collapse when climbing plants become heavy later in the season.
35. Use Concrete Blocks for a Fire Ring
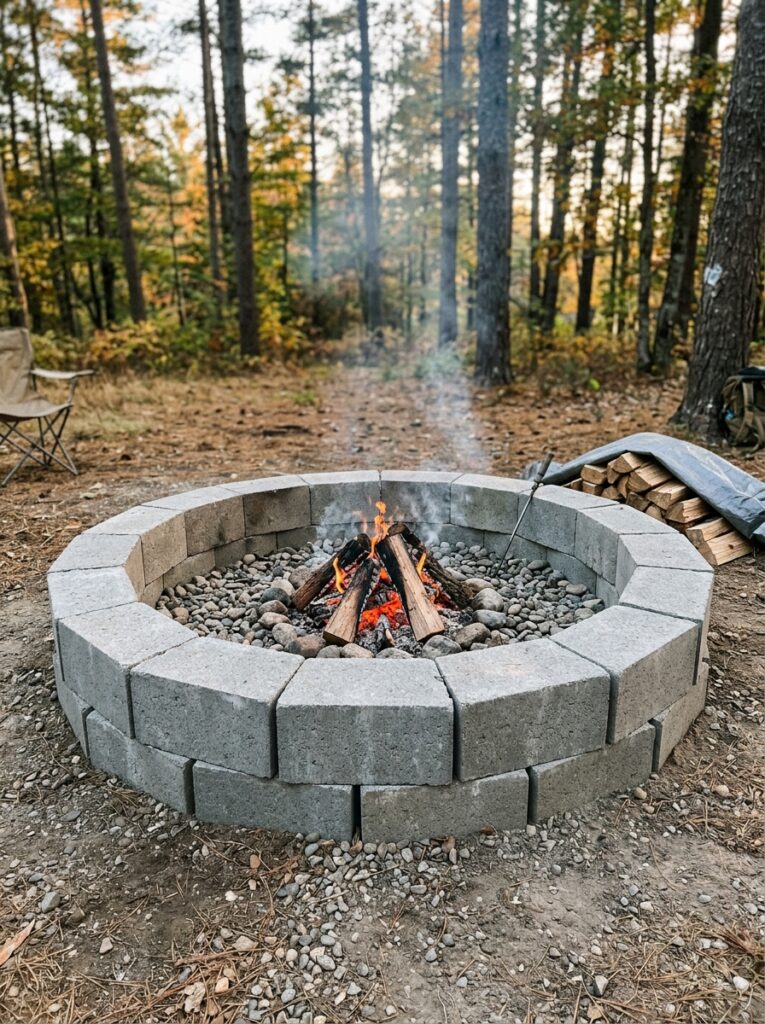
A fire ring can be built using concrete retaining wall blocks (2−3 each). Stack them in a circle, two or three layers high, depending on your desired fire depth.
No mortar is needed. The weight of the blocks holds them in place. It is safe, sturdy, and can be disassembled if you move to a new home.
Pro Tip: Leave small gaps between blocks for airflow. A fire needs oxygen to burn properly, and gaps prevent smoke from smothering the flames.
Mistake to Avoid: Do not use cinder blocks with hollow cores facing upward. Water will collect in the cores and crack them when frozen.
36. Turn a Kiddie Pool into a Cooling Lounge
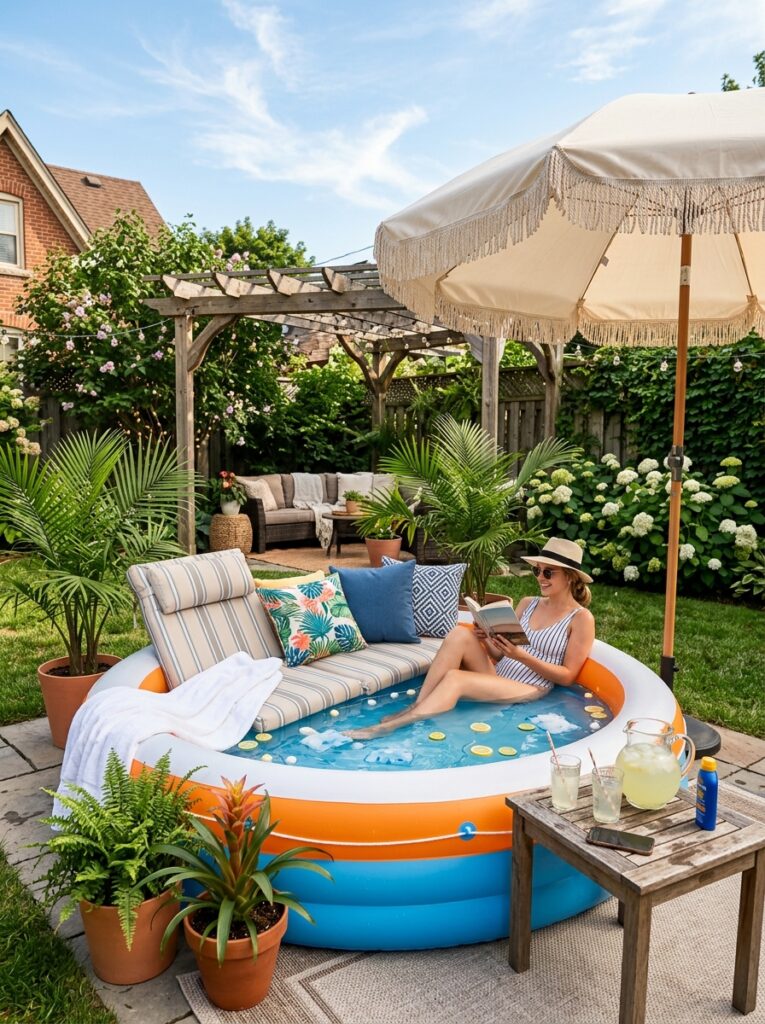
Inflatable kiddie pools are not just for children. Fill one with inexpensive bean bag fill or just lay down old blankets and pillows to create a soft, cushioned base.
On a hot day, you have a sunken lounge area to read or nap in. The pool acts as a contained, comfortable nest that keeps pillows from scattering.
Pro Tip: Use a battery-operated inflator to fill the pool quickly. Manual pumps take much longer and require significant effort.
Mistake to Avoid: Do not leave the pool inflated in direct sun for weeks. UV light will degrade the plastic and cause leaks.
37. Repurpose a Metal Shelf as a Plant Stand
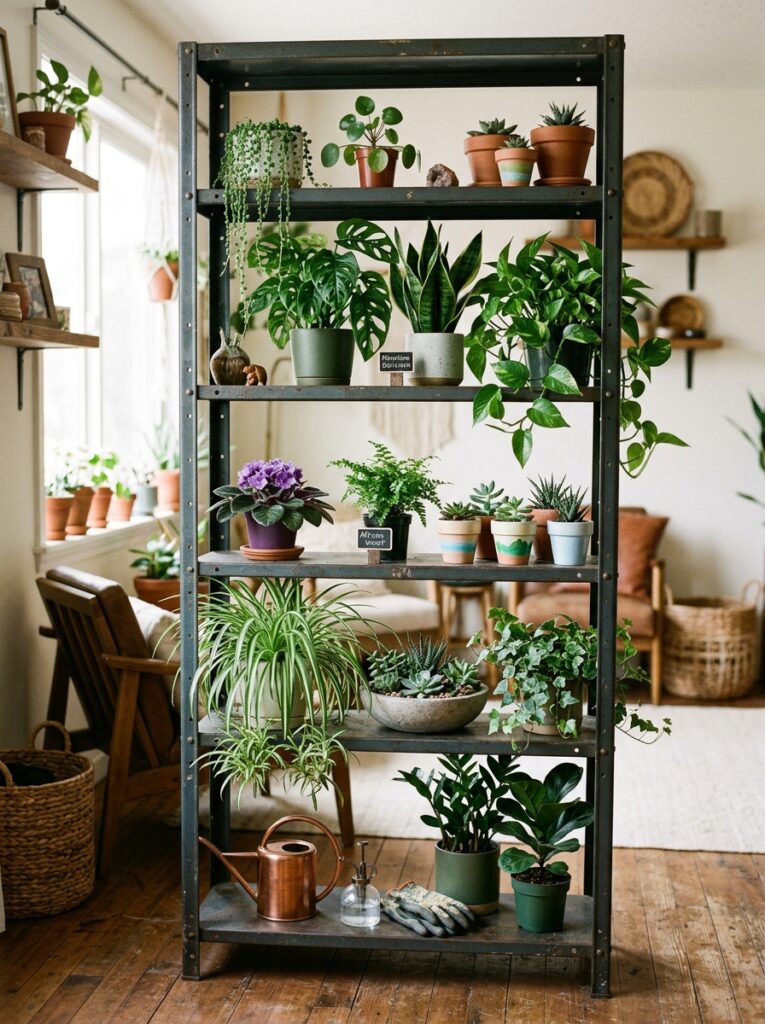
An old metal utility shelf (the type found in garages) can be painted black or white. Remove the wheels if it has them for a more stable base.
Place it against a wall or fence. It becomes an instant multi-tiered plant stand for container gardening, displaying herbs, flowers, or succulents beautifully.
Pro Tip: Use a wire brush to remove rust before painting. Sand and prime the metal for the best paint adhesion and longest life.
Mistake to Avoid: Do not overload the shelves. Metal shelves have weight limits, and wet soil is heavier than it looks.
38. Hang a Hammock from Two Trees
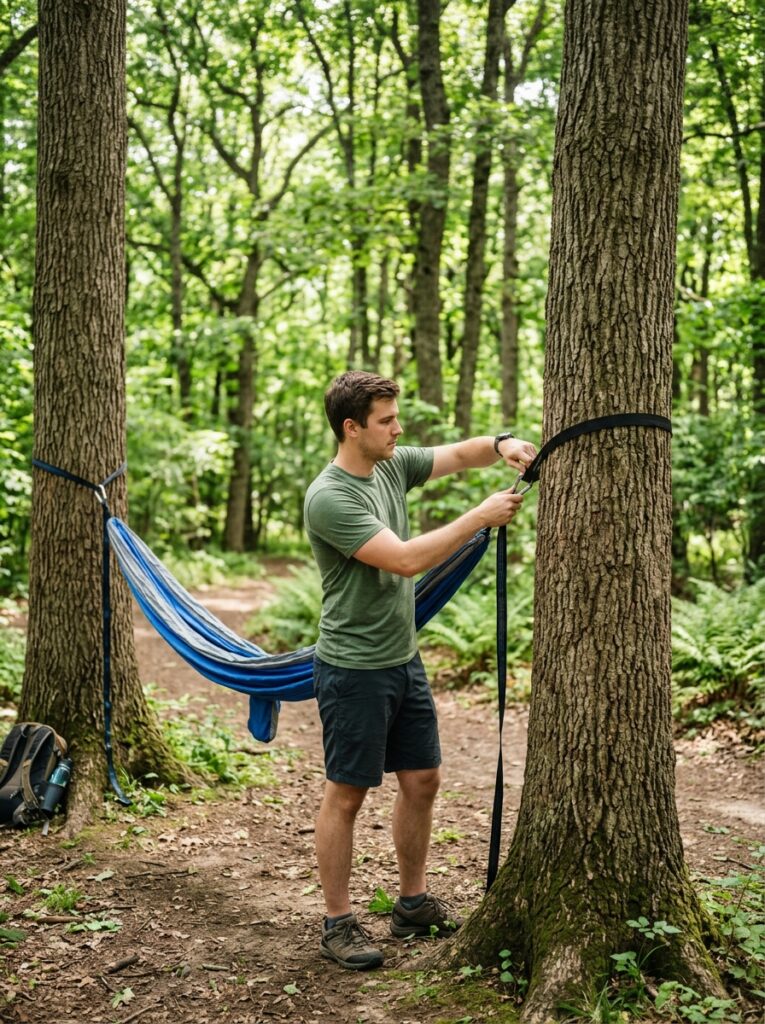
A hammock can be expensive, but a simple DIY version is cheap. Buy a canvas drop cloth ($10) from a hardware store.
Fold the long edges over a rope and sew a hem. Tie the rope securely to two trees. You have a durable, oversized hammock for a fraction of the retail price.
Pro Tip: Use rope pads or old towels around the tree trunks. This protects the bark from damage and keeps arborists happy.
Mistake to Avoid: Do not hang the hammock too tight. A properly hung hammock should have a 30-degree angle from the tree to the attachment point.
39. Use a Log as a Garden Bench
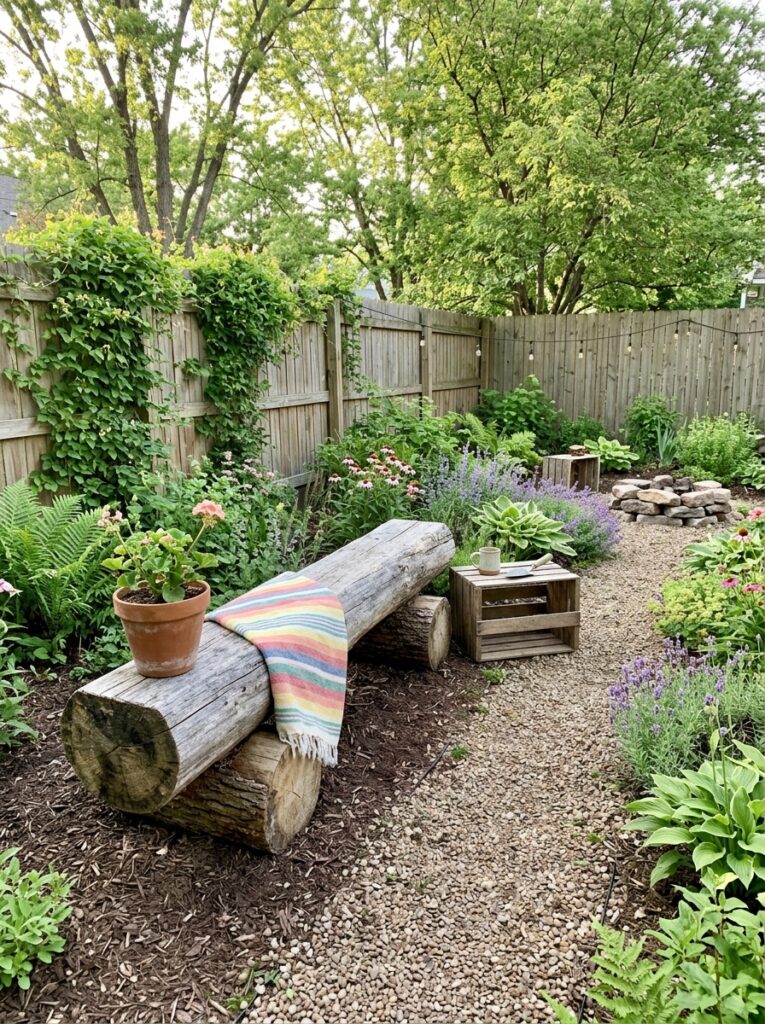
A fallen large-diameter log can be rolled into place and used as a rustic, natural bench. Leave the bark on for texture or peel it off for a smoother surface.
Seal the cut ends with wood sealer to prevent cracking. This is the ultimate free seating option for a woodland or rustic garden style.
Pro Tip: Cut the log to the same length as a standard bench (48-60 inches). This provides comfortable seating for two to three people.
Mistake to Avoid: Do not use a log from a diseased tree. The rot will continue, and the log will crumble within one season.
40. Build a Privacy Screen from Pallets and Fabric
Attach pallets to T-posts to create a semi-private wall around a seating area or hot tub. The pallets provide a sturdy frame for fabric attachment.
Weave burlap, old curtains, or outdoor fabric through the slats. This provides an instant windbreak and visual barrier for less than $30 total.
Pro Tip: Use zip ties to attach the pallets to the T-posts. They are strong, weather-resistant, and easy to remove if you change your mind.
Mistake to Avoid: Do not use fabric that is not UV-rated. It will fade and disintegrate within weeks of summer sun exposure.
Part 5: Thrifty Lighting, Pathways & Finishing Touches (Ideas 41-45)
The final layer of any outdoor transformation is the evening ambiance and the polished details. These ideas tie everything together for a professional look.
41. Use Waxed Milk Cartons as Garden Lanterns
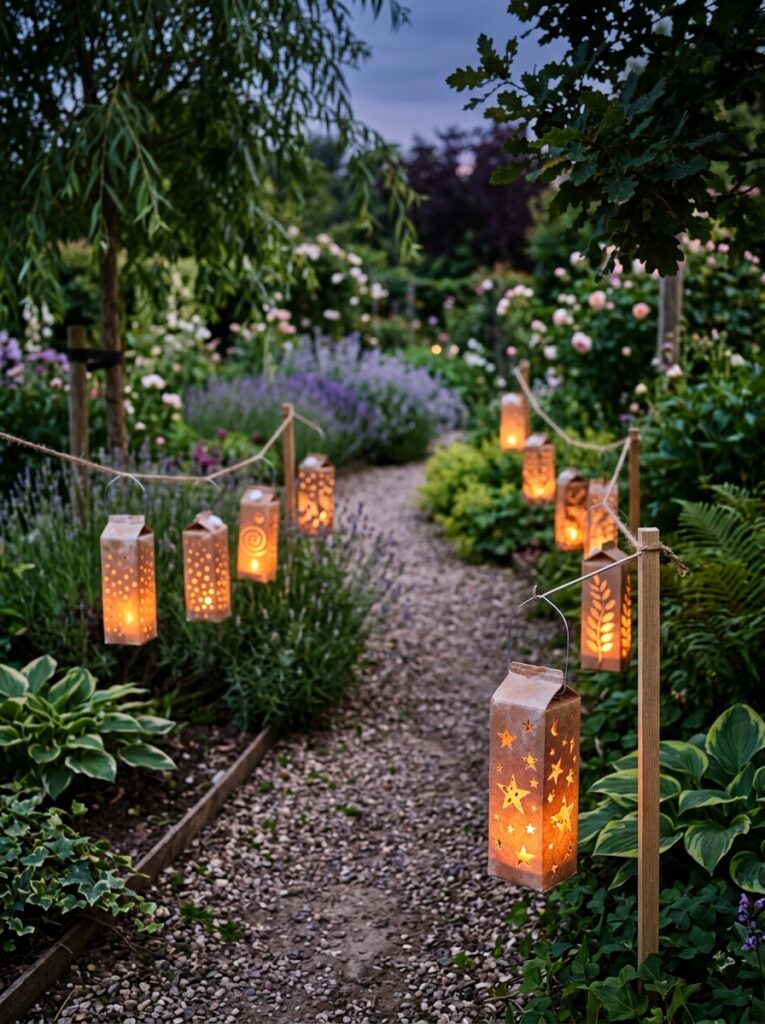
Wash out a paper milk carton thoroughly. Cut a hole in the side or cut the top off completely. Place a battery-operated tea light inside.
They cast a warm, diffused glow and look like expensive Japanese paper lanterns. Scatter them along pathways or cluster them on a patio table for evening magic.
Pro Tip: Cut different patterns into different cartons. Stars, circles, and crescent moons create varied and interesting light effects.
Mistake to Avoid: Do not use real candles inside paper cartons. The paper is flammable, and a tipped candle could start a fire.
42. Mark a Path with Discounted Solar Lights
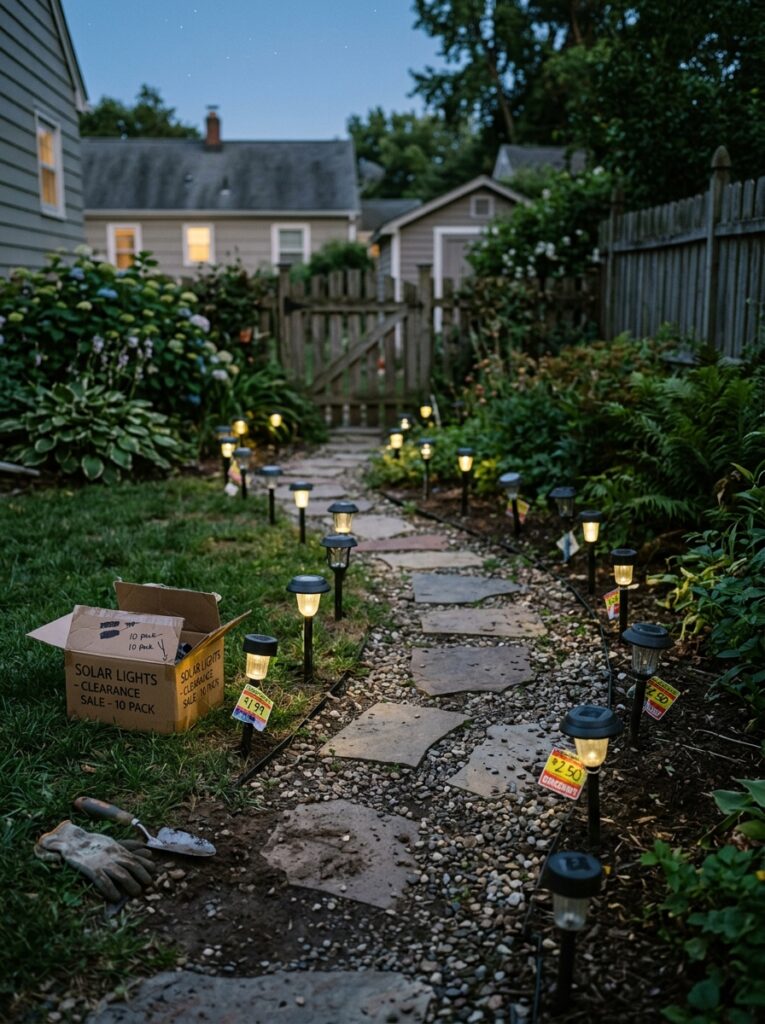
Solar path lights are sold everywhere, but they are expensive at full price. Buy them at the end of summer when they are heavily discounted.
Place them only on one side of the path or stagger them irregularly. This saves money and still guides the way effectively without a symmetrical look.
Pro Tip: Charge the solar lights in direct sun for 48 hours before installation. This ensures the batteries are at full capacity.
Mistake to Avoid: Do not place solar lights in shaded areas. They will not charge properly and will dim or fail at night.
43. Hang a Blanket as an Outdoor Curtain
Create a private, boho cabana by hanging a flat bedsheet or a colorful blanket from a branch, the edge of a pergola, or a clothesline.
Use curtain clips, clothespins, or simply tie the fabric to the support. This creates a cozy, enclosed nook that feels like an outdoor room.
Pro Tip: Use outdoor fabric or treat cotton fabric with a waterproofing spray. The curtain will last longer and resist mildew.
Mistake to Avoid: Do not hang fabric near a fire pit or grill. A stray spark can ignite the fabric quickly.
44. Use a Birdbath as a Garden Focal Point
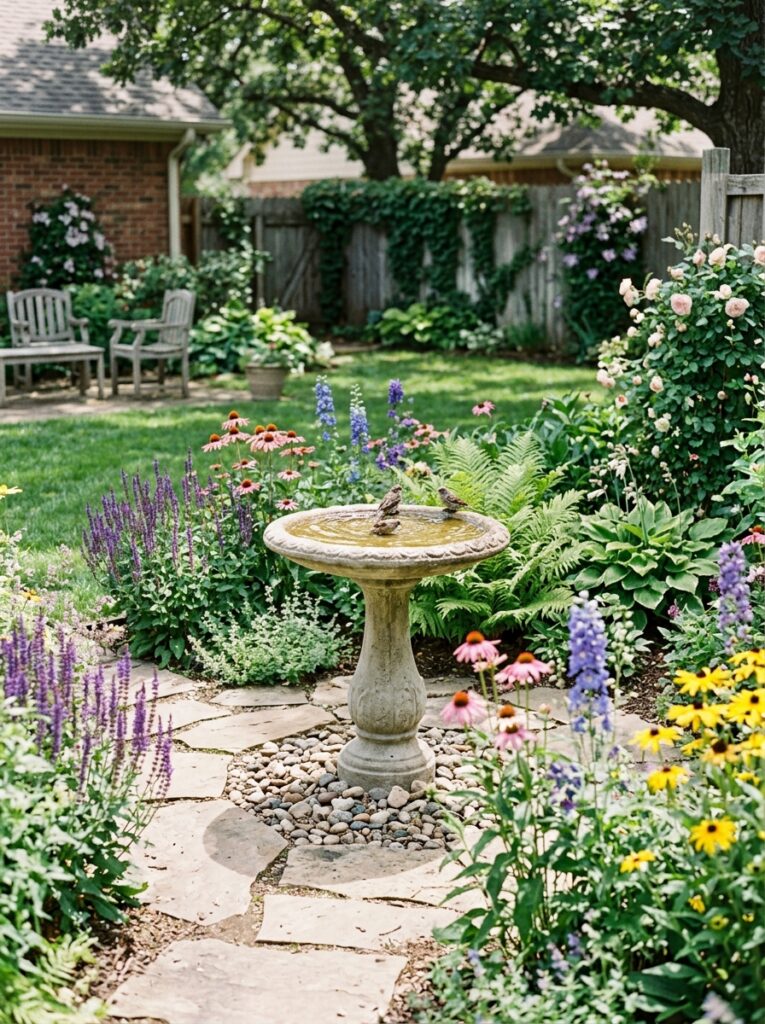
A simple concrete birdbath can be found used for 10−20 on Facebook Marketplace or at thrift stores. Place it centrally in your garden or near a seating area.
Keep it clean and filled with fresh water. Birds will come, and the movement and sound of splashing water will make your yard feel alive and tranquil.
Pro Tip: Add a small solar fountain to the birdbath. The moving water attracts more birds and prevents mosquitoes from breeding.
Mistake to Avoid: Do not place the birdbath under a tree. Falling leaves and bird droppings will foul the water constantly.
45. Keep a “Free” Curb Alert List on Your Phone

The ultimate budget tip is patience and persistence. Regularly check the “Free” section on Craigslist or Facebook Marketplace for your area.
Search for terms like “pavers,” “mulch,” “plants,” “lumber,” “bricks,” and “soil.” Over a few months, you can collect enough high-quality materials to complete several projects here for absolutely nothing.
Pro Tip: Set up email alerts for “free” and “curb alert” in your local area. You will be notified instantly when new items are posted.
Mistake to Avoid: Do not take free wood pallets without checking for the “HT” stamp. Pallets marked “MB” are treated with toxic pesticides.
Conclusion
Creating a beautiful backyard on a budget is not about deprivation. It is about resourcefulness, patience, and knowing where to look for free or inexpensive materials.
You do not need a full renovation to love your outdoor space. Start with one small area—a fire pit seating zone, a repainted dresser bar, or a single well-mulched garden bed.
By focusing on DIY projects, repurposed materials, and plant propagation, you can create a yard with more character than any expensive catalog showroom. Your wallet will thank you, and your neighbors will be amazed at what you built for so little.