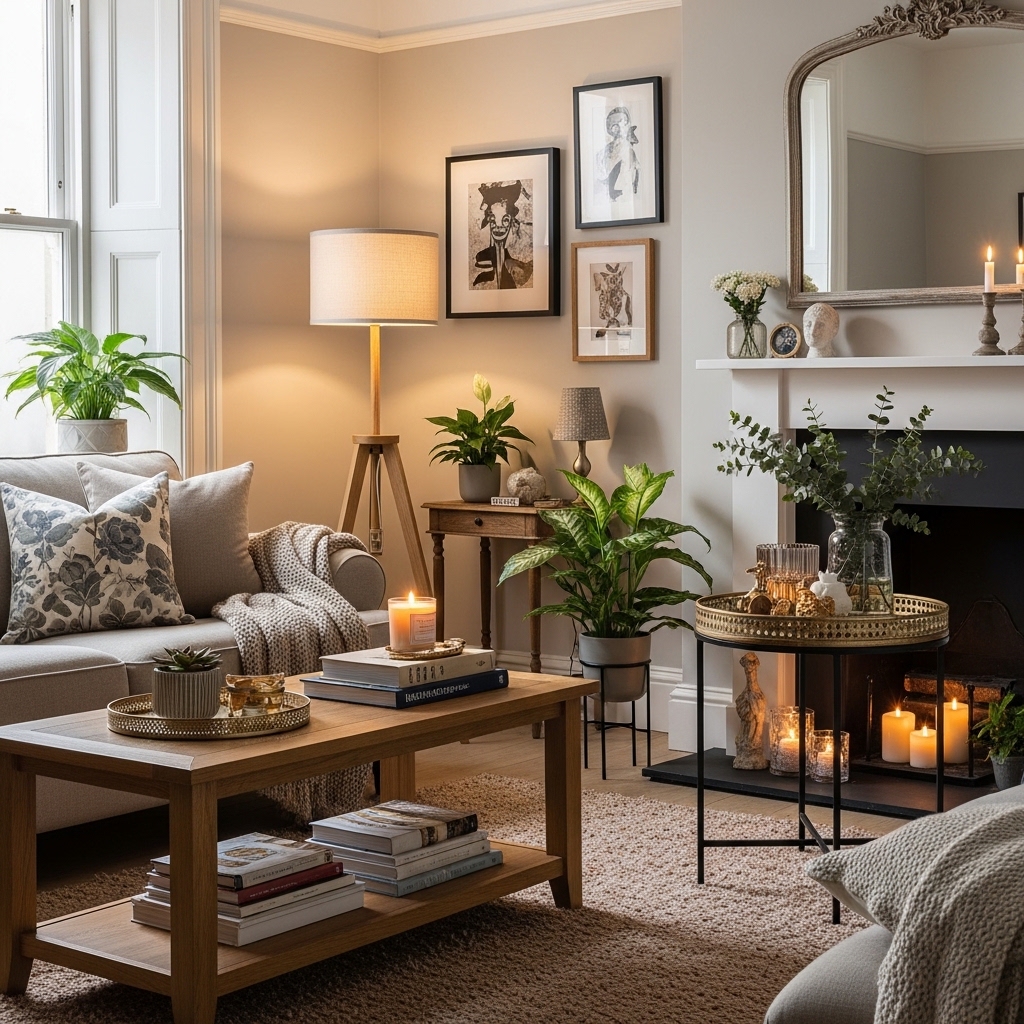
How I Styled My Living Room Step-by-Step: A Complete Walkthrough from Bare Walls to Cozy Retreat
The living room was a blank box. Beige walls. Gray carpet. No furniture. No personality. No idea where to start.
After years of trial and error, the process finally became clear. There is a logical order to styling a room. Start with the largest pieces. End with the smallest details. Work from the floor up.
This guide walks through the exact step-by-step process used to style a living room from nothing. Every decision. Every purchase. Every mistake avoided. Every lesson learned.
Whether you are starting from scratch or reworking an existing space, these steps apply. The same principles work in apartments, houses, rentals, and owned homes. The budget can be adjusted up or down. The process remains the same.
Before Starting: The Empty Room Assessment
Before buying a single item, the room needed an honest assessment. What were the non-negotiables? What could be changed? What had to be worked around?
The Room Audit
The room measured 12 feet by 15 feet with an 8-foot ceiling. A single 4-foot by 5-foot window sat centered on the longest wall. The window faced south, which meant abundant natural light throughout most of the day.
The walls were painted beige. The flooring was gray carpet. Both were rental constraints that could not be changed. The budget for the entire room was set at $800.
The Non-Negotiable Constraints
Every room has limitations. Identifying them early prevents falling in love with items that will not work.
Rental Restrictions
- No painting walls meant color had to come from furniture, rugs, and accessories. Removable wallpaper was an option for future updates.
- No changing flooring meant a large area rug was essential to cover the gray carpet and define the seating area.
- No drilling into certain walls meant tension rods for curtains and command strips for art. Heavy items needed to lean against walls or sit on furniture.
Budget Limitations
The $800 budget had to cover every item in the room. No existing furniture could be used. Everything needed to be purchased or thrifted.
- Sofa: $400 (half the budget, the anchor piece)
- Chairs: $100 (two chairs at $50 each)
- Rug: $150 (large enough for the seating area)
- Coffee table: $80 (multi-functional preferred)
- End tables: $60 (two tables at $30 each)
- Lamps: $60 (two lamps at $30 each)
- Curtains: $50 (two panels and a rod)
- Art: $50 (one large piece or several small ones)
- Pillows and throws: $100 (texture and color)
- Plant and accessories: $50 (life and finishing touches)
Pro Tip: List your constraints before shopping. Keep the list on your phone for reference while browsing.
Mistake to Avoid: Do not buy a single item until the room is measured and constraints are listed.
Step 1: Choose the Largest Piece First (The Sofa)
The sofa is the anchor of any living room. Every other decision flows from it. Size. Color. Style. Placement. Get the sofa wrong and the whole room suffers.
Sofa Selection Criteria
The right sofa for this room needed to meet specific measurements and functional requirements.
- Size (72 inches wide): The longest wall was 12 feet. A 72-inch sofa left 36 inches of space on each side for end tables or walking paths. This was the ideal proportion.
- Depth (32 inches): Deep sofas feel luxurious but eat up floor space. A 32-inch depth was shallow enough to keep walking paths open while still comfortable for lounging.
- Color (light beige): Dark sofas absorb light and make small rooms feel smaller. Light beige reflected the abundant natural light and served as a neutral base for colorful accessories.
- Material (performance fabric): Life happens. Spills happen. Performance fabric resists stains and cleans easily. It was worth prioritizing over cheaper, less durable options.
- Back height (34 inches): A low back kept the sofa from blocking the window. A high back would have interrupted the sightline and reduced natural light.
- Seat depth (22 inches): A seat that is too deep makes conversation difficult. A seat that is too shallow is uncomfortable for lounging. Twenty-two inches hit the sweet spot.
Where to Find Affordable Sofas
New sofas are expensive. Quality new sofas start at $1,000. The budget allowed only $400. Secondhand was the only option.
Best Sources for Budget Sofas
- Facebook Marketplace: The widest selection. Prices are negotiable. The downside is arranging pickup and inspecting for damage or pests.
- Craigslist: Similar to Marketplace but less curated. Cash-only transactions are common. Deals can be found but require more effort.
- Thrift stores: Sofas can be inspected in person. No surprises. The selection is limited and rotates daily.
- Estate sales: High-quality vintage pieces appear at estate sales. The best deals happen on the last day. Timing is everything.
- IKEA As-Is section: New sofas with minor damage or missing parts. Prices are discounted. Sizes and colors are limited.
The Sofa Inspection Checklist
Before buying any used sofa, a thorough inspection prevented costly mistakes.
- Sit on every cushion. Feel for sagging or uneven support. Compare the left and right sides.
- Check for stains under natural light. Use your phone’s flashlight to examine seams and crevices.
- Smell the sofa. Musty odors indicate mold. Urine smells are impossible to remove.
- Check for bed bugs. Look in seams, under cushions, and in crevices. Look for dark spots or live bugs.
- Measure the sofa. Bring a tape measure. Measure width, depth, and height. Measure doorways and hallways.
- Ask about pets and smoking. Pet hair can be cleaned. Smoke smell is permanent.
Where the Sofa Came From
The sofa was not new. It came from Facebook Marketplace. The original owner was moving cross-country and needed to sell quickly.
- Original price: $1,200
- Paid price: $400
- Age: 3 years
- Condition: Excellent. No stains. No sagging. No smells.
- Pickup: Rented a truck from Home Depot for $25. Two people loaded it in 10 minutes.
Pro Tip: Search Facebook Marketplace for “moving sale,” “must sell,” and “leaving town.” These listings have the deepest discounts.
Mistake to Avoid: Never buy a sofa without sitting on it first. Photos hide sagging cushions and broken springs.
Step 2: Define the Layout with the Sofa
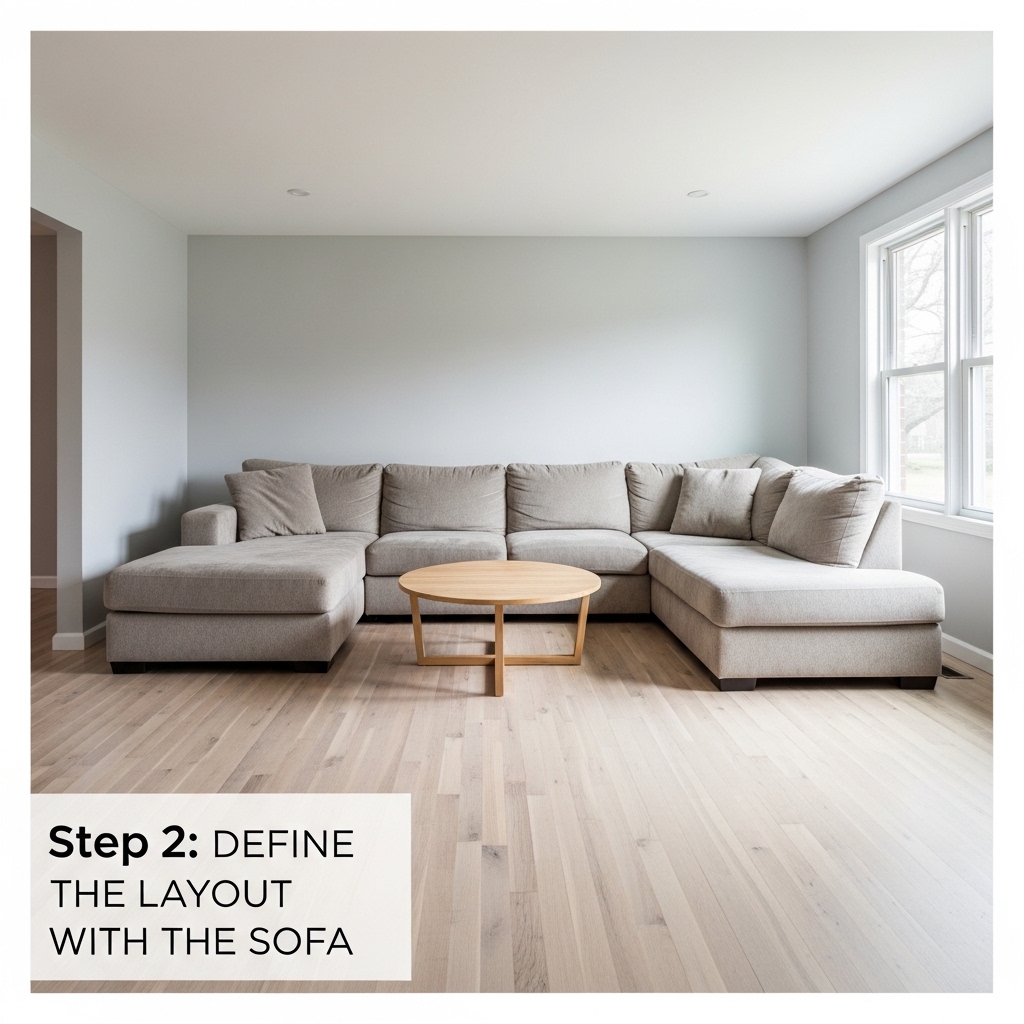
The sofa placement determined everything else. Where would the sofa go? What would face it? Where would people walk?
Layout Options Considered
- Sofa against the longest wall: This would block the window. Light would be reduced. The view would be interrupted. This option was rejected immediately.
- Sofa facing the window: The sofa back would face the room. This feels unwelcoming to anyone entering. The back of a sofa is not attractive. This option was rejected.
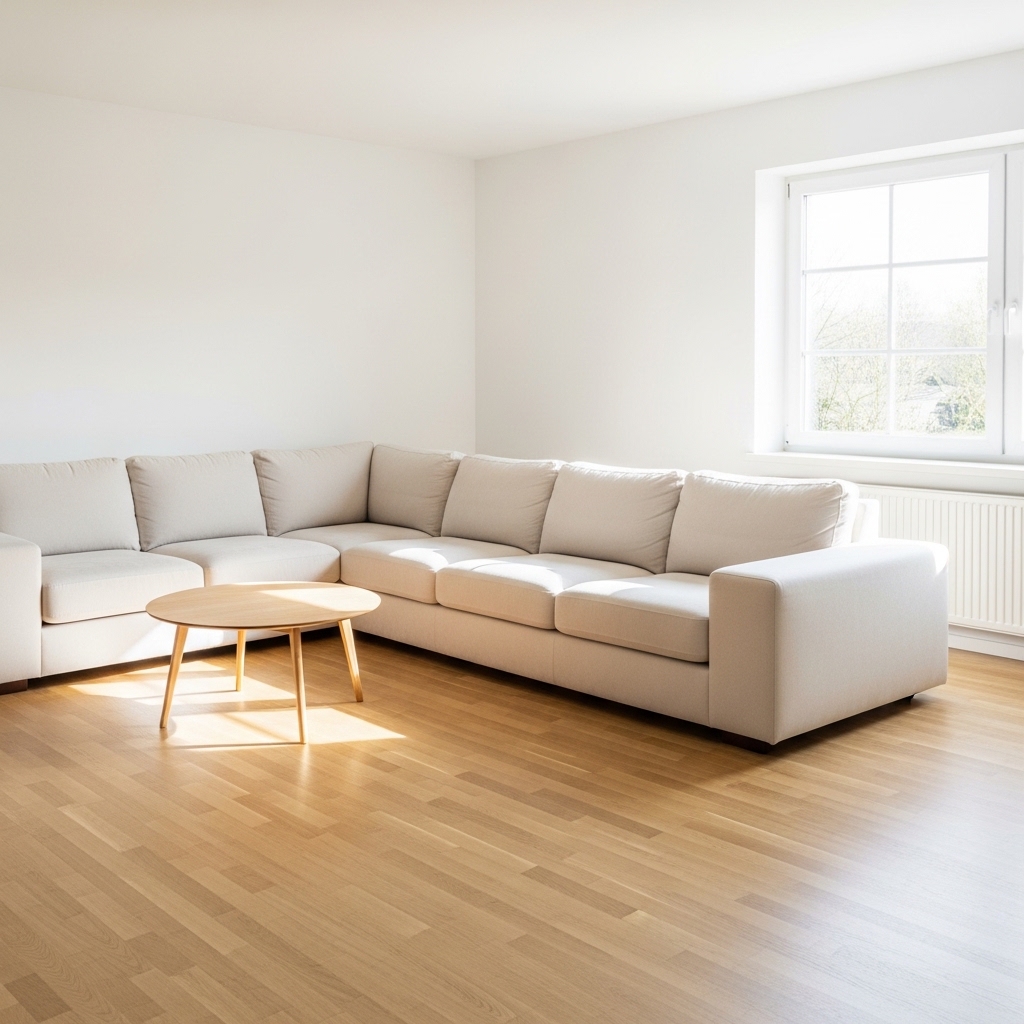
- Sofa perpendicular to the window: The sofa would float 6 inches away from the wall parallel to the window. The window would remain unobstructed. A walking path behind the sofa would create depth. This option was chosen.
The Final Layout
The sofa was placed perpendicular to the window, floating 6 inches away from the wall. The window remained completely unobstructed. Natural light flooded the room.
A walking path behind the sofa connected the entry door to the rest of the house. The gap behind the sofa also created visual depth. The room felt larger than its actual dimensions.
Two chairs faced the sofa at a slight angle. The angle softened the layout. Straight lines feel stiff. Angled furniture feels dynamic and inviting.
The coffee table sat centered between the sofa and the chairs. Every seat had access to the table surface.
The Walking Path Test
After placing the furniture, walking paths were tested.
- Could the door open fully? Yes.
- Was there at least 30 inches of clearance between furniture pieces? Yes.
- Could someone walk behind the sofa without squeezing? Yes.
- Could someone walk between the coffee table and the chairs comfortably? Yes.
Pro Tip: Use painter’s tape to outline furniture footprints on the floor. Live with the tape for a day before moving heavy pieces.
Mistake to Avoid: Do not push all furniture against the walls. Floating pieces create depth and interest.
Step 3: Add Seating Layers
One sofa is not enough for conversation. Two people can sit side by side, but they cannot face each other. Additional seating creates a gathering space.
Chair Selection Criteria
- Quantity (2 chairs): Two chairs opposite the sofa created a balanced, symmetrical layout. Conversation would flow naturally between the sofa and the chairs.
- Size (28 inches wide each): Two 28-inch chairs fit perfectly opposite the 72-inch sofa. The total width of the chairs (56 inches) left breathing room on both sides.
- Color (beige with pattern): Solid beige would have been too matchy. A subtle pattern added visual interest while staying neutral. The pattern also hid inevitable wear and stains.
- Style (armless): Armless chairs have less visual weight than armchairs. They take up less space. They feel less bulky. They were the right choice for a room of this size.
- Price ($50 each): The budget allocated $100 for both chairs. Fifty dollars per chair was the target.
Where the Chairs Came From
The chairs were thrifted on two separate trips. They did not match exactly. This was intentional.
- Chair one: Found at a local thrift store. Beige with a subtle stripe pattern. Excellent condition. $45.
- Chair two: Found at a different thrift store two weeks later. Beige with a small floral pattern. Good condition. $55.
- Total spent: $100
The chairs were different, but they shared the same color family and similar scale. The slight mismatch made the room look collected rather than purchased from a catalog.
Pro Tip: Look for chairs with removable cushion covers. Washable covers extend the life of thrifted furniture.
Mistake to Avoid: Do not buy chairs that are too large for the space. Measure the wall opposite the sofa before shopping.
Step 4: Anchor the Space with a Rug
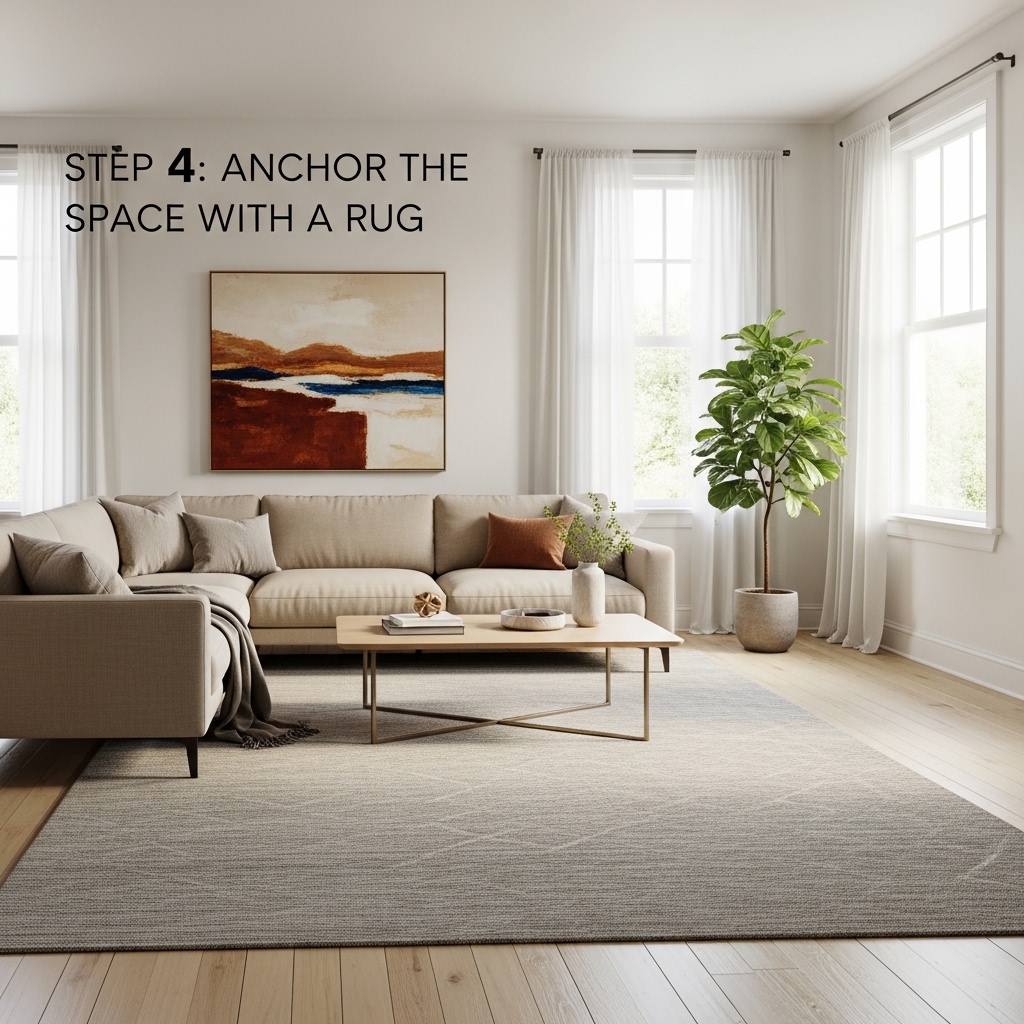
The rug tied everything together. It defined the seating area. It added warmth to the gray carpet. It provided a visual foundation for the furniture.
Rug Selection Criteria
- Size (8 feet by 10 feet): The rug needed to be large enough for the front legs of the sofa and chairs to sit on it. An 8×10 rug accomplished this. The rug extended 6 inches beyond the sides of the sofa.
- Color (cream and beige with black geometric pattern): The neutral cream and beige blended with the sofa and chairs. The black geometric pattern added contrast and visual interest. The black also tied to other black elements in the room.
- Material (wool): Wool rugs are durable. They resist stains. They are naturally flame-resistant. They hold their shape for years. Synthetic rugs flatten and look cheap within months.
- Price ($120): The rug was found on Overstock clearance. Original price was $280.
The Rug Placement Rule
The front legs of the sofa sat on the rug. The front legs of the chairs sat on the rug. The coffee table sat entirely on the rug.
The rug extended 6 inches beyond the sides of the sofa. This created a unified seating area. The furniture felt connected rather than floating separately.
Rug sizes that work for a 12×15 living room:
- 5×7: Too small. The rug would float in the middle of the room. The furniture would not fit on it.
- 8×10: Perfect. The front legs of all seating fit on the rug. The room feels anchored.
- 9×12: Also works. The rug would cover most of the floor. The room would feel larger.
Pro Tip: Use rug tape to keep the rug flat. Curling corners look cheap and create tripping hazards.
Mistake to Avoid: Do not buy a rug that is too small because it is cheaper. A properly sized rug is worth the investment.
Step 5: Add a Coffee Table with Purpose
The coffee table needed to be functional and proportional. It also needed to pull double duty in a small space.
Coffee Table Selection Criteria
- Size (36 inches round): A 36-inch round table fit perfectly between the sofa and chairs. The round shape softened the room. Straight lines everywhere feel stiff. A round table adds organic contrast.
- Height (18 inches): The sofa seat height was 18 inches. The coffee table matched this exactly. Drinks and books were within easy reach from every seat.
- Material (wood with black metal base): The wood added warmth. The black metal base tied to other black elements in the room (lamp bases, picture frames, rug pattern).
- Function (storage ottoman with tray): A standard coffee table offers only a surface. This storage ottoman offered hidden space for blankets and pillows. A large tray on top created a flat surface for drinks.
- Price ($75): The ottoman was thrifted for $60. The tray cost $15 at a discount home store.
Why Round Works
- No sharp corners to bump into
- Easier to navigate around in a small space
- Softens a room full of straight lines
- Encourages conversation (everyone faces the center)
The Tray Trick
A storage ottoman alone is not a good coffee table. The fabric surface is unstable for drinks. Books slide off.
Adding a large tray solves both problems.
- The tray creates a flat, stable surface.
- The tray corrals items (remote, coaster, candle).
- The tray can be removed when the ottoman is needed for seating.
Pro Tip: Choose a tray with a raised lip. The lip prevents items from sliding off when the tray is moved.
Mistake to Avoid: Do not buy a coffee table wider than half the width of your sofa. A table that is too wide cannot be reached from the edges of the sofa.
Step 6: Add End Tables and Lighting
End tables provide surface space for lamps. Lamps provide layered lighting. Layered lighting creates depth and warmth.
End Table Selection Criteria
- Quantity (2 tables): One on each side of the sofa. Symmetry creates balance. Balance feels intentional.
- Size (20 inches wide each): The sofa was 72 inches wide. The wall was 12 feet wide. Twenty-inch end tables fit perfectly on each side.
- Style (wood with drawer): The drawer hid remotes, coasters, and other small items. Visible clutter on end tables looks messy. Hidden clutter looks clean.
- Price ($25 each): Found on Facebook Marketplace. Solid wood construction. Minor scratches that added character.
Lamp Selection Criteria
- Quantity (2 lamps): One on each end table. Symmetry continued.
- Height (26 inches): The lamps needed to be tall enough to provide task lighting for reading. Twenty-six inches placed the bottom of the shade at shoulder height when seated.
- Shade color (cream linen): Linen softens light. Cream is neutral. The shades tied to the cream rug and beige sofa.
- Price ($15 each for bases, $10 each for new shades): The lamp bases were thrifted. The original shades were yellowed and damaged. New shades from IKEA transformed them.
The Three-Light Layer Rule
Every room needs three layers of light.
- Ambient lighting (overhead fixture): General illumination for the whole room. Should be on a dimmer.
- Task lighting (table lamps): Focused light for specific activities like reading or working.
- Accent lighting (floor lamp in corner): Mood lighting that highlights dark corners and adds depth.
This room had all three layers. The overhead light was on a dimmer. The table lamps provided task lighting. A floor lamp in the corner filled a dark spot.
Pro Tip: Use warm white bulbs (2700K) in all living room lamps. Consistent color temperature creates cohesion.
Mistake to Avoid: Do not use lamps that are too short. The bottom of the lampshade should be at shoulder height when seated.
Step 7: Add Curtains for Softness
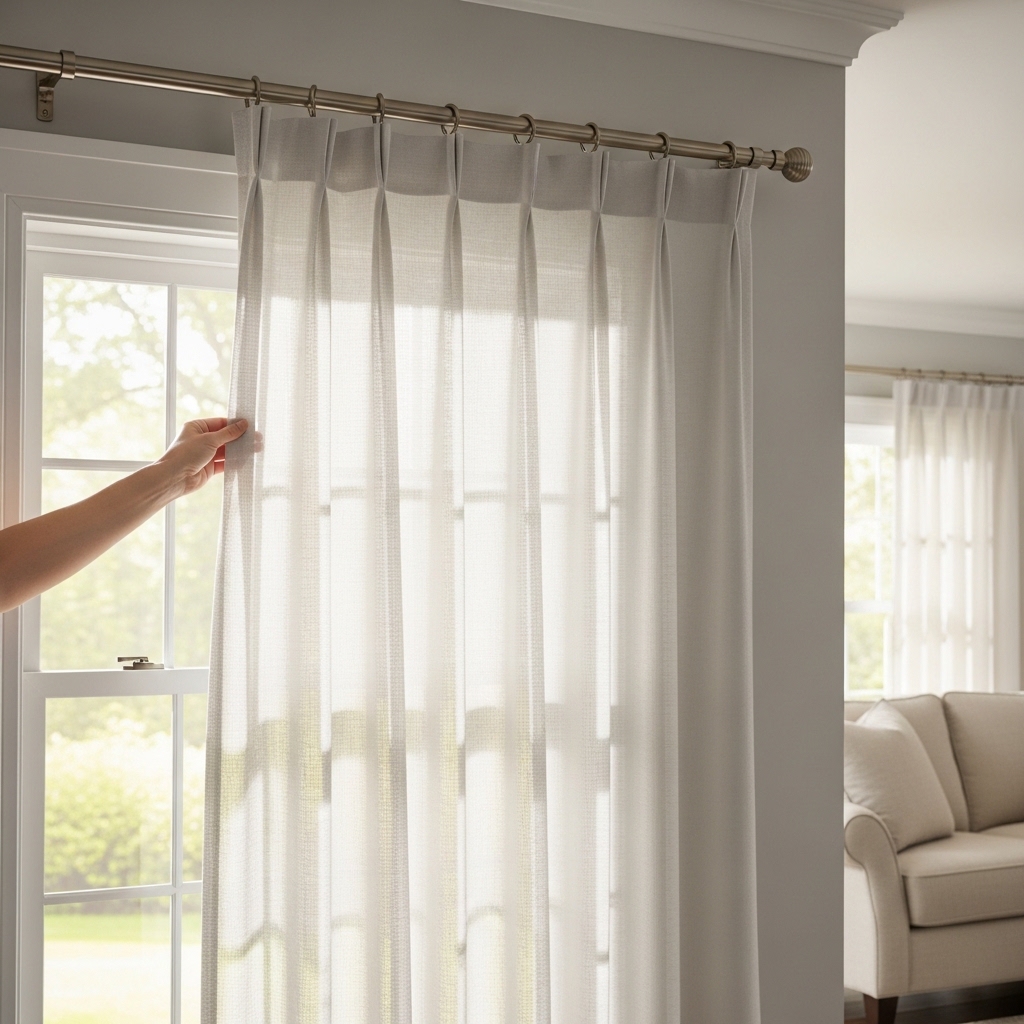
Curtains added softness to the hard window frame. They made the room feel finished. They also made the window look larger.
Curtain Selection Criteria
- Length (96 inches): The window was 60 inches tall. The ceiling was 96 inches tall. Ninety-six-inch curtains kissed the floor perfectly.
- Width (50 inches per panel, 2 panels): The window was 48 inches wide. Two 50-inch panels provided fullness when closed and stacked beautifully when open.
- Color (cream linen): Linen has natural texture. Texture adds visual interest without adding color. Cream tied to the rug and sofa.
- Lining (light-filtering): Blackout lining would have made the room too dark during the day. Light-filtering lining provided privacy while letting natural light through.
- Price ($40 for both panels): IKEA. Linen curtains at other retailers cost $100+ per panel.
The Curtain Hanging Rule
- Rod height: 4 inches below the ceiling (92 inches from the floor)
- Rod width: 8 inches beyond the window frame on each side (64 inches total)
- Curtain length: Kissing the floor (not hovering, not puddling)
- Number of panels: 2 panels, stacked on the sides of the window (not covering the glass)
Why this works:
- High rods draw the eye upward. The ceiling feels taller.
- Wide rods make the window look larger.
- Curtains that kiss the floor look tailored and intentional.
- Curtains stacked off the window let in maximum light.
Pro Tip: Use curtain rings with clips. Rings slide easily. Clips make adjusting length simple.
Mistake to Avoid: Do not buy curtains that are too short. Curtains that hover above the floor look cheap and unfinished.
Step 8: Add Art and Wall Decor
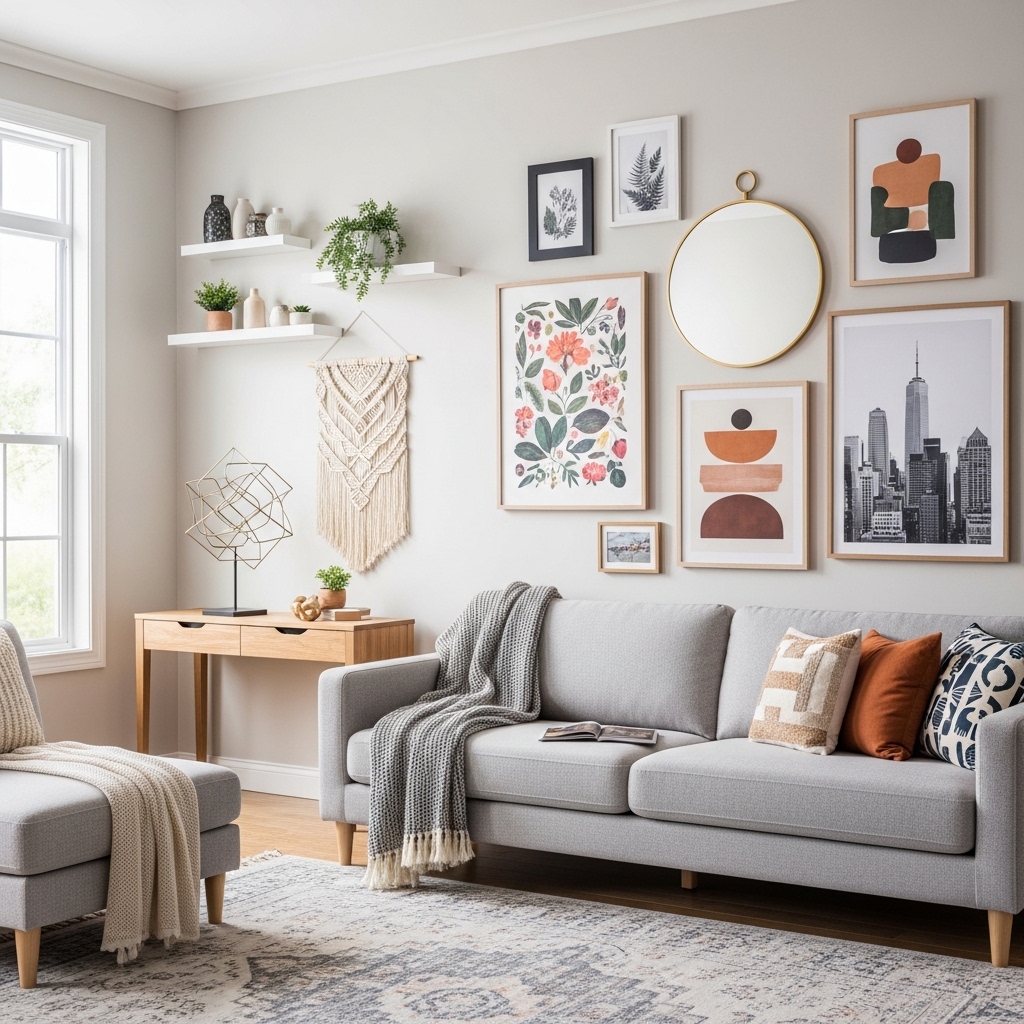
Art added personality and color. Empty walls felt cold. Art made the room feel lived in.
Art Selection Criteria
- Size (one large piece, 36 inches by 48 inches): The wall above the sofa needed a large piece. Small art would have looked lost and insignificant.
- Subject (abstract landscape): Neutral colors (cream, beige, sage green, soft black). The colors pulled from the rug and pillows. The abstract style felt modern but not trendy.
- Frame (thin black wood): Black added contrast. The thin profile kept the frame from overwhelming the art. Black tied to the lamp bases and rug pattern.
- Price ($0 for art, $30 for frame): The art was a calendar page from a previous year. The frame was thrifted.
Where to Find Affordable Art
- Calendar pages: Large format calendars (16×20 or larger) become instant art at the end of the year.
- Book pages: Vintage botany, bird, or architecture books have beautiful illustrations.
- Fabric: Stretch interesting fabric over a canvas frame for custom art.
- Your own photos: Print and frame your best travel or nature photos.
- Thrift stores: Frames are cheap. Swap in new art. Keep the frame.
The Art Placement Rule
The bottom of the art was hung 8 inches above the back of the sofa. The art and sofa became a single visual unit.
Why this works:
- Art that floats too high above the sofa feels disconnected.
- Art that sits too low crowds the sofa.
- Eight inches is the sweet spot.
Pro Tip: Use painter’s tape to outline art placement before hammering nails. Adjust the tape until the placement feels right.
Mistake to Avoid: Do not hang art based on standing eye level in an empty room. Art should relate to the furniture below it.
Step 9: Add Pillows and Throws
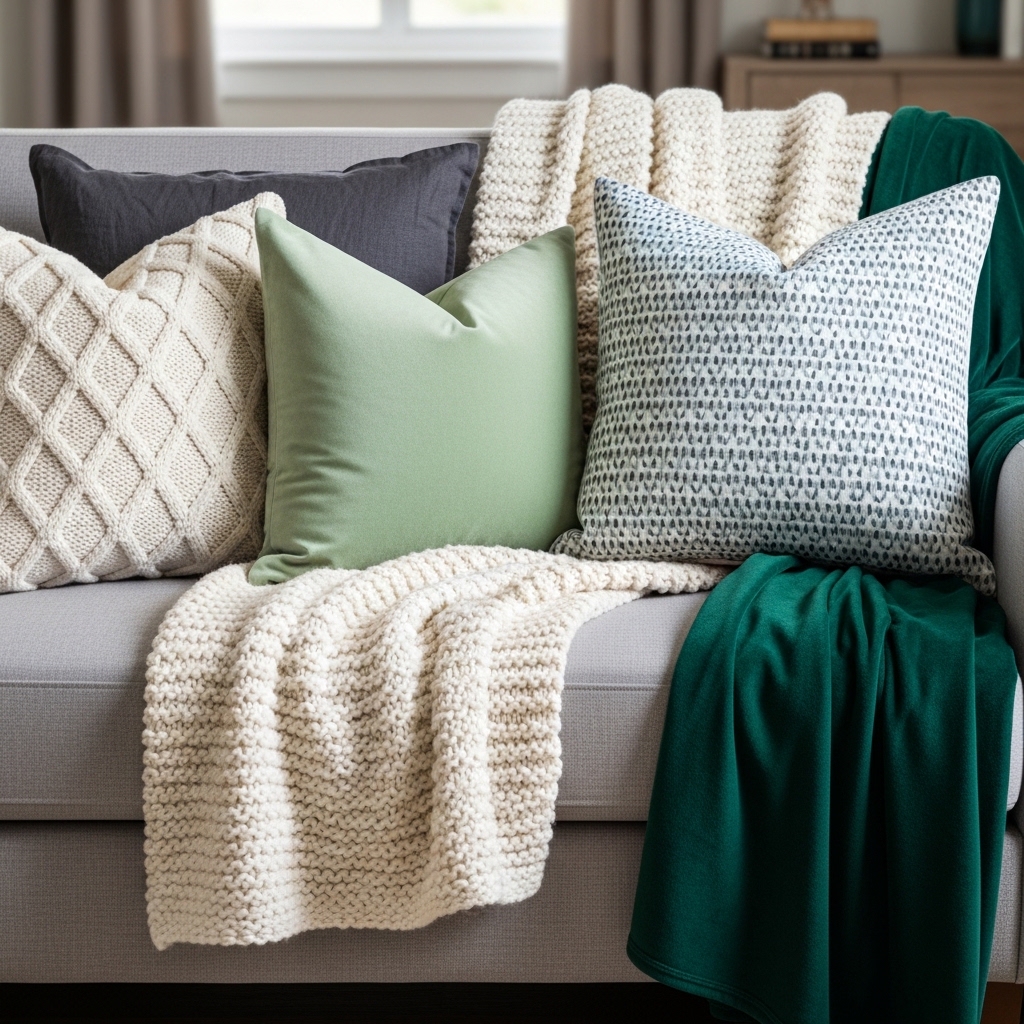
Pillows and throws added color, texture, and comfort. They were the easiest and cheapest way to inject personality.
Pillow Selection Criteria
- Quantity (4 pillows): Two on the sofa (one on each end). One on each chair. None in the middle of the sofa where people actually sit.
- Colors (mustard yellow, navy, cream): Mustard yellow added warmth. Navy added depth. Cream tied to the sofa and rug.
- Sizes (mix of 20 inches and 22 inches): Varied sizes look more collected than matching sizes. A 22-inch pillow next to a 20-inch pillow creates visual rhythm.
- Inserts (feather): Feather inserts are plump. They hold their shape. They can be fluffed. Polyester inserts flatten within months.
- Price ($10 per cover, $8 per insert): Covers from Amazon. Inserts from IKEA. Total $72 for 4 pillows.
The Pillow Arrangement
- On the sofa: Two pillows. One on the far left end. One on the far right end. The middle remained empty for actual sitting.
- On the chairs: One pillow centered on each chair.
Throw Blanket Selection
- Color: Mustard yellow (pulled from the pillows)
- Material: Cotton knit (textured, cozy, washable)
- Placement: Draped casually over one arm of the sofa
- Price: $20 (Target clearance)
Pro Tip: Buy pillow inserts 2 inches larger than the cover. A 20-inch cover needs a 22-inch insert for a plump, expensive look.
Mistake to Avoid: Do not use too many pillows. Six or more pillows make the sofa unusable for seating.
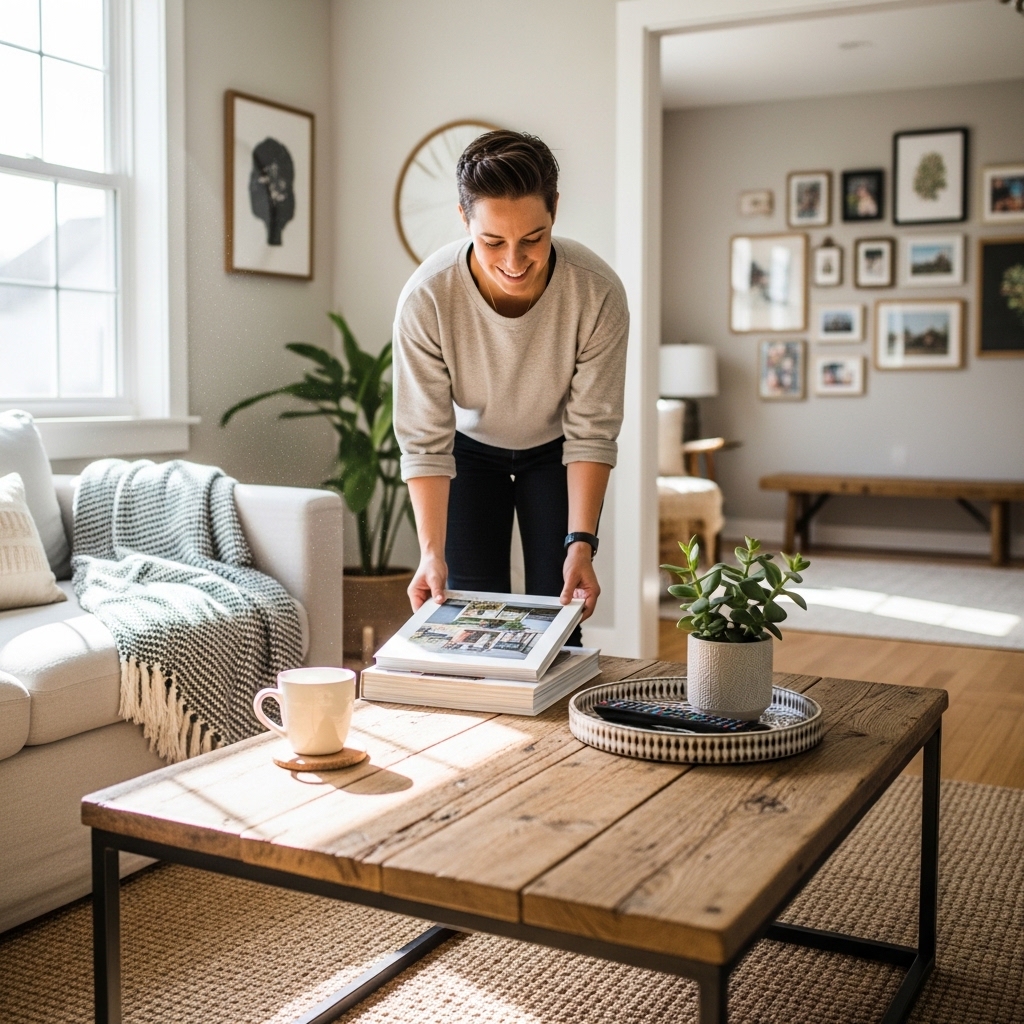
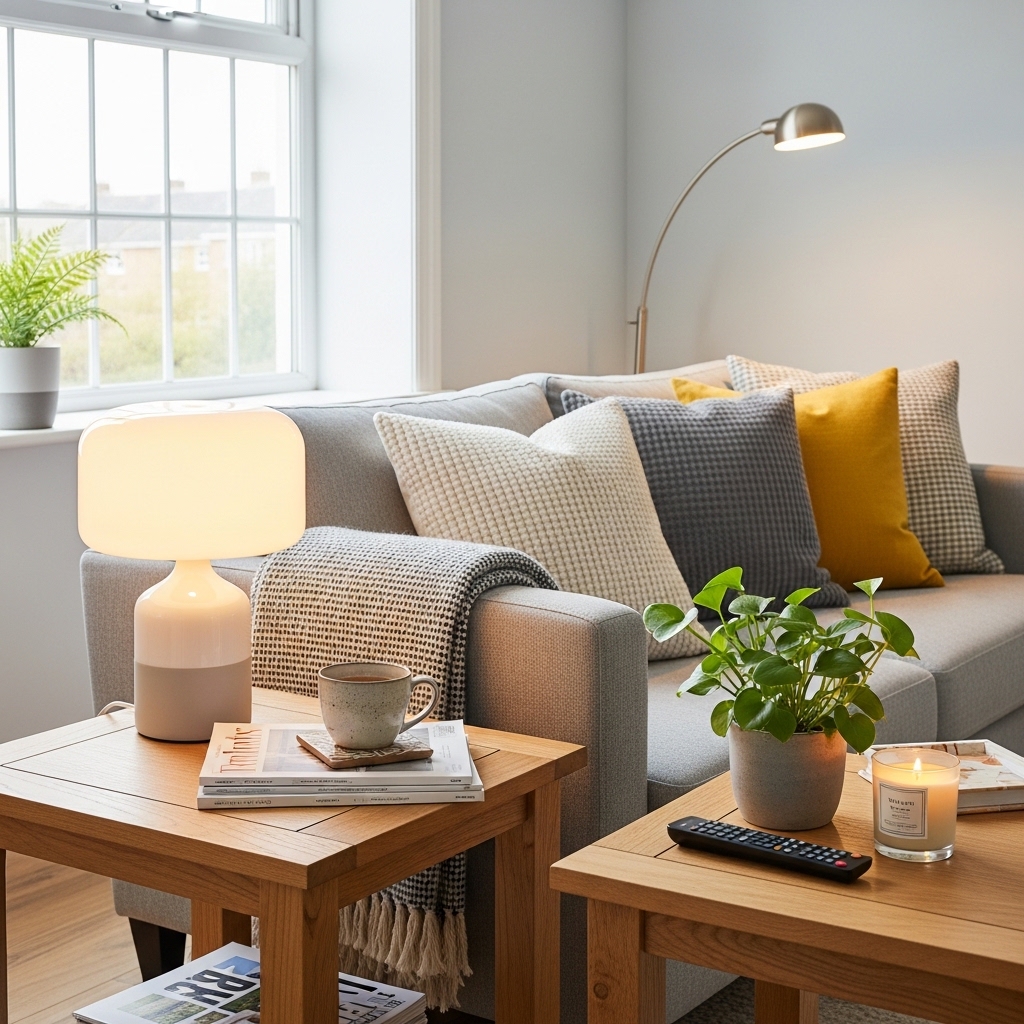
Step 10: Add Finishing Details and Accessories
The final layer was small details that made the room feel intentional rather than assembled.
Coffee Table Styling
A large tray corralled the items. Inside the tray:
- A stack of 3 books (added height and visual interest)
- A small vase with a single stem (added life and organic shape)
- A candle (added warmth and soft light in the evening)
End Table Styling
Each end table held:
- The table lamp (essential for task lighting)
- A small dish (caught keys, remotes, or loose change)
- A small plant (added life to every corner)
Corner Fillers
- Left of the sofa: A tall arc floor lamp. Filled the empty corner. Added accent lighting. Thrifted for $20.
- Right of the sofa: A tall fiddle leaf fig plant. Added height and life. Facebook Marketplace find for $25.
- Behind the chairs: A narrow console table. Added surface space for a small lamp and a bowl of coasters. Facebook Marketplace for $30.
Pro Tip: Use the rule of three for decor groupings. Three items in different heights and textures look intentional. Two items look like a pair. Four items look scattered.
Mistake to Avoid: Do not fill every corner. Empty space is not wasted space. Empty space gives the eye a place to rest.
Step 11: Edit and Adjust
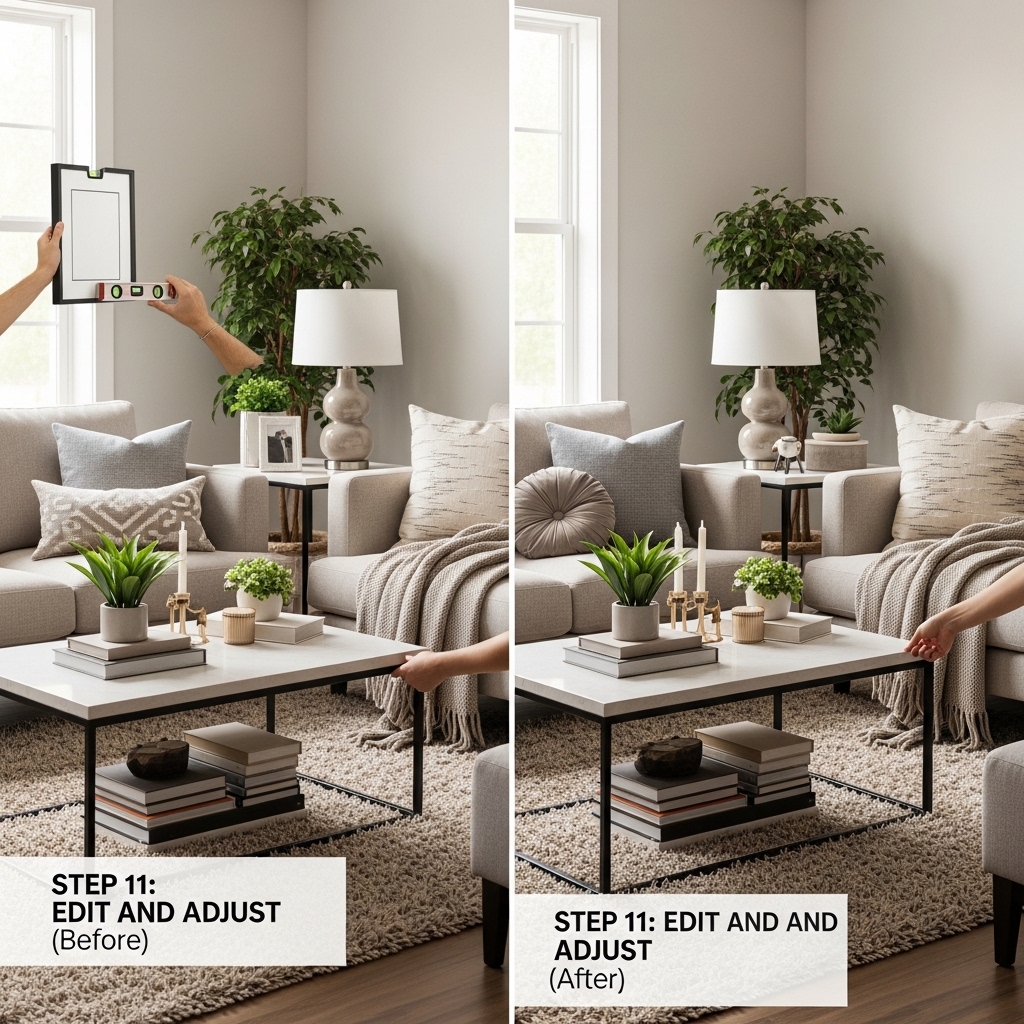
The room was styled. Then came the editing. Removing items that did not work. Adjusting what remained.
The Editing Checklist
- Remove one item from every surface. The room will look better.
- Step back and take a photo. Photos reveal clutter that eyes have learned to ignore.
- Live with the room for a week. Make note of daily frustrations. Adjust accordingly.
What Was Removed
- One pillow from the sofa (4 pillows became 3, then 3 became 2)
- A second vase from the coffee table (1 vase was enough)
- A stack of magazines from the console table (moved to a basket)
What Was Adjusted
- The arc lamp was moved 6 inches to the left (better light distribution)
- The rug was rotated 90 degrees (fit the room better in the other orientation)
- The art was lowered by 2 inches (felt more connected to the sofa)
Pro Tip: Take a photo of the room after each change. Compare photos side by side. The camera sees what your eyes miss.
Mistake to Avoid: Do not fall in love with the first arrangement. Move things. Try different layouts. The best arrangement is rarely the first one.
Final Before and After Comparison
| Element | Before | After |
|---|---|---|
| Sofa | None | 72″ beige performance fabric sofa (Facebook Marketplace, $400) |
| Chairs | None | 2 armless beige chairs (thrifted, $100 total) |
| Rug | Gray carpet only | 8’x10′ cream and beige wool rug with black geometric pattern (Overstock, $120) |
| Coffee table | None | 36″ round storage ottoman with tray (thrifted, $75 total) |
| End tables | None | 2 wood end tables with drawers (Facebook Marketplace, $50 total) |
| Lamps | None | 2 thrifted lamp bases with new IKEA shades ($50 total) |
| Curtains | None | 2 cream linen panels (IKEA, $40) |
| Art | None | Large framed abstract landscape (calendar page + thrifted frame, $30) |
| Pillows | None | 4 pillows with feather inserts ($72) |
| Throw blanket | None | Mustard yellow cotton knit (Target clearance, $20) |
| Floor lamp | None | Tall arc lamp (thrifted, $20) |
| Plant | None | Fiddle leaf fig (Facebook Marketplace, $25) |
| Console table | None | Narrow table behind chairs (Facebook Marketplace, $30) |
Total spent: $1,032 (slightly over the $800 budget due to the console table and plant)
Time invested: Approximately 3 months from empty room to finished space
Key Takeaways from This Living Room Styling Journey
Start with the Sofa
The sofa is the most expensive and largest piece. Choose it first. Everything else works around it. Buy the wrong sofa and the whole room suffers.
Wait for the Right Pieces
Rushing leads to regret. The right sofa appeared after 6 weeks of searching. The right chairs appeared after 4 weeks. The right rug appeared after 2 weeks. Patience paid off.
Thrift and Marketplace Are Goldmines
New price for everything in this room would have been over $3,000. The total spent was just over $1,000 by shopping secondhand. The savings allowed for better quality pieces.
Layers Create Depth
One light source is not enough. One texture is not enough. One color is not enough. Layers make a room feel rich. Layers make a room feel designed.
Empty Space Is Not Wasted
Not every wall needs art. Not every surface needs decor. Not every corner needs furniture. Empty space gives the eye a place to rest. A room without empty space feels chaotic.
Edit Ruthlessly
Remove one item from every surface. The room will look better. Take a photo. Photos reveal clutter. Remove another item. The room will look even better.
Frequently Asked Questions
How long did it take to style this living room from start to finish?
Approximately 3 months. The sofa took the longest to find. Once the sofa was in place, the remaining pieces came together within 6 weeks.
What was the most expensive item?
The sofa at $400. This was intentional. Half the budget went to the anchor piece. The remaining items filled in around it.
What was the best deal?
The rug. Originally $280, paid $120 on Overstock clearance. The second best deal was the art. A free calendar page in a $30 thrifted frame looks like a $300 piece.
Could this be done on a smaller budget?
Yes. The sofa could be found for $200 instead of $400. The chairs could be $25 each instead of $50. The rug could be $80 instead of $120. A $500 budget is realistic with more patience and flexibility.
What would you do differently?
The console table behind the chairs was an unnecessary purchase. The room worked without it. The $30 could have been saved or spent on a higher quality floor lamp.
Conclusion
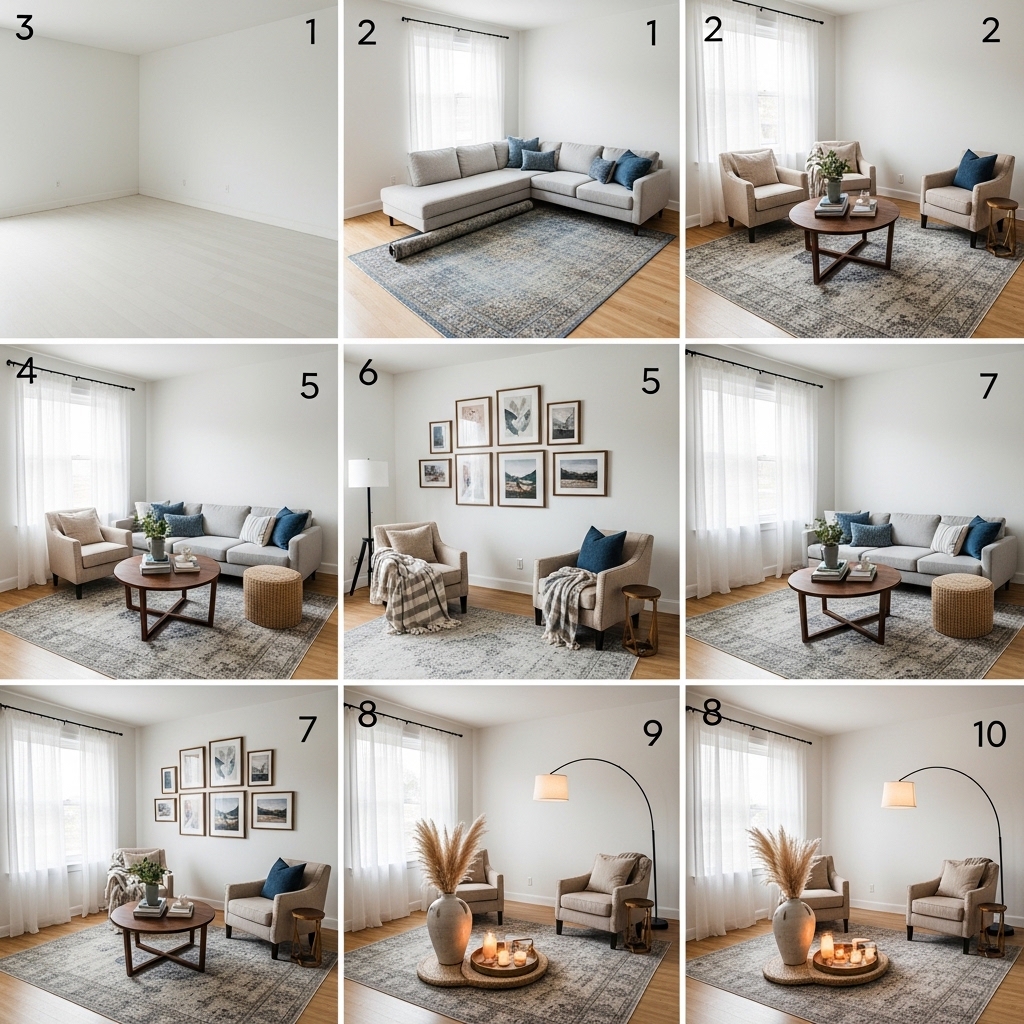
A living room styled step-by-step is not about buying everything at once. It is about making intentional decisions in the right order.
Start with the sofa. Define the layout. Add seating layers. Anchor with a rug. Add a coffee table. Add end tables and lighting. Add curtains. Add art. Add pillows and throws. Add finishing details. Edit and adjust.
The room went from bare walls to cozy retreat. The total cost was just over $1,000. The time invested was 3 months. The satisfaction is daily.
The most important lesson: A room is never truly finished. It evolves. Styles change. Needs change. The best rooms grow with the people who live in them.
Start with one step today. Measure the room. Search for a sofa. Tape out a layout.
Small steps add up to complete transformations. The living room of your dreams is within reach.
Take back your living room starting today. Step by step. Piece by piece. Decision by decision.