Before & After: Real Room Transformation Story
The room was a disaster. Not in a charming, messy way. In a way that made me avoid spending time there. Clothes everywhere. Boxes stacked in corners. A bed that barely fit. No style. No personality. No peace.
After six months of trial and error, the room transformed. Not with expensive furniture. With smart choices and patience.
This is the real before and after story of a small bedroom transformation. Every decision. Every mistake. Every lesson.
Before: The Problem Room
The bedroom measured 9 feet by 10 feet. It had one window facing north. It had one closet. It had no style.
The Before Photos (What the Camera Captured)
| Problem | What It Looked Like | Why It Happened |
|---|---|---|
| Cluttered surfaces | Nightstand covered, dresser covered | No landing zones, too much stuff |
| Dark corners | Corner by window was empty and dark | No floor lamp, no plant |
| Wrong scale bed | Queen bed in a 9×10 room | Bought before measuring |
| No cohesive style | Mismatched colors, patterns, textures | Bought pieces without a plan |
| Poor lighting | One overhead light only | Did not know about layered lighting |
The Before Assessment
| Element | Before State | Priority |
|---|---|---|
| Bed placement | Centered on longest wall | High (fix first) |
| Storage | Low dresser + boxes on floor | High |
| Lighting | One overhead light | High |
| Surfaces | Cluttered | Medium |
| Wall color | Beige (rental, cannot change) | Low (constraint) |
Pro Tip: Take before photos from every angle. You will need them to appreciate the transformation.
Mistake to Avoid: Do not start buying things before assessing what is wrong. Assessment first. Shopping second.
The Transformation Process: Step by Step
Step 1: Empty the Room Completely
Everything came out. Bed. Dresser. Boxes. Clothes. Everything.
What came out:
- Queen bed frame and mattress
- Low dresser (6 drawers)
- 4 boxes of miscellaneous items
- 3 floor lamps (none worked well)
- 2 piles of clothes on the floor
The empty room feeling: The room felt huge. The potential was visible. The goal was not to fill it back up. The goal was to put back only what belonged.
Pro Tip: Take a photo of the empty room. Refer to it when tempted to put back items that do not belong.
Mistake to Avoid: Do not start putting items back immediately. Live with the empty room for a few hours.
Step 2: Sort Everything into Four Piles
Each item removed from the room went into one of four piles.
| Pile | Definition | Number of Items |
|---|---|---|
| Keep | Used regularly, loved, needed | 40 items |
| Donate | Good condition, not used | 60 items |
| Trash | Broken, stained, unusable | 15 items |
| Relocate | Belongs in another room | 10 items |
What was donated:
- 30 clothing items (not worn in over a year)
- 15 books (already read, unlikely to read again)
- 10 decor items (no longer fit the style)
- 5 small electronics (working but not needed)
Pro Tip: Be ruthless with the donate pile. If an item has not been used in the past year, it does not belong in the room.
Mistake to Avoid: Do not create a “maybe” pile. Maybe piles become keep piles. Make a decision on every item.
Step 3: Clean Every Surface
With the room empty, cleaning was finally easy. No items to move around. No dusting around clutter.
The deep clean checklist:
- Walls: Damp microfiber cloth (10 minutes)
- Baseboards: All-purpose cleaner and rag (10 minutes)
- Floors: Vacuum, then mop (15 minutes)
- Window: Glass cleaner and squeegee (10 minutes)
- Closet interior: Vacuum and wipe down (15 minutes)
The difference cleaning made: The room felt fresh. The room smelled clean. The empty space felt inviting rather than sad.
Pro Tip: Clean top to bottom. Start with ceilings and walls. End with floors. Dirt falls downward.
Mistake to Avoid: Do not skip baseboards and corners. These areas collect dust that becomes visible once the room is organized.
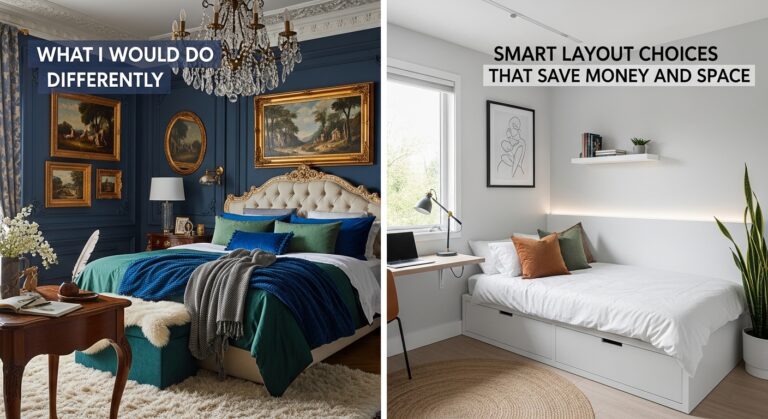
Step 4: Choose a New Layout
With the room empty and clean, it was time to plan. Where should the bed go? What furniture was needed?
The layout options considered:
| Layout | Pros | Cons | Verdict |
|---|---|---|---|
| Bed centered on longest wall | Symmetrical | Wastes floor space | Rejected |
| Bed in corner | Maximizes floor space | Only one nightstand | Chosen |
| Bed angled in corner | Interesting, dynamic | Difficult to make bed | Rejected |
The final layout:
- Bed in corner (headboard against 10-foot wall, side against 9-foot wall)
- Tall bookshelf on opposite wall (vertical storage)
- Small nightstand next to bed (only one)
- Floor lamp in corner opposite bed
- Wall-mounted sconce above nightstand
Pro Tip: Use painter’s tape to outline furniture footprints before moving heavy pieces. Adjust the tape until the layout feels right.
Mistake to Avoid: Do not push all furniture against the walls. Floating pieces create depth.
Step 5: Add Furniture and Storage
With the layout planned, it was time to add furniture back. Only the essentials.
The furniture that stayed or was added:
| Furniture | Before | After | Source | Cost |
|---|---|---|---|---|
| Bed | Queen centered | Queen in corner | Already owned | $0 |
| Dresser | Low, wide (donated) | Tall bookshelf | Facebook Marketplace | $40 |
| Nightstand | One (too large) | One (smaller) | Thrift store | $15 |
| Chair | None | Small armchair | Thrift store | $25 |
The furniture that was removed:
- Low dresser (donated)
- Second nightstand (donated)
- Floor lamps (3, all donated, replaced with one good lamp + sconce)
Pro Tip: Buy furniture that serves multiple purposes. The tall bookshelf provides storage and display. The armchair provides seating and a place to put clothes.
Mistake to Avoid: Do not buy furniture in sets. Buy only what fits and what you need.
Step 6: Add Lighting
The room had one overhead light. It was harsh. It was dim. It was the only source of light.
The lighting additions:
| Light | Placement | Cost | Source |
|---|---|---|---|
| Wall sconce | Above nightstand | $25 | Amazon (plug-in) |
| Floor lamp | Corner opposite bed | $20 | Thrift store |
| Dimmer switch | Overhead light | $15 | Hardware store |
The lighting before and after:
| Time of Day | Before | After |
|---|---|---|
| Morning | Overhead light only, harsh | Natural light + sconce (off), bright |
| Afternoon | Dark (north-facing) | Floor lamp on, warm glow |
| Evening | Overhead light only, harsh | Sconce + floor lamp + dimmed overhead |
Pro Tip: Use warm white bulbs (2700K) in all bedroom lamps. Cool light signals daytime. Warm light signals relaxation.
Mistake to Avoid: Do not rely on the overhead light alone. Overhead light is too harsh for a cozy bedroom.
Step 7: Add Textiles
Textiles add softness, warmth, and color.
The textile additions:
| Textile | Before | After | Cost |
|---|---|---|---|
| Bedding | Old, mismatched sheets | Cream sheets, beige quilt, knitted throw | $80 |
| Rug | None | 8×10 cream and beige wool rug | $120 |
| Curtains | None | Cream linen curtains on tension rod | $50 |
| Pillows | 2 flat pillows | 2 sleeping pillows + 2 Euro pillows + 2 decorative | $60 |
The bedding layering formula:
- Bottom sheet (cream cotton)
- Top sheet (cream cotton)
- Light blanket (beige quilt)
- Duvet (cream, folded at foot of bed)
- Throw blanket (cream knitted, draped over chair)
Pro Tip: Layer textures. Smooth cotton sheets + quilted blanket + knitted throw. The contrast adds visual interest.
Mistake to Avoid: Do not use too many decorative pillows. More than 2-3 makes the bed unusable for sleeping.
Step 8: Add Art and Decor
Empty walls felt cold. Art added personality and color.
The art and decor additions:
| Item | Placement | Cost | Source |
|---|---|---|---|
| Large art | Above dresser | $15 (frame) + $0 (calendar page) | Thrifted frame + free art |
| Small art | Above nightstand | $8 (frame) + $0 (print) | Thrift store |
| Plant | Corner by window | $15 | Nursery + thrifted pot |
| Mirror | On closet door | $10 | Thrift store |
The art placement rule:
- Large art: Center at 57 inches from floor
- Small art: Bottom 6 inches above nightstand
Pro Tip: Use calendar pages for affordable large art. At the end of the year, 12×12 and 16×20 calendars go on sale for $5-10.
Mistake to Avoid: Do not hang art too high. Art that is too high feels disconnected from the furniture below it.
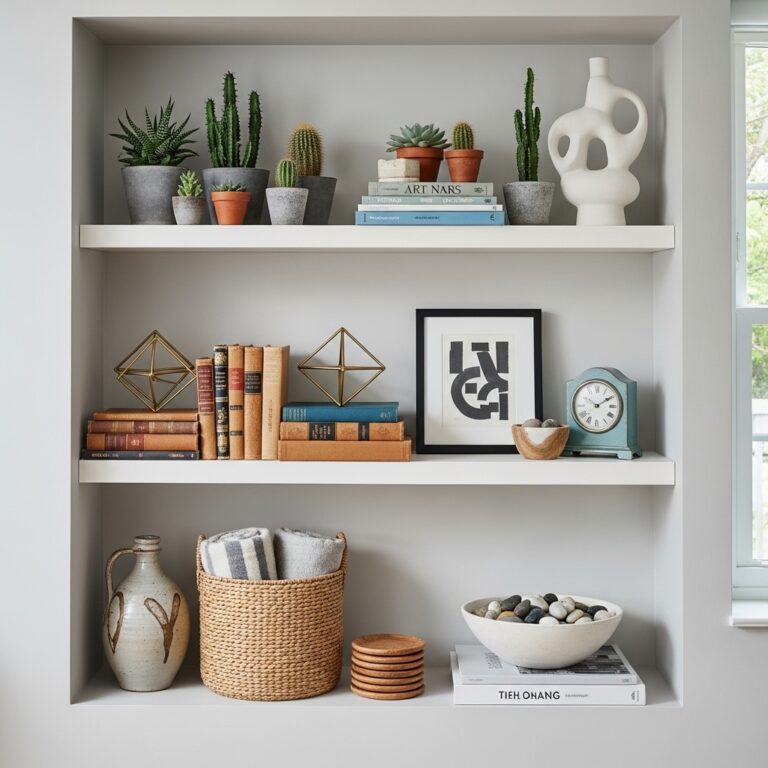
Step 9: Style Surfaces
The final step was styling. A few items on each surface. Nothing more.
The surface styling formula:
| Surface | Items | Why |
|---|---|---|
| Nightstand | Lamp, book, small dish | Lamp for light, book for reading, dish for jewelry |
| Dresser | Plant, framed photo, small bowl | Plant for life, photo for personal touch, bowl for keys |
| Bookshelf | Books, baskets, a few decor items | 70% full, 30% empty |
The rule of three: Group decor in threes. Three items on the dresser. Three items on the nightstand. Three items on the bookshelf shelf.
Pro Tip: Remove one item from every surface. The room will look better.
Mistake to Avoid: Do not fill every inch of shelf space. Empty space is essential for a calm look.
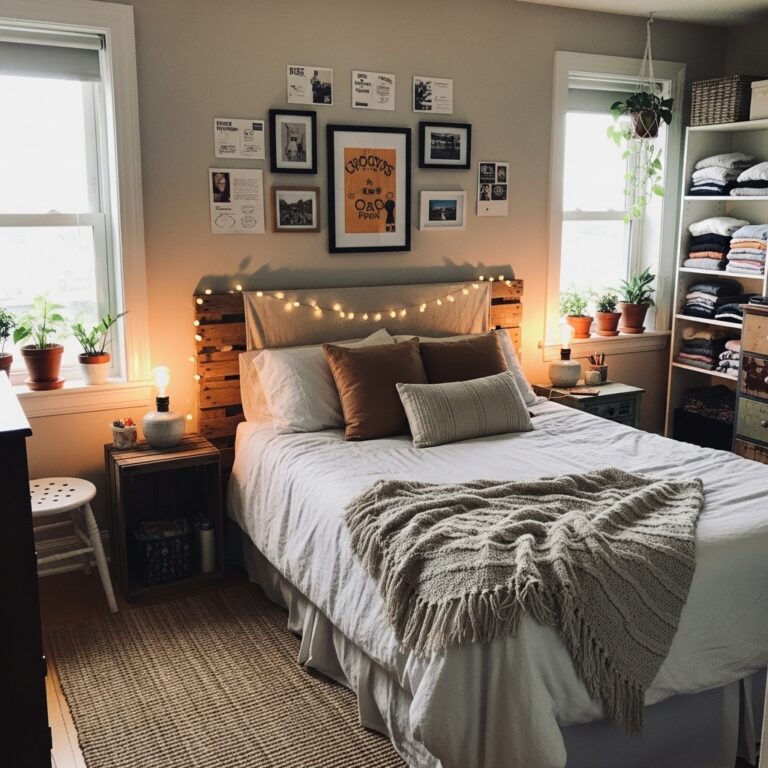
After: The Transformed Room
The After Photos (What the Camera Captured)
| Element | Before | After |
|---|---|---|
| Bed placement | Centered, blocking walking path | Corner-anchored, clear walking path |
| Storage | Low dresser + boxes on floor | Tall bookshelf + nothing on floor |
| Lighting | One overhead light | Sconce + floor lamp + dimmer |
| Surfaces | Cluttered (12+ items) | Curated (3-5 items per surface) |
| Textiles | Old bedding, no rug | Layered bedding, large rug |
| Art | None | Large art above dresser, small art above nightstand |
| Plants | None | Snake plant in corner |
| Overall feel | Cramped, dark, cluttered | Open, bright, calm |
The Before and After Comparison Table
| Metric | Before | After | Improvement |
|---|---|---|---|
| Visible floor space | 40% | 75% | +35% |
| Time to find keys | 3 minutes | 10 seconds | -2 min 50 sec |
| Time to clean the room | 45 minutes | 15 minutes | -30 min |
| Items donated | 0 | 60 | Decluttered |
| Items trashed | 0 | 15 | Removed |
| Stress level (1-10) | 7 | 2 | -5 points |
| Satisfaction (1-10) | 3 | 9 | +6 points |
Total spent on transformation: $473
Time invested: 3 weekends (decluttering, cleaning, shopping, arranging)
Items donated value: Approximately $200 (tax deduction)
What Worked (Strategies to Copy)
| Strategy | Why It Worked | Cost |
|---|---|---|
| Corner bed placement | Maximized floor space | $0 |
| Tall bookshelf instead of low dresser | Same footprint, triple storage | $40 |
| Wall-mounted sconce | Freed nightstand space | $25 |
| Large rug (8×10) | Unified the room | $120 |
| Layered bedding | Added coziness without clutter | $80 |
| The 24-hour rule for purchases | Prevented impulse buys | $0 |
| Decluttering before shopping | Avoided buying unnecessary storage | $0 |
Pro Tip: Always declutter before shopping. You cannot organize clutter. You can only remove it.
Mistake to Avoid: Do not buy storage bins before decluttering. Bins purchased early are often the wrong size for what remains.
What Failed (Strategies to Avoid)
| Strategy | Why It Failed | Lesson |
|---|---|---|
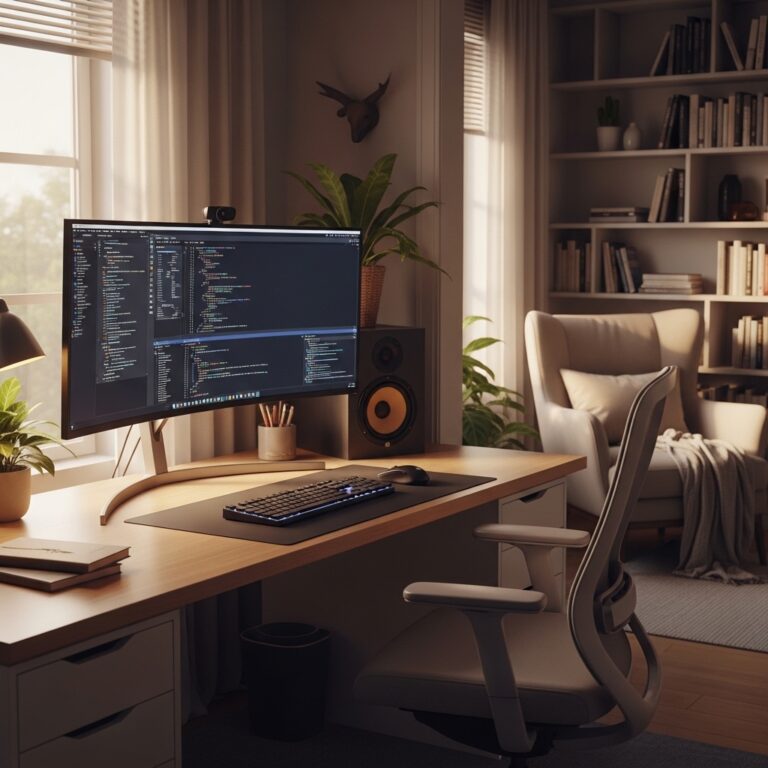
| Folding desk | Never folded, became clutter | Be honest about your habits |
| Under-bed bins on carpet | Too hard to access | Only use on hardwood |
| Matching nightstands | Only one fit | Buy what fits, not what matches |
| Decorative ladder | No function, wasted floor space | Every item must earn its footprint |
Pro Tip: Before buying any item, ask: “What purpose does this serve?” If the answer is “it looks nice,” reconsider.
Mistake to Avoid: Do not buy decorative items that take up floor space in a small room. Use walls for decor.
Key Lessons from This Transformation
Lesson 1: Declutter First
You cannot organize clutter. You can only remove it. Decluttering took one weekend. It was the most important step.
Lesson 2: Measure Before Buying
The second nightstand was never used because it did not fit. Measure. Then measure again. Then buy.
Lesson 3: Lighting Changes Everything
One overhead light is never enough. Add lamps. Add a dimmer. Use warm bulbs. The room felt completely different.
Lesson 4: Patience Pays Off
The right pieces appeared over time. The tall bookshelf took 3 weeks to find. The rug took 2 weeks. The armchair took 4 weeks. Waiting was worth it.
Lesson 5: A Room Is Never Truly Finished
The room will continue to evolve. Styles change. Needs change. The best rooms grow with the people who live in them.
Frequently Asked Questions
What was the most expensive item?
The rug at $120. It was worth every penny. The room felt completely different once the rug was in place.
What was the best deal?
The tall bookshelf at $40. It replaced a dresser that cost $150 new. Same footprint. Triple the storage.
Could this be done on a smaller budget?
Yes. The rug could be $80 instead of $120. The bedding could be $50 instead of $80. The art could be $0 (use what you already have). A $300 budget is realistic with more patience.
What would you do differently?
I would not have bought the folding desk. I would not have bought the second nightstand. I would have added a dimmer switch earlier.
Conclusion
The room went from cluttered, dark, and cramped to open, bright, and calm. The total cost was $473. The time invested was 3 weekends.
The most important steps were free. Decluttering. Cleaning. Rearranging furniture. Fixing art height. Adding a dimmer.
The purchases that made the biggest difference were the rug, the tall bookshelf, and the layered bedding.
Start with one change today. Declutter one drawer. Move the bed to the corner. Add a lamp.
Small changes add up to dramatic transformations. The before and after photos prove it.
Take back your room starting today. Step by step. Decision by decision. Item by item.